Workshop and Equipment (Updated 160420)
Tools. You can't have too many tools. And a workshop to use them in is nice, too! My titchy bungalow was formerly owned by a chap who liked his cars and bikes so he had the detached garage extended to give me... er, I mean him... more space. :-D
About 30 feet long and nearly 10 feet wide at the widest point, it was one of the main reasons I bought the house. At the time (2001) I only had the TVR, a lathe and several toolboxes to accommodate. Then I discovered Ebay...!
Now I have:-
Bridgeport 1ES Horizontal Milling Machine
Perrin Vertical Mill/ Jig Borer
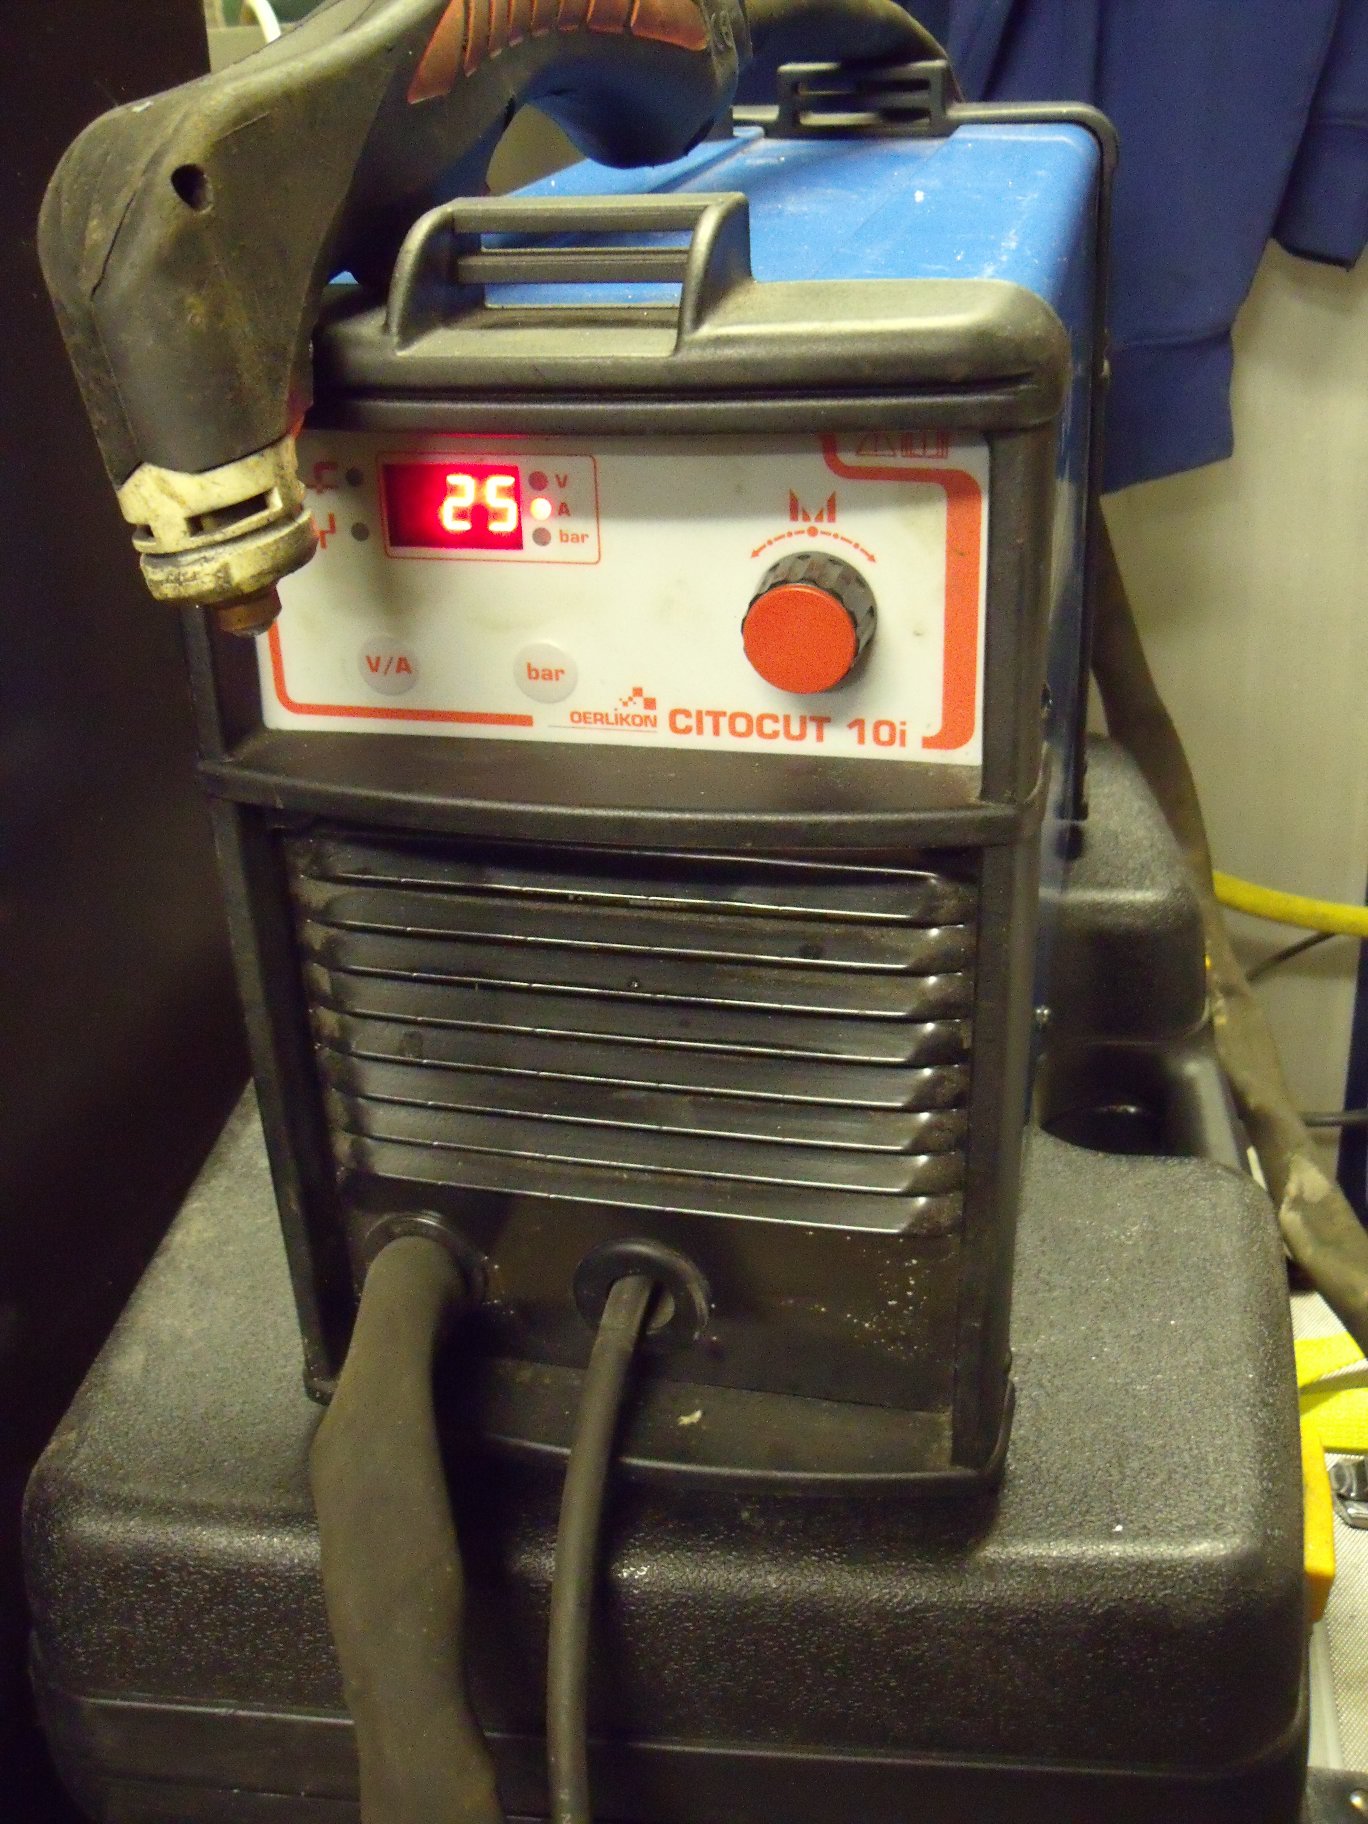
Oerlikon Citocut 10i Plasma Cutter
Bosch Cut-off Disc ('chop saw')
Guyson Blasting Cabinet and Extractor
Bench-mounted sheet steel guillotine
8" and 6" Double-ended Bench Grinders
Electric Drills, Angle- and Die-Grinders, Electric Shears, Oscillating Cutter etc.
Assorted Air Drills, Grinders, Wrenches, Cut-off, Sprayguns etc.
Ultrasonic Cleaning Tank
Gunsons CO Meter
Tektronix 212 Portable Oscilloscope
Electro-hydraulic mobile scissor table
Two-ton long-reach folding crane
Plus all the usual hand tools you'd expect and maybe a few more besides...! Alas space is now short and the TVR is surrounded by 'stuff', which leads to some scary moments when you're squeezing past it.
At the moment , the workshop looks like this...
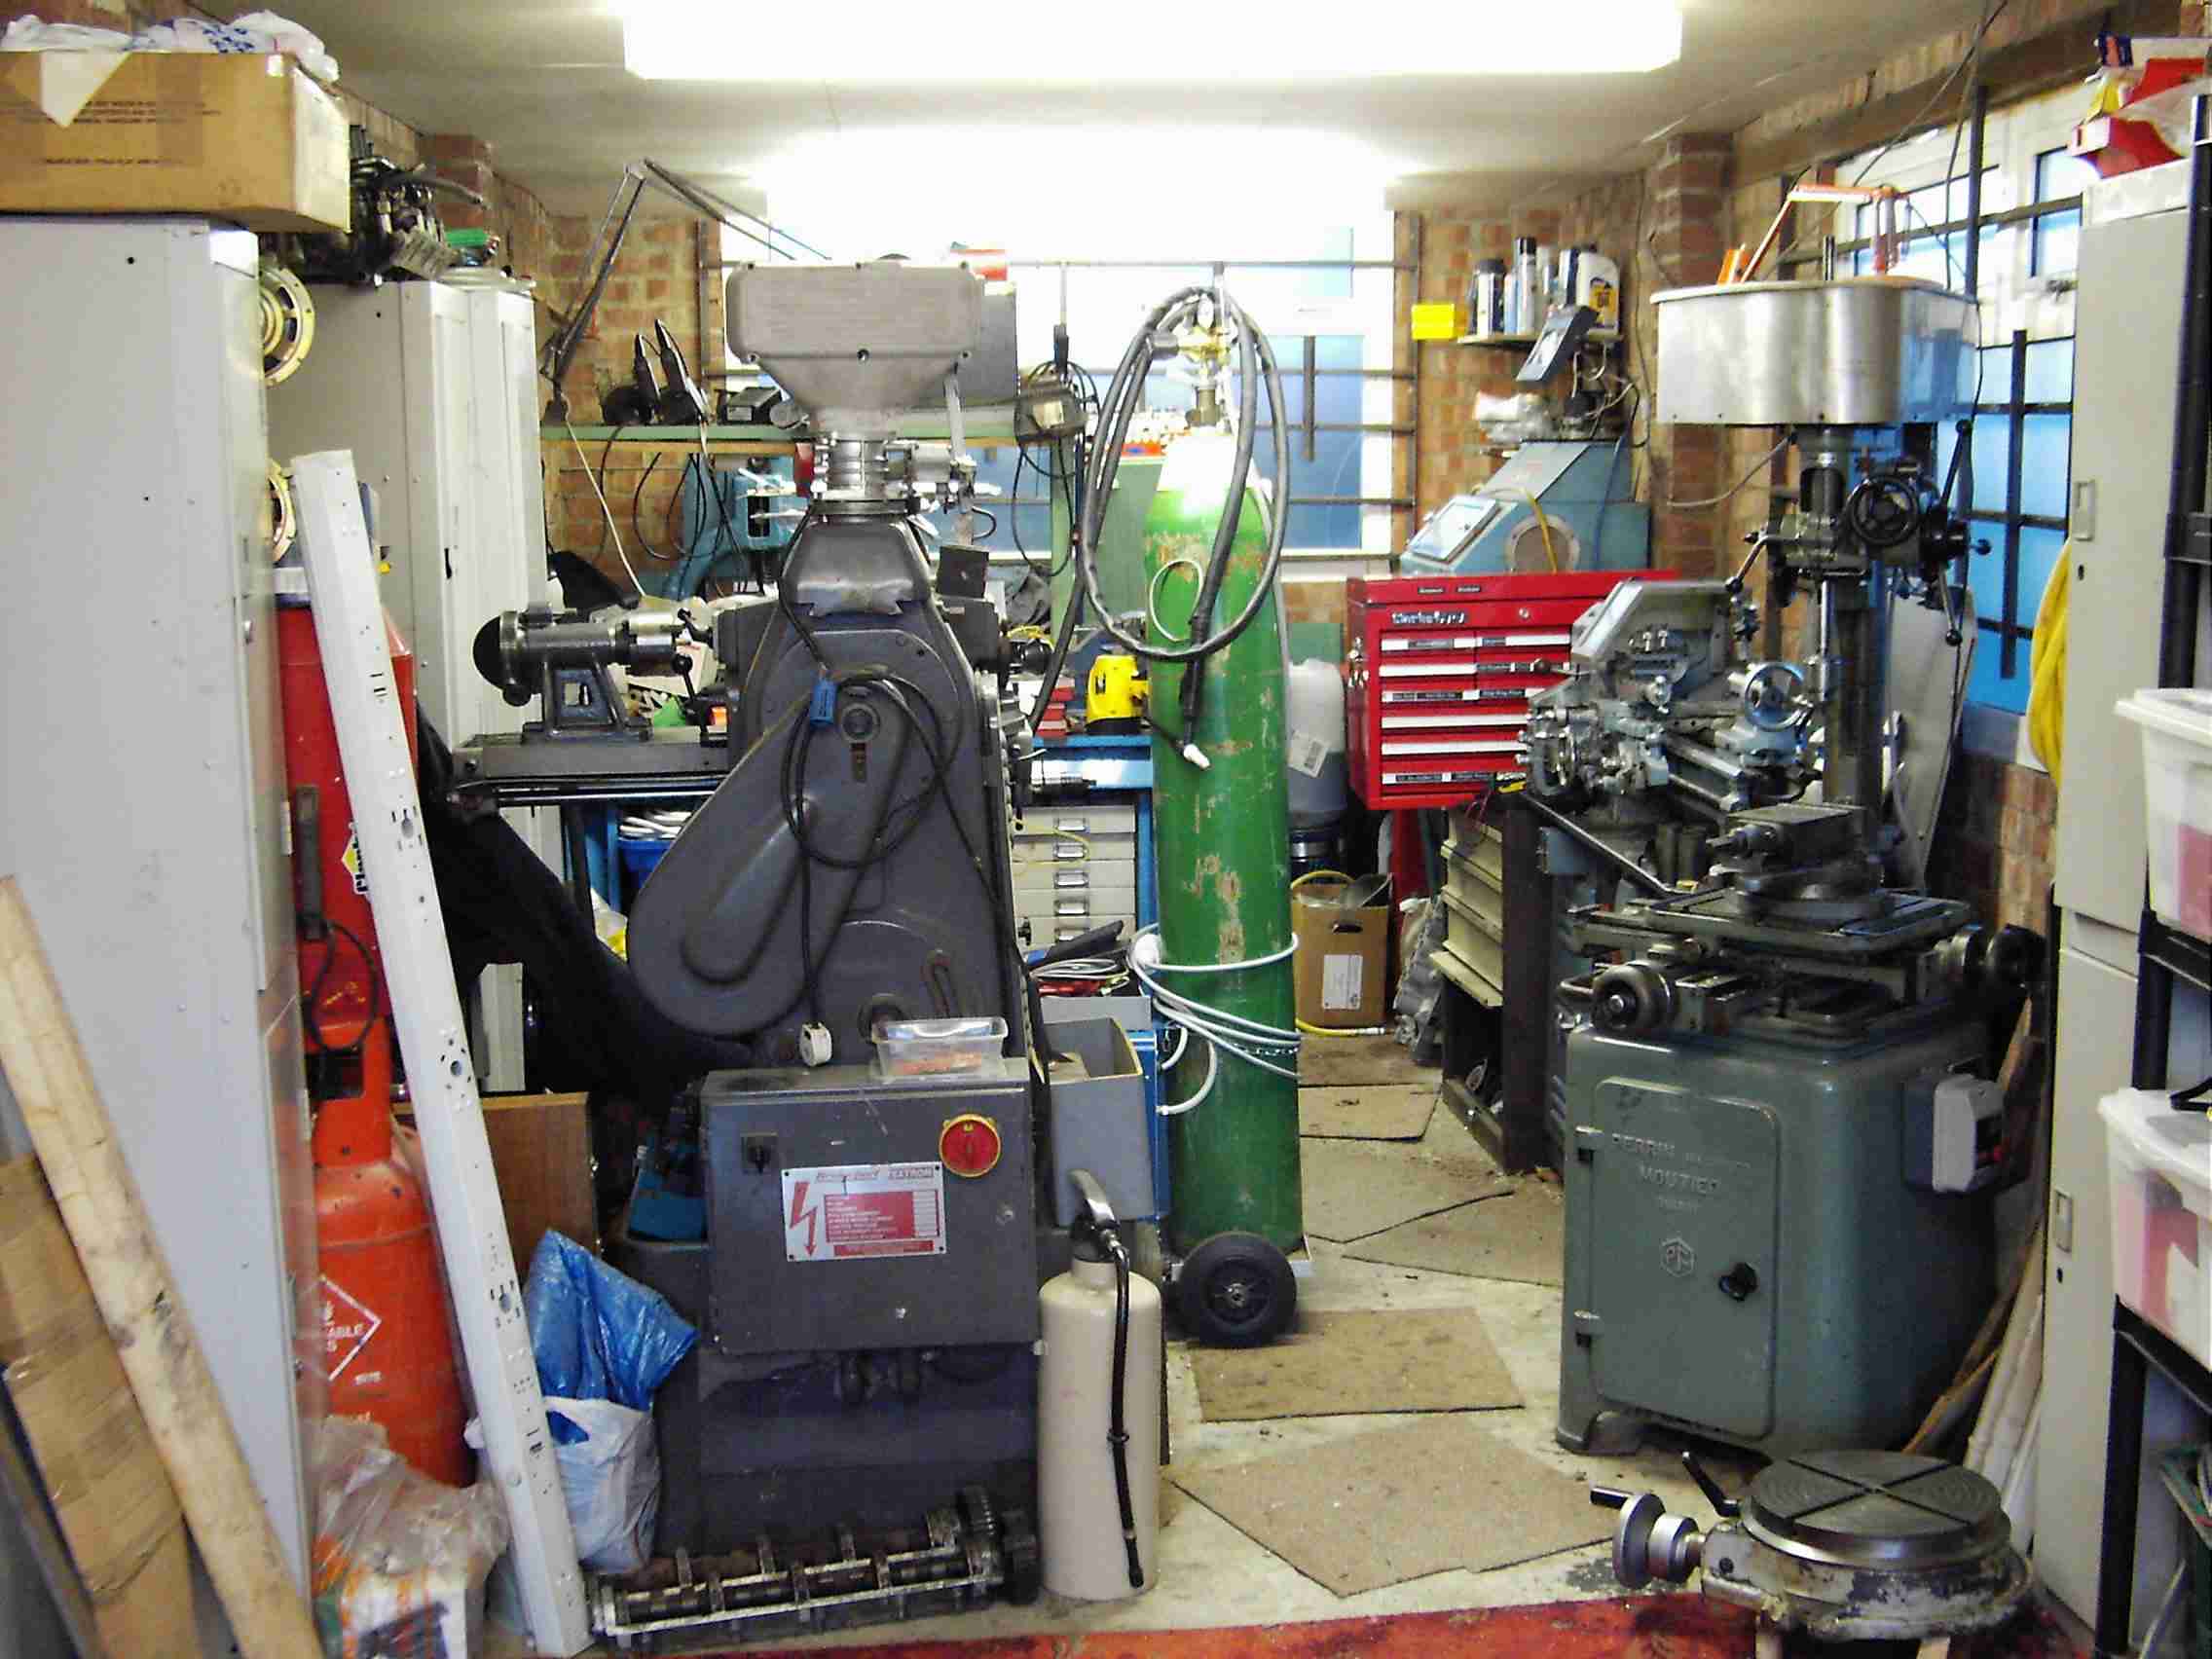
This is the rear half of the workshop; the space where I'm standing is where the TVR lives. Incidentally, I was contacted a few months back by a publishing company that was preparing the source material for the new diploma in engineering that will soon be hitting schools/ colleges... they wanted to use the above photo as an illustration for Health and Safety in the workshop! Cheeky buggers, it's not THAT bad... anyway I said yes, so I fully expect to retire on the royalties ;o) The random carpet tiles, by the way, have long since been replaced by some 'proper' workshop flooring as seen in the lathe pic. further down (although it's a swine to clean swarf out of!).
The picture below shows the 'garage end' from a slightly elevated angle...
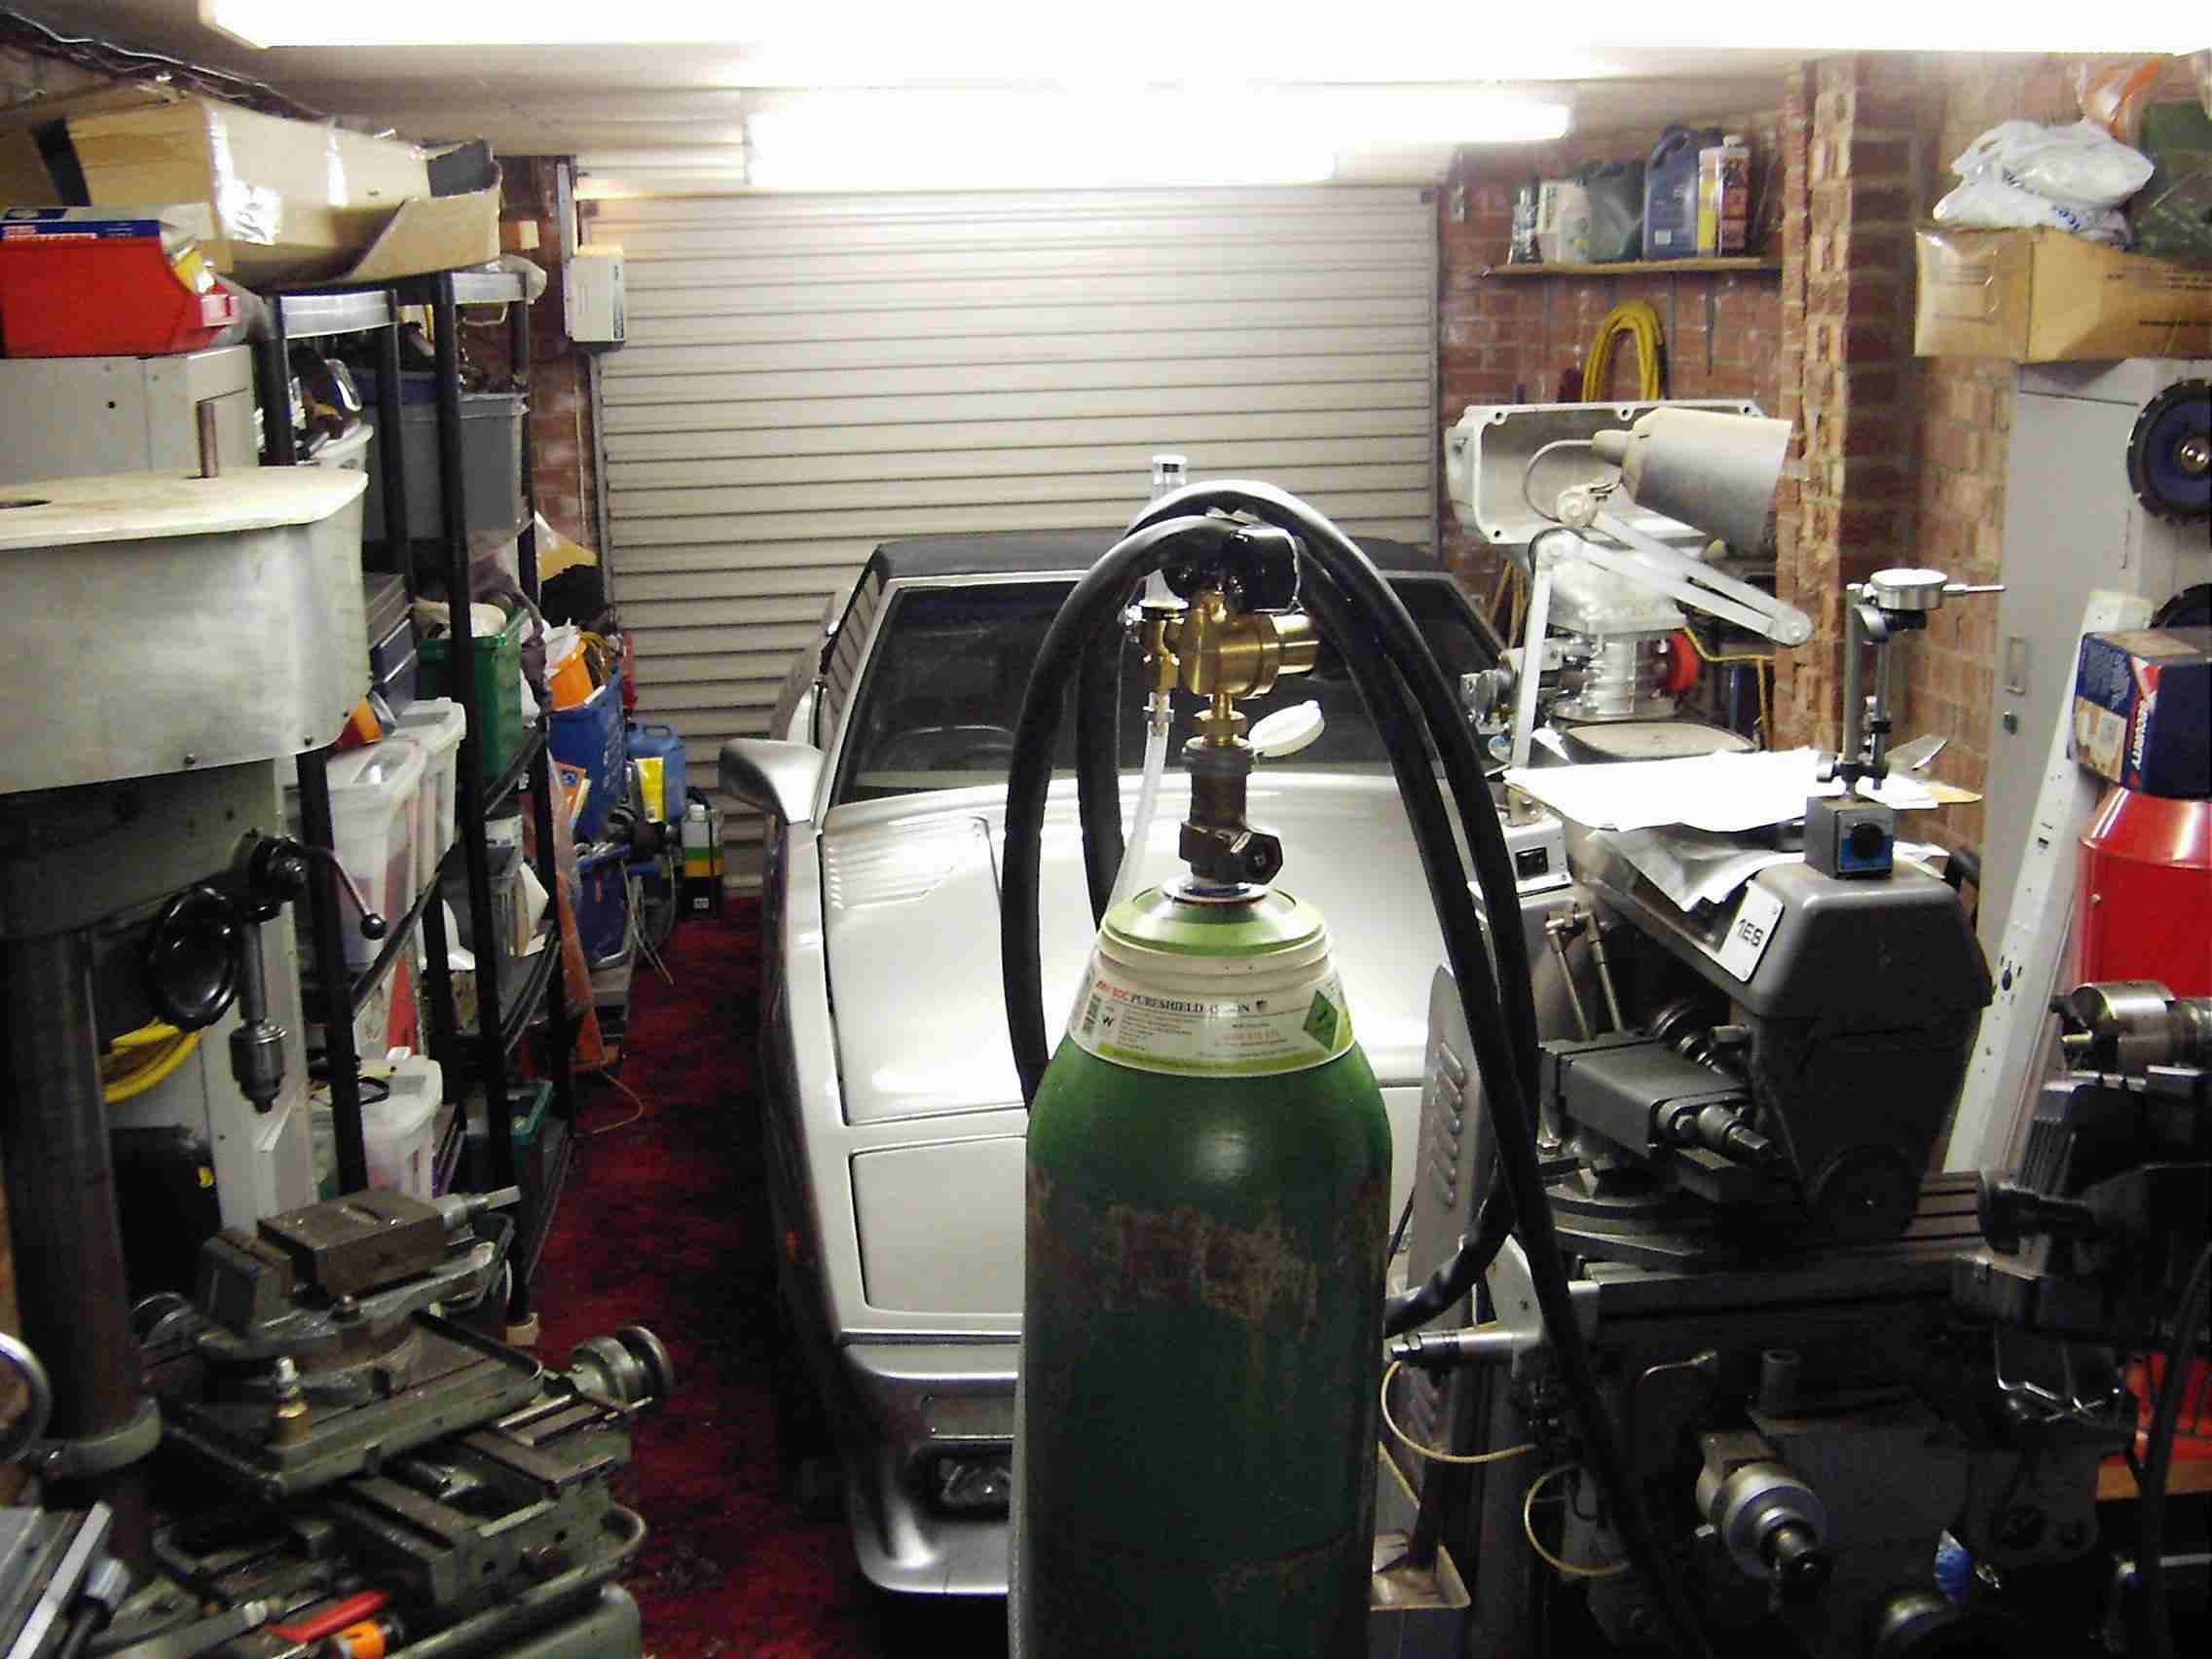
...but that was before I acquired a couple of sea kayaks! One is 16' 8" and the other 17' 10"... so they take some storing. Luckily I had some fresh air just above the TVR so I bought some light-duty sliding door gear (from these chaps) and slung the boats from the rafters...
I started out with the old drawers and cabinets from my daughter's bedroom for storage, but being cheap chipboard they didn't survive very long. I've since acquired an eclectic mix of old and new tool cabinets, former changing room lockers, scrapped photocopier base units, a couple of self-assembly benches, some B&Q shelving... and my main workbench, made from spare shelving frame and a slab of steel plate, with a big Record vice bolted to it.
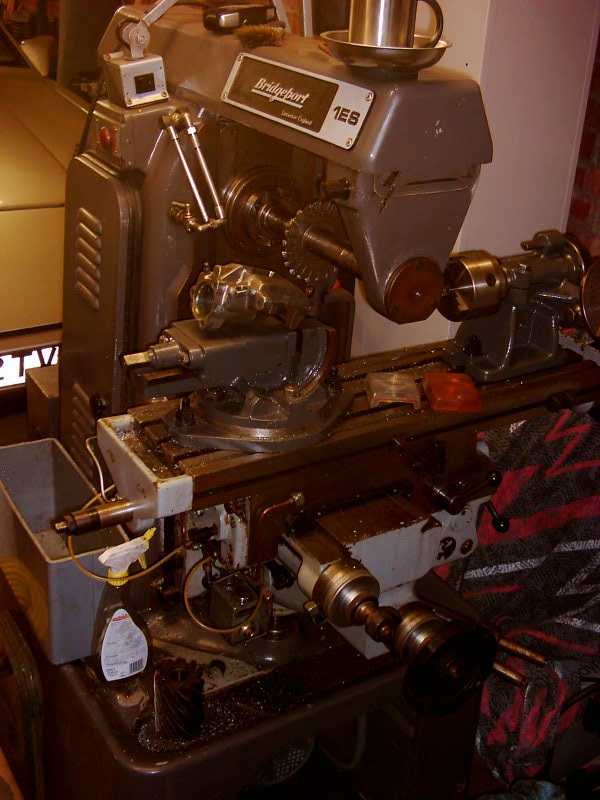
Bridgeport 1ES Horizontal Milling Machine
One of the first things I ever bought via Ebay, and formerly in a college, this 1ES was built in Leicester in 1980. It was originally produced by Adcock & Shipley, who ended up as part of the Textron group which included Bridgeport, hence the badging. It's a horizontal mill with power traverse on the x-axis. There's a vertical head available for the 1ES but I have yet to find one for sale at a price I want to pay. The machine weighs in at 1600 lbs and had to be delivered to my workplace and stripped down for removal to the house. I converted it from 3-phase to single-phase electrics with a 3hp motor and new coolant pump. Also via Ebay came the dividing head and 2-axis work vice. Cleaned up and painted a similar shade of grey to the mill, they almost look to be original equipment! I acquired a 40 Int. collet chuck which is a bit tricky to use on a horizontal mill, you have to think in a parallel universe to work out where the cutter's going.
More info on the 1ES can be found here, but here's mine, complete with tilt & swivel vice, dividing head and coffee mug...
Perrin Vertical Mill/ Jig Borer
This machine is a bit of a puzzler. I acquired it through my company when we bought out one of our competitors but have been able to discover very little about it or its makers, other than that Perrin are (or were) a respected Swiss company who have produced some very expensive milling machines!
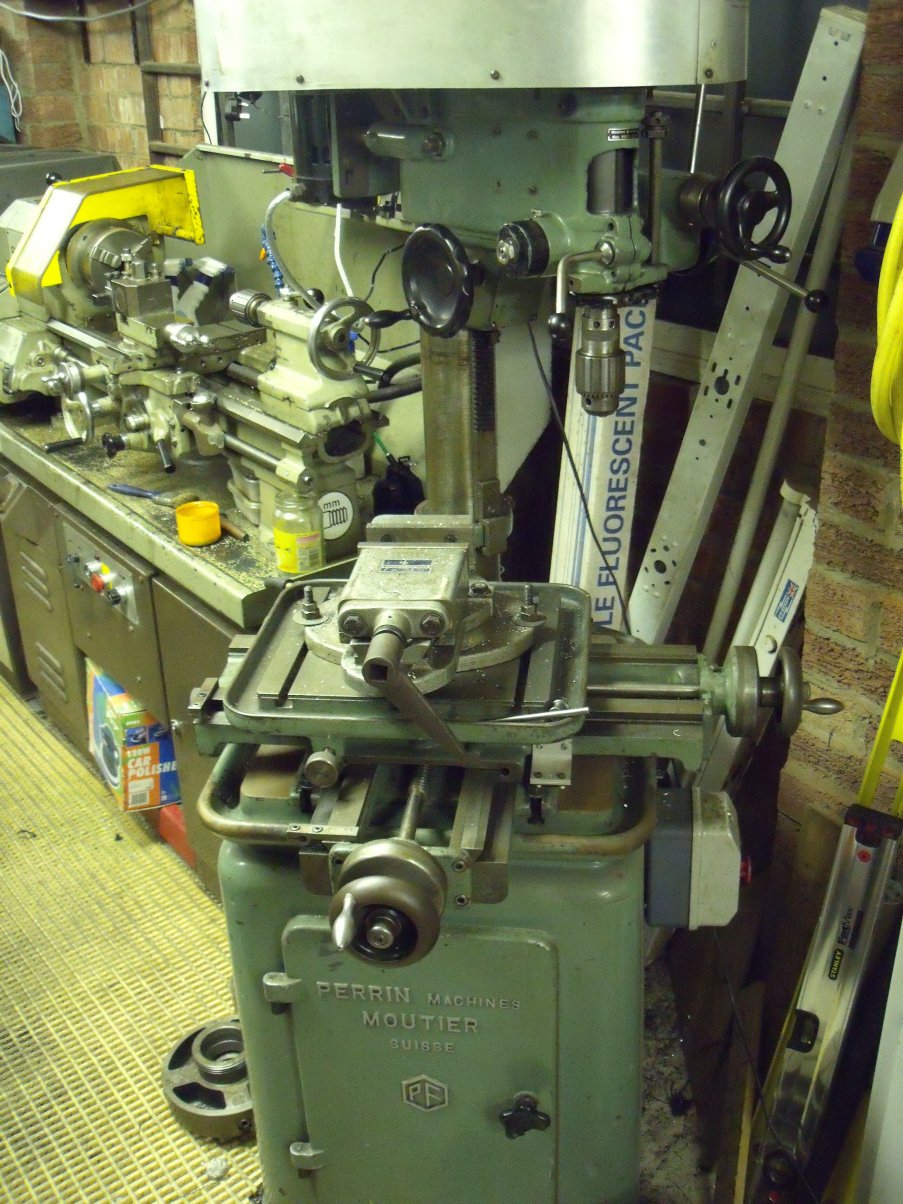
It is classed as a 'jig borer' though with care and light cuts it's capable of being used as a vertical milling machine. In appearance it resembles a pillar drill on steroids, but i've never seen a pillar drill with a column anything like the size of the one this has! The 'head' moves up and down on a rack and pinion and can be swung around the column (but is only locked by friction hence the necessity for light cuts when milling). The x-y table has about 7" of travel in each axis (but no power feeds as on a 'true' mill). A two-stage, 5-step pulley drive is fitted that gives an impressive range of speeds (about 60-10,000 rpm!), and the spindle can be interchanged to give either a threaded nose to which chucks can be attached, or a Morse tapered socket for suitable tooling. A selection of apparently dedicated tooling came with it: flycutter, Jacobs chuck, ER25 collet chuck, boring head, centring device etc. The quill can be fed in as on a pillar drill, or the fine-feed gearbox can be engaged to allow precise depth control. Confusingly, whilst the x & y axes use Imperial leadscrews and are calibrated in thousandths of an inch, the z (quill) axis is Metric!
From the few pictures I've been able to find, it appears the Perrin originally ran with its belt drive mostly exposed, with just a cast dome at the front to keep the operator's hair out of the belt, as seen in this picture of a fairly tidy example, found on a machinery trader's website:
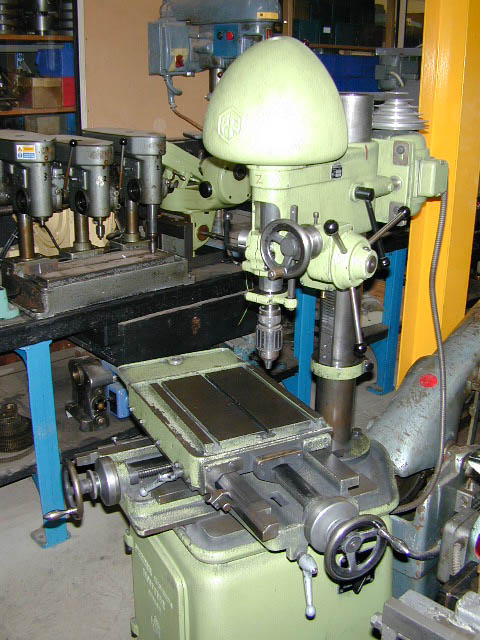
Mine has had a home-made cover of plywood and sheet alloy added to improve safety, if not visual nicety:
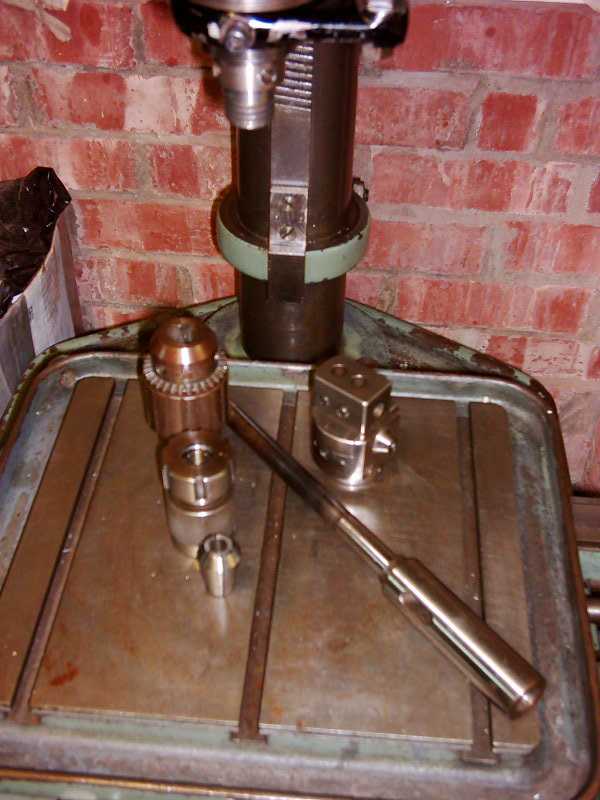
Some of the tooling that appears to be original equipment (Jacobs chuck, collet chuck, boring head and 2MT spindle):
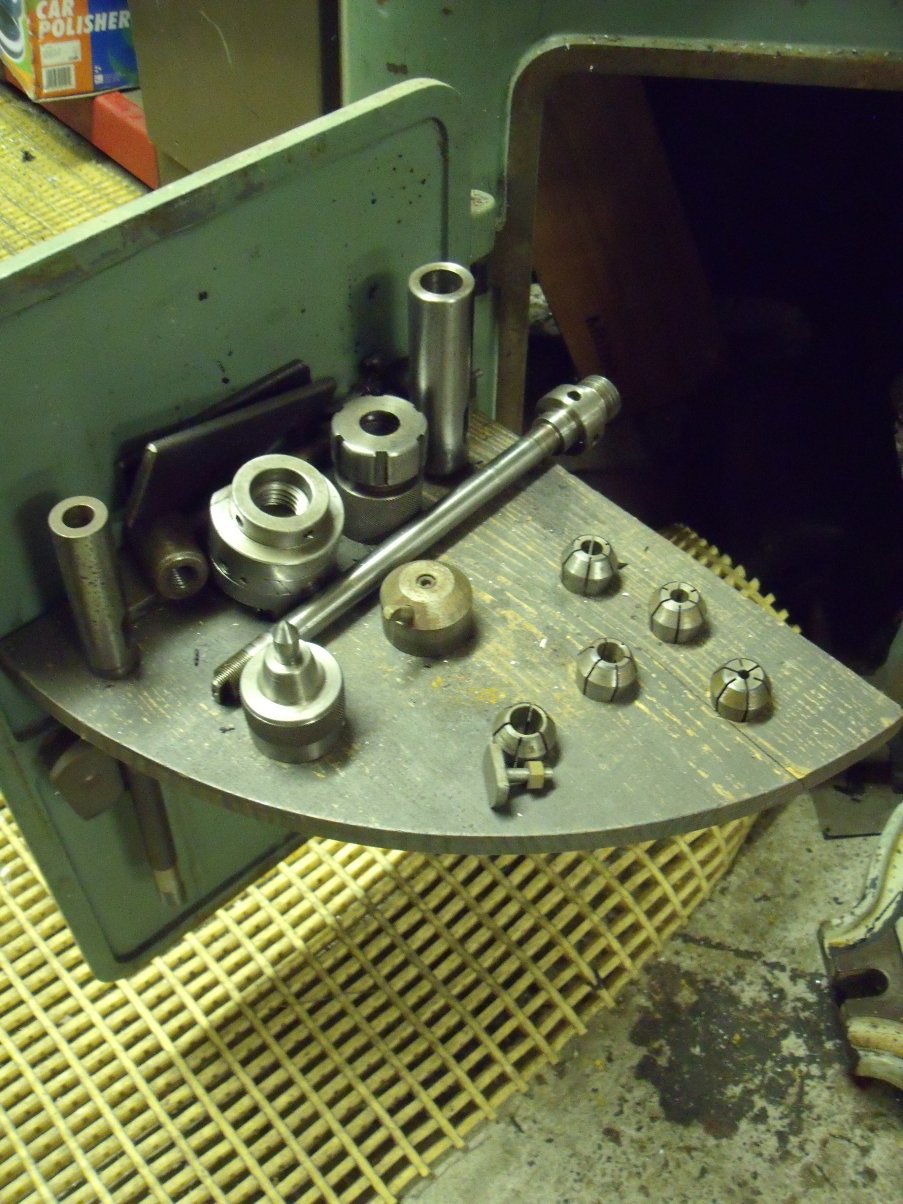
The tooling is stored in the base, on a wooden panel fixed to the inside of the door:
One thing that had perturbed me since I got the Perrin was that the 'universal' spindle (the one with the threaded end to fit the various chucks etc.) appeared to be bent, but I'd never managed to get the locking rings undone to pull it out:
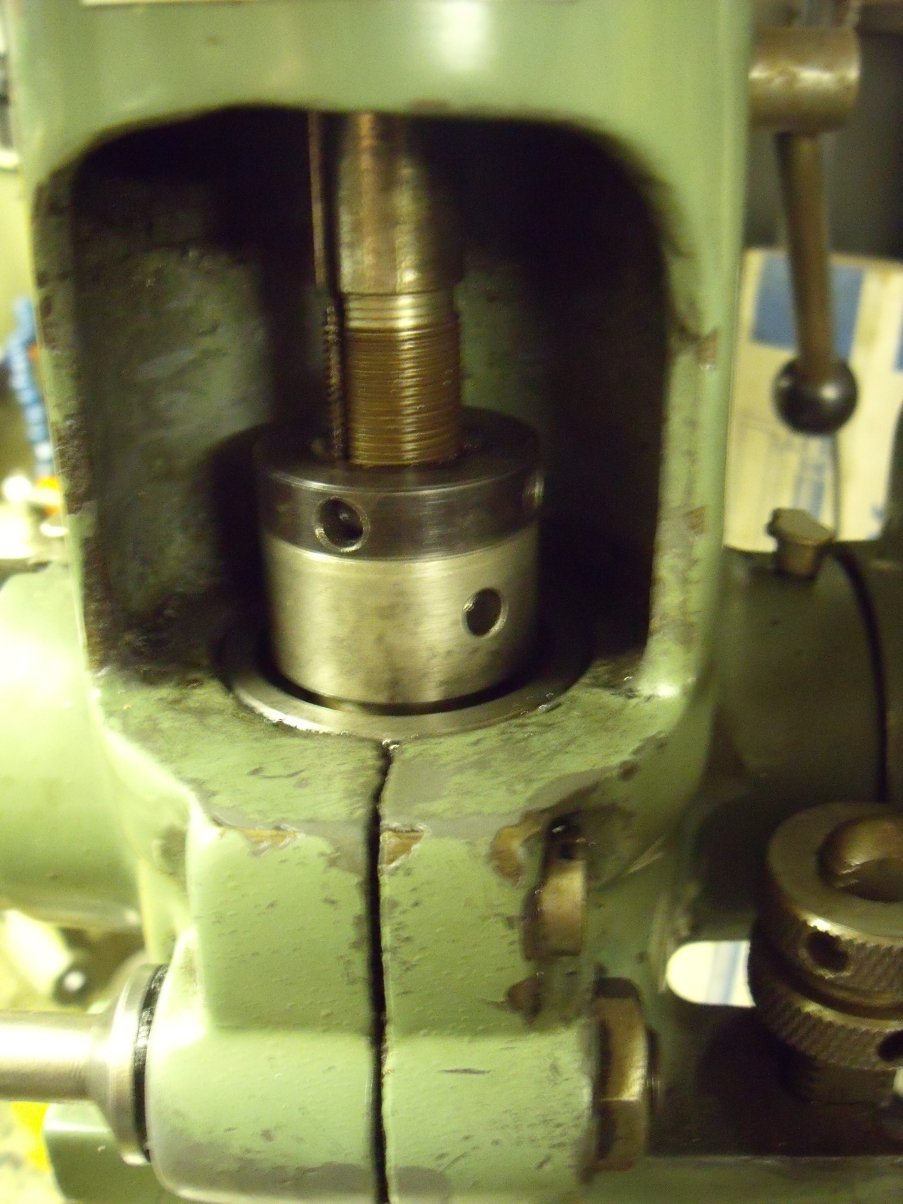
I made some 'C' spanners from 5mm steel plate with sawn-off bolts welded on and had the spindle out in moments. I put it on Vee blocks and rotated it and sure enough it's bent. Not much, but enough to make it pretty inaccurate! I fitted the 2MT spindle and that runs spot-on. My lathe has a 2MT-fitting Jacobs drill chuck for the tailstock so I plugged that into the Perrin and straight off it drilled better holes! Closer inspection of the universal spindle reveals a selection of marks that imply to me that someone has previously tried to straighten it in a press or similar. As luck would have it, we had a job at work that required the manufacture of several precision parts. I was able to slip the bent spindle in to the machine shop and they produced a new one. I'm finally able to mill things with a reasonable degree of accuracy!
UPDATE 140410: DRO!
The Perrin has been well and truly hauled into the 21st... well OK, the late 20th... century, with the addition of digital readouts! I don't even remember how I came across it, but some guy's website had brief details of how he'd fitted a DRO system to an old mill. Some time was spent surfing the 'net and I ended up buying a system from these people. Three digital scales (like digital calipers) are installed to each axis of the machine and a cable from each feeds the DRO itself. It took some work to get the X and Y axis scales installed; I haven't done the Z (quill) yet as there's so much going on at the front of the Perrin's head that I can't yet see how to mount the scale. I've been using the machine to make some test blocks used in the calibration of ultrasonic test equipment and the setup time has been vastly reduced compared to the previous blocks I made. In the process of installing the slides I found some play in the table gibs that was probably largely responsible for some inaccuracies I've noticed in the past (talking thousandths of an inch here!) and having adjusted the gibs I'm pleased to see an improvement in the finish quality of some slots I milled. With the DRO system in Imperial mode I can easily work to the maximum resolution of the scales (5 ten-thousands of an inch). All I need now is an accurate edge-detection method and I can speed things up even further! The DRO unit is the 3-axis one here and the scales are 150mm and 200mm versions of the vertical types here. The supplier also offers horizontal scales but the ones initially supplied would not work with the DRO. I found that they were 'positive earth' and the DRO needs 'negative earth' signals in order to function correctly. As the scales are mounted underneath the X-Y table of the mill they are inaccessible anyway so it doesn't matter that they are the 'wrong' type. The main drawback of these Chinese-made scales is that they are affected by water; I don't have flood coolant on the Perrin so as long as I'm careful with my squirty bottle of soluble oil I should be OK! I plan to modify the system so that the scales are supplied with DC from the DRO unit, rather than running them on batteries, as they're a bit difficult to get at for battery changes. And besides, I'm a skinflint ;o)
UPDATE 100511
I sourced a 1.5v regulator to power the linear scales, lashed-up a small circuit board and fitted it into the DRO unit. Conveniently, the sockets for each scale input had uncommitted tracks for what I took to be the + feed so it was a quick install. Shame it didn't work :( It transpires that the linear scales are positive-earth, but the DRO is negative earth. So the scale chassis' are connected to the DRO ground. Consequently the scales didn't work. No problem, thought I, simply reverse the polarity of two wires in the connection cable. This time the scales powered-up but the DRO didn't respond. Er....?! I had a bit of a think. The solution seemed to be to have the new 1.5v supply reversed relative to the DRO ground, but obviously that wouldn't work as the 1.5v regulator used the same ground. What was needed was another power supply! I rummaged in the loft and found an old Nokia phone charger with nominal 5.7v output. I wired it to the 1.5v board, reversed the connections from there to the DRO and hey presto, everything works.. however the display tends to be unstable - which I think was noted by another website author when he tried externally supplying the scales. I found that some suitable suppression components soldered across the edge connector of the scale's PCB cures it. I had a suspicion that the DRO wouldn't like the various electromagnet fields created by the 3-phase inverter and sure enough, when I switched on the mill the displays went haywire. They were perfectly stable when the scales had batteries in them though, so it's 'just' a matter of suppressing the electrical noise now...
UPDATE 291112
Time passed, as it does, so it was only this week that I determined to resolve the issues with the DRO installation. A couple of other websites outlined a technique for modifying the scale units to be negative, rather than positive earth, as a means to help the interference suppression. I dismantled the units, which involved drilling out some brass rivets, made the required changes and reassembled. Testing showed that the original problem remained :(
As a last-ditch attempt, I stripped the scales down again and soldered in some extra capacitors... and, finally, it works! I ran the table from end to end of both axes to determine the maximum travel, then set the table dead-centre and went for a takeaway, leaving the motor running. Three hours later (I eat slowly, OK?!) the DROs were still showing the table dead-centre, with not a flicker on either axis. I can attain 190 mm of travel on the X-axis and 164mm on the Y, restricted by the table hitting the column! I've tried wiggling cables, dropping the mill head to be closer to the table etc., and it's rock-solid. About bloody time :O) Rather than sully this page with pictures of circuit board carnage, I've put together a separate page to illustrate what's involved.
One day, I was browsing on Ebay (as you do ;-) when I happened upon a Rotary Table. For the uninitiated, that's a cast-iron circular table used to accurately position parts on a mill for drilling etc... and it rotates. So if for example you wanted to cross-drill some brake discs every 'x' degrees, a rotary table will allow you to turn the disc exactly the right amount to line up for the next hole. It's 12" in diameter and badged by the respected British firm of Jones & Shipman:-

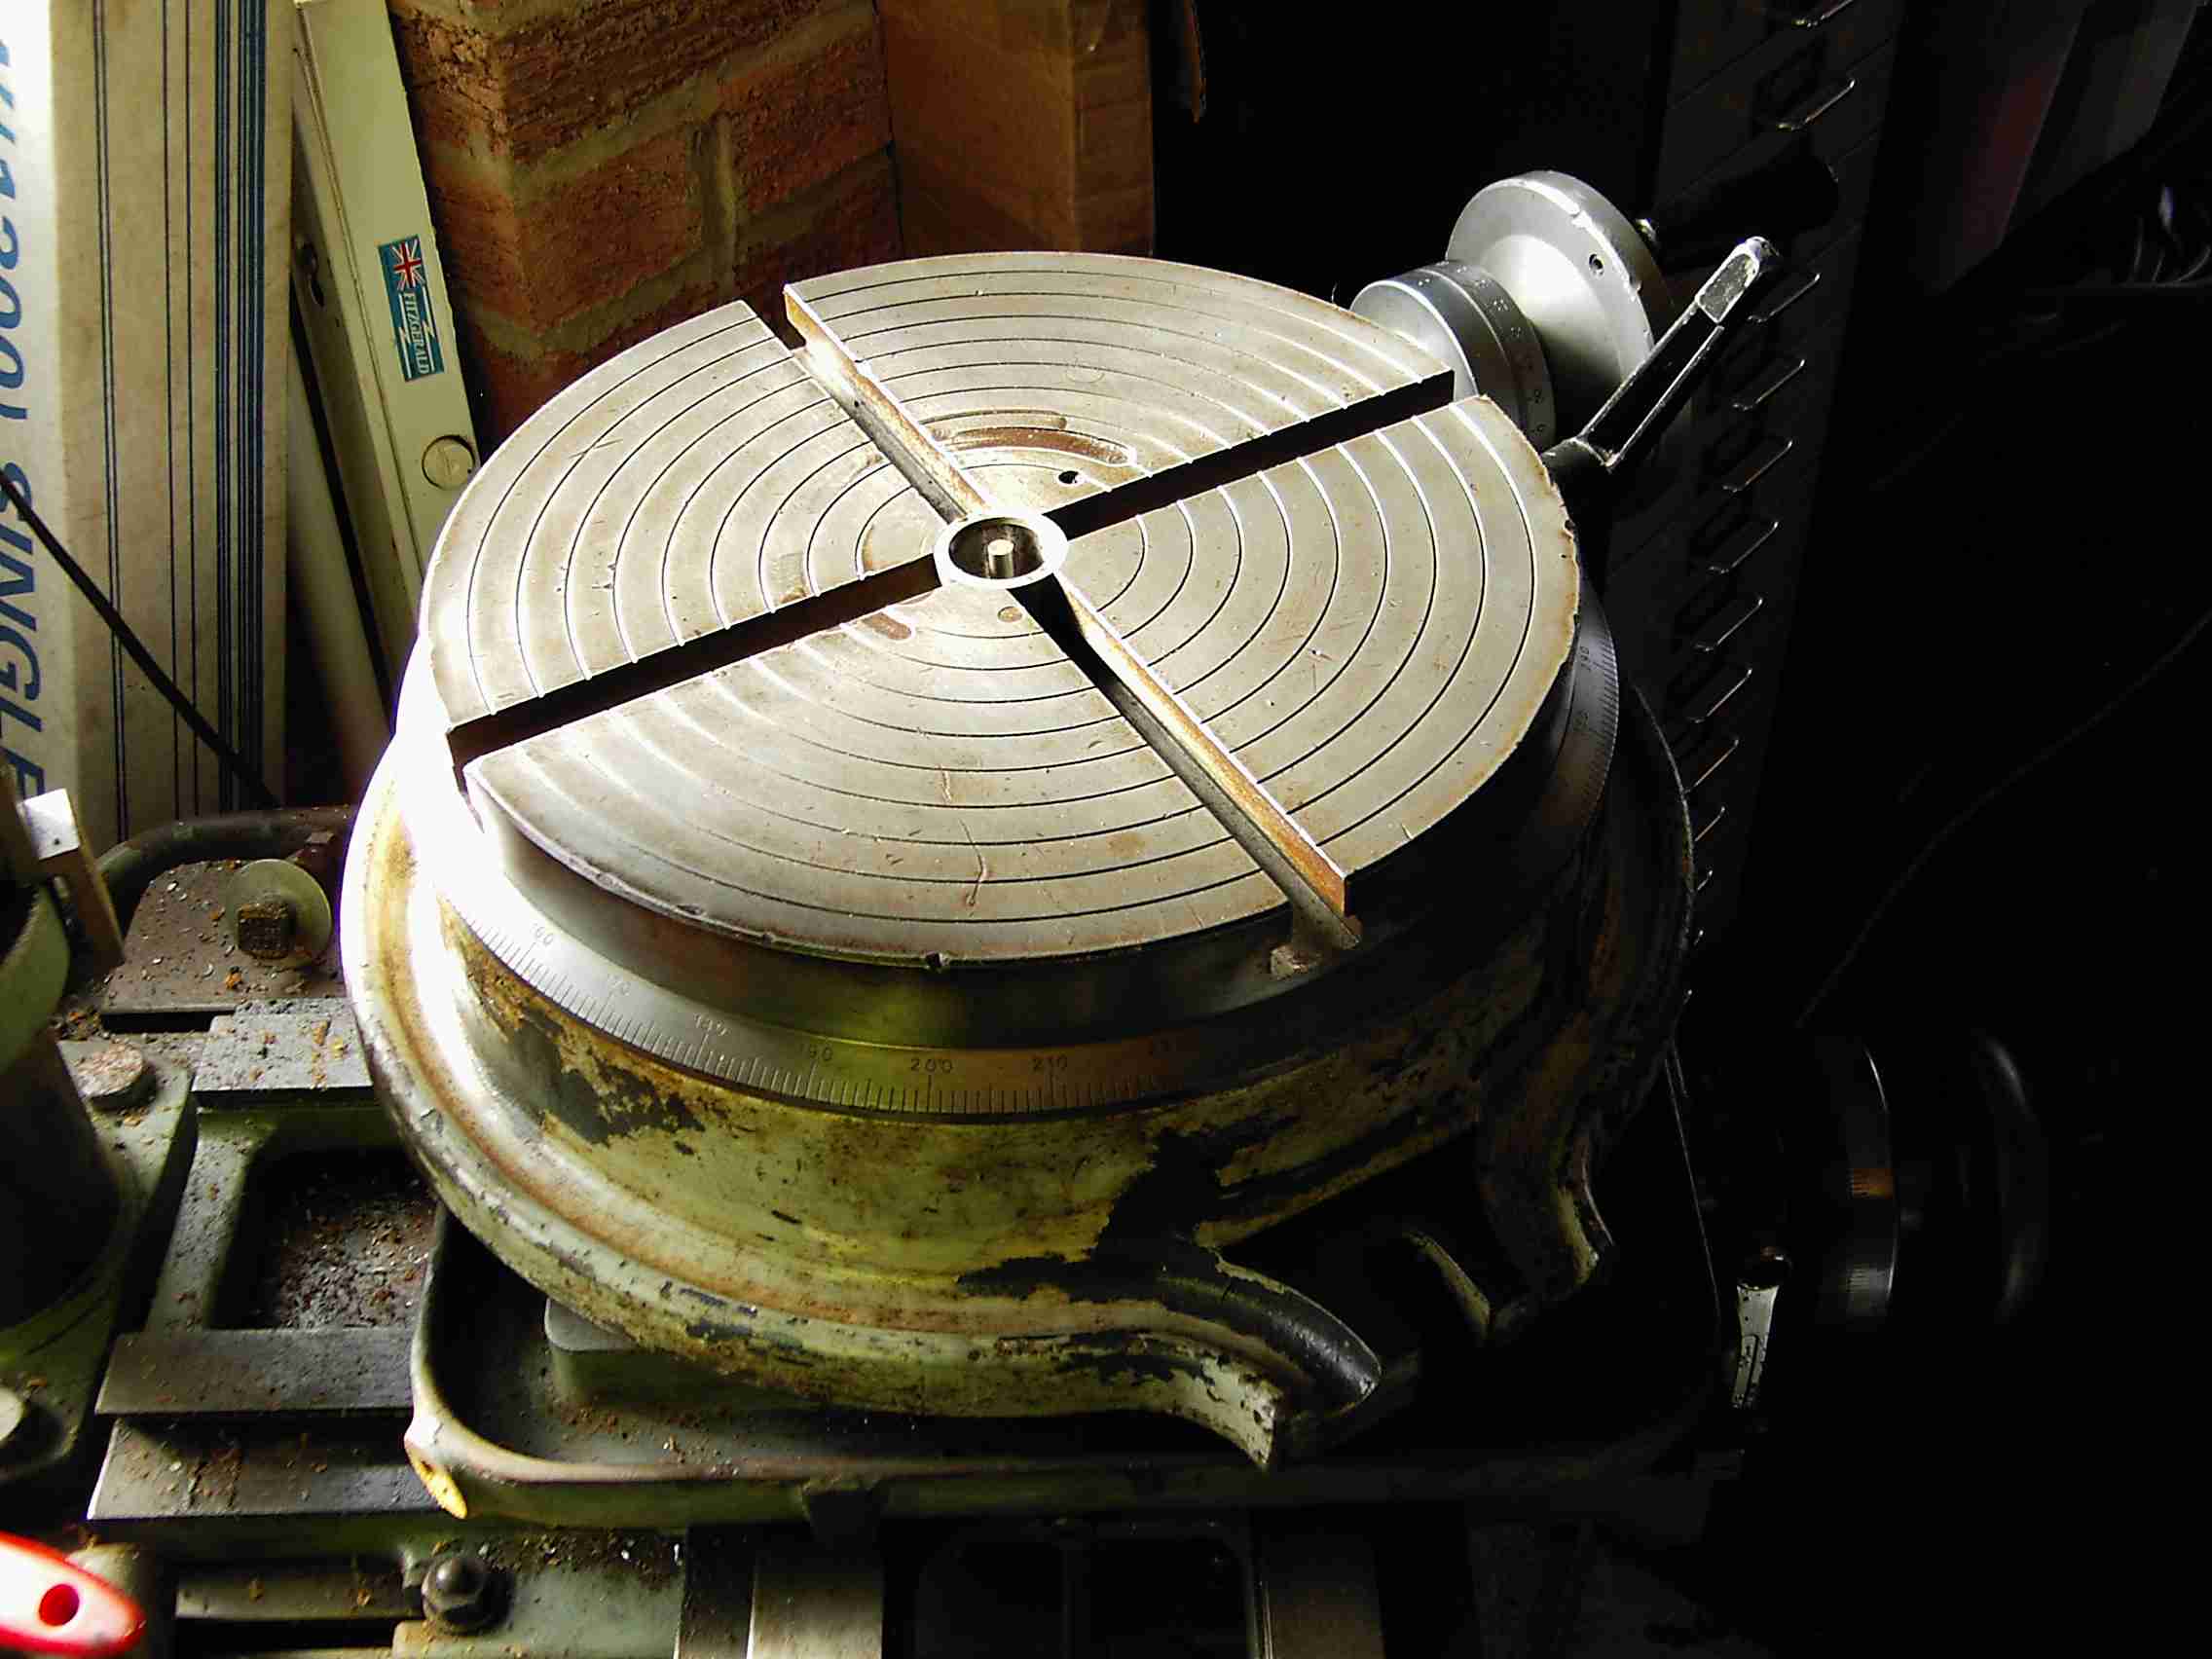
As you can see it's a shade too big for my mill, though it's just possible to position it so that the centre of the table is central to the quill, and a large pair of G-clamps seems to keep it in place well enough. The table weighs over 50Kg as it's basically a cast-iron T-slotted platter on a cast-iron base with a reduction gear and a brake.. probably made from cast iron. The table is graduated in degrees and the vernier in minutes of rotation; there's about 4 minutes of lash in the reduction drive which I reckon is acceptable given the jobs I'm likely to have for it. I stripped the table down and cleaned the gunk out: with a liberal squirt of oil it now rotates smoothly with little effort. The price was right too: the seller was out in the sticks near Aberdeen and the table was 'collection only' so I guess it limited his market somewhat. I happened to be in the north of Scotland on business and was able to detour to collect it! The pin you can see in the middle is attached to a plunger that can be used to clear swarf out from the centre hole; in a flash of genius I turned it to a tapered point and with a threaded centre fitted to the end of the spindle it becomes the work of seconds to set or reset the table dead-centre under the quill (though the Perrin's new DRO system should take care of that anyway!).
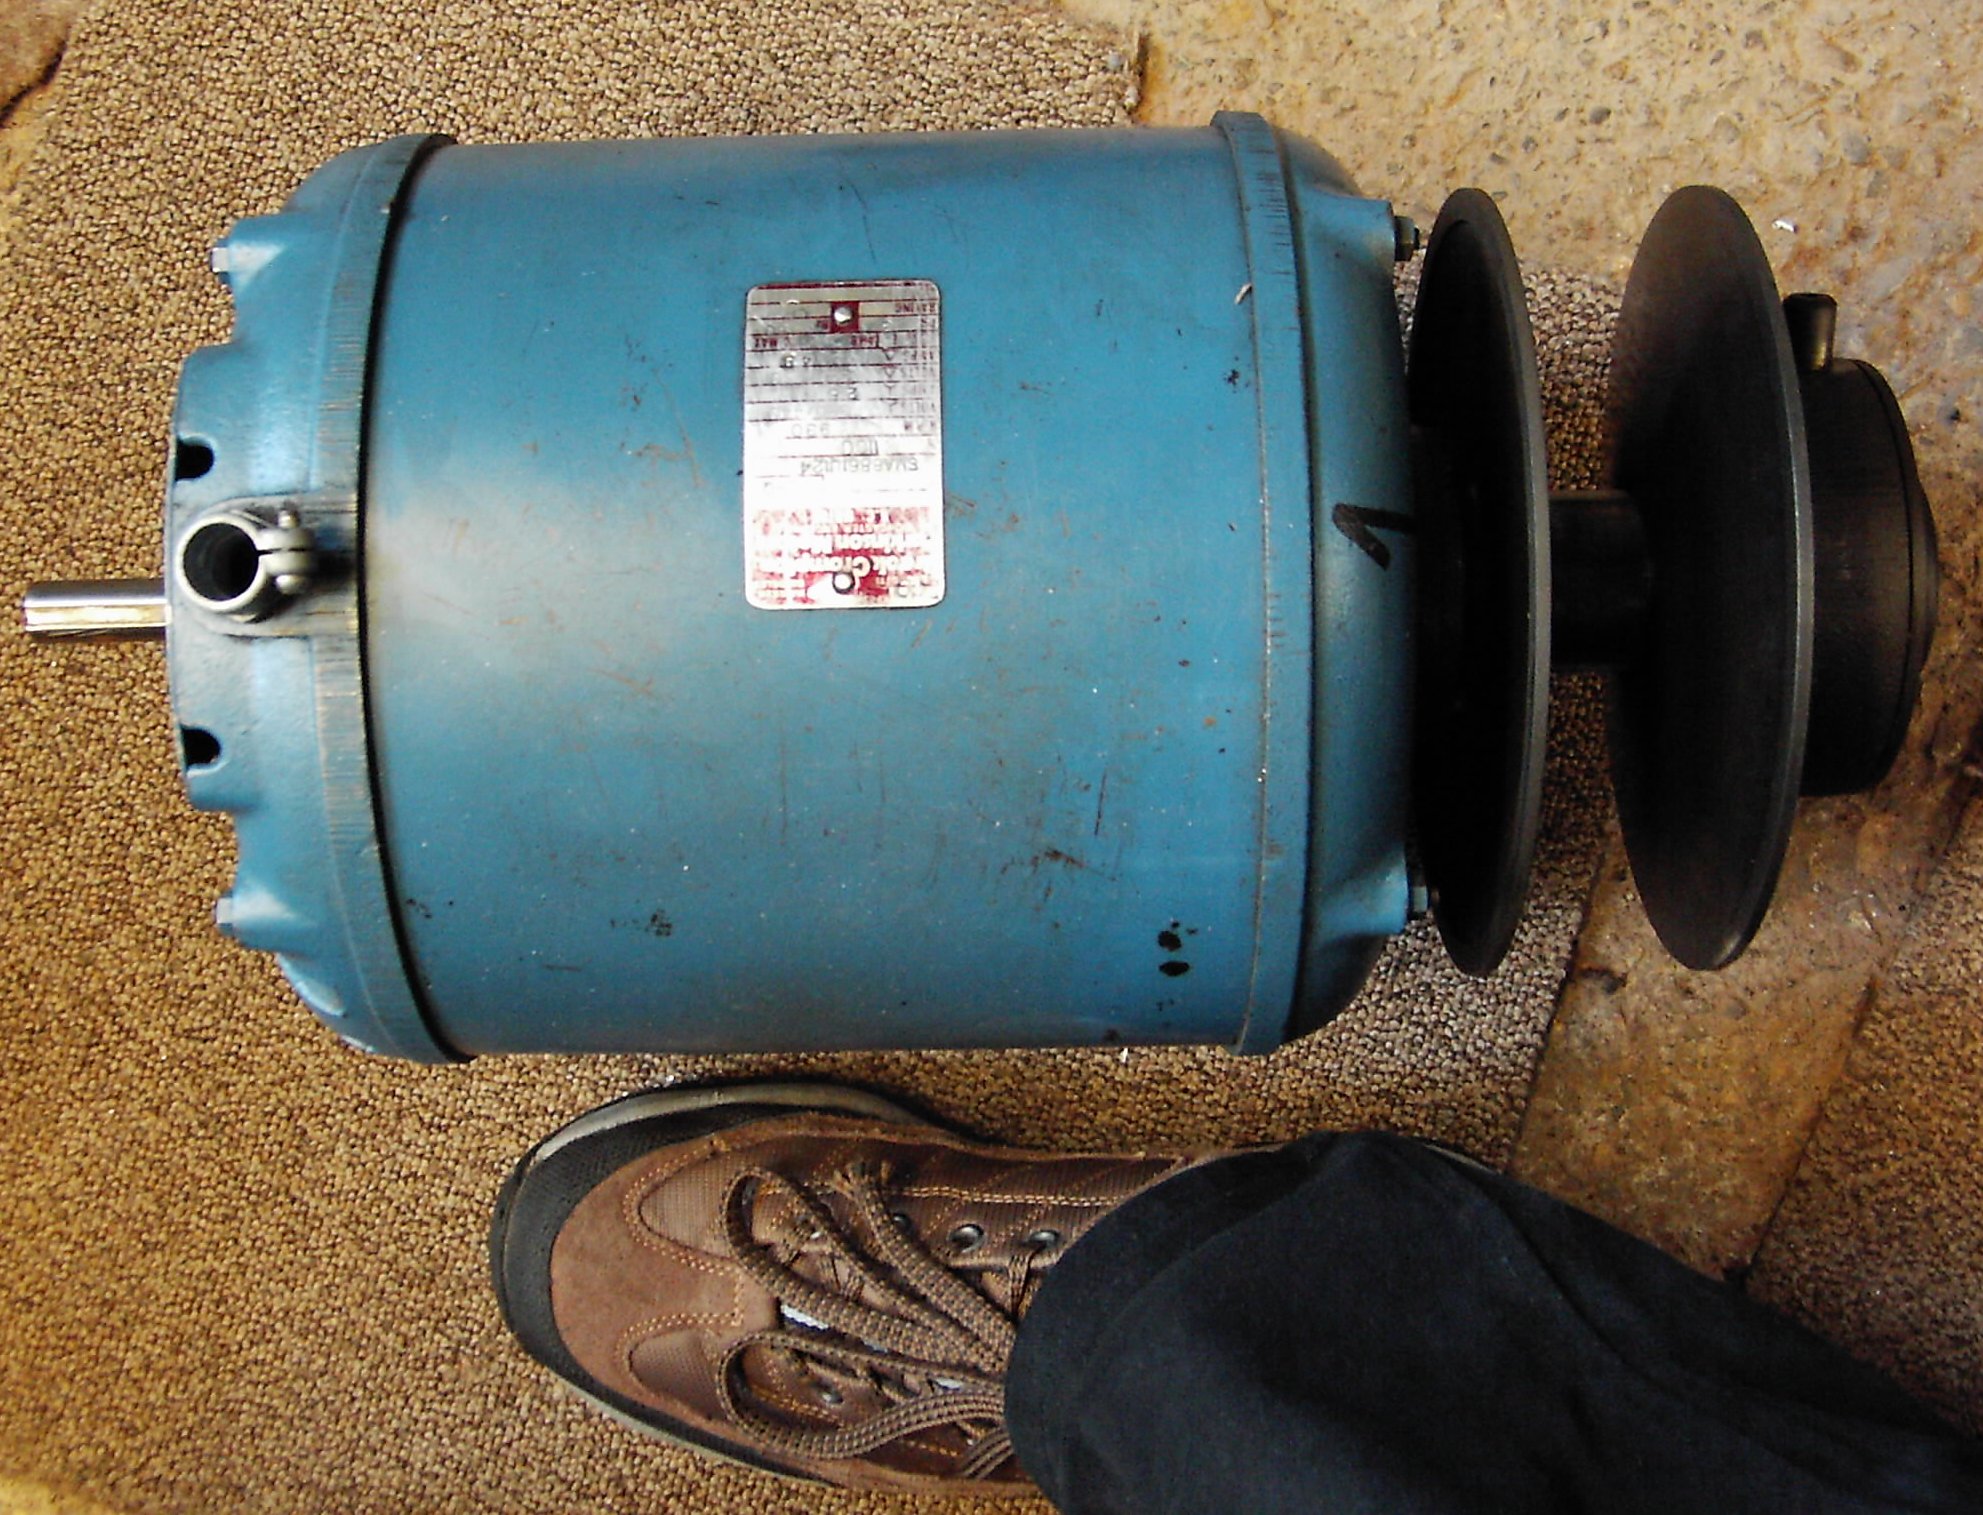
I started with a 1920s lathe by Mellor, a long-gone company that was based in Huddersfield. That was replaced by a 1950s version of the same thing, then in 2004 I decided to take the plunge and bring my workshop kicking and screaming into at least the 1960s :) - so I bought a 1972 Boxford AUD. I'd had it less than a year when I found myself drooling over a Boxford VSL500 on - you guessed it - Ebay. The seller had a number of Boxfords that he'd bought from a school in Retford; one he'd kept for himself and the rest he was selling on to recoup the outlay of having been persuaded to buy them as a job lot! In the event he did very nicely out of it; the first of two VSLs sold for £1800 which is about top whack for an absolutely mint, hardly used example. These were good, but not THAT good. I knew I could sell my AUD for more or less what I'd paid - I'd put a reserve on to make sure - so I thought I'd chance my arm (by now suffering from lathe envy!) and put in a bid on the second VSL. To my surprise I 'won' the bidding (at less than half the price of the first VSL) and made the trip to Retford to collect my new toy. As it's an ex-school machine (the bed has a casting date of December 1977) it has of course done no real work, although several of the controls were seized, having evidently been neither used nor lubricated. The gearbox in particular was nigh-on impossible to operate until I'd spent a couple of hours squirting oil over the moving parts and working the levers. Fortunately the bedways, leadscrews etc. had been kept at least splash-lubed by the cutting oil and the spindle bearings are sealed-for-life so no issues there. The VSL is often regarded as the dog's-danglies of the Boxford non-CNC range. As well as having increased spindle bore it has the 'L00' fitting on the spindle nose which gives more positive location for chucks etc.; T-slots in the cross-slide to allow use as a milling table etc.; and the pièce de resistance, continuously-variable speed control of the spindle. This was pre-inverter drive days of course, so they achieved it by having a system of expanding and contracting pulleys that are controlled by a dial on the front of the machine. Winding the dial clockwise forces the pulleys to change diameter so the ratio between them changes and the spindle speeds up. The whole thing is propelled by an enormous 3-phase 415v motor. Changing that for a single-phase would, whilst not impossible, be an engineering challenge given the arrangement of the speed-change mechanism (as well as sacrilege!) so I opted to leave it in and fit an inverter. Now most inverters take in 240v from a wall socket and output 3-phase... but at 240v. This means rewiring the motor windings to suit (not difficult) with an attendant reduction in the power of the motor. I turned to Ebay... and found a single-phase in, 3-phase at 415v out inverter. It wasn't cheap but by heck it's good. It was only the second time I'd ever worked with an inverter but I quickly realised that if I reinstalled the 3-phase motor to my Perrin mill, I could run that from the same inverter. A box on the wall now houses the inverter along with sundry contactors etc. to switch between the two. I still have the 3-phase motor and coolant pump that I removed when I converted my Bridgeport mill to single-phase, so when I get bored I might swap them back and have the 1ES running from the inverter as well! Anyway, the VSL:


Note DRO for the Perrin at right; it's magnetic so can be positioned to suit the job. You can see the size of the VSL's motor in the following pic! The double-ended shaft allowed factory fitment of an electromagnetic spindle brake, not fitted to this machine as it was apparently an expensive option to have on a school lathe! Unfortunately it does make the VSL slightly longer than was my AUD and I had to rearrange a few things to make it fit the workshop.
I've found that chucks etc. with the L00 fitting don't come along on Ebay very often. However a year after I bought the VSL, I happened upon the same Ebay seller listing a 3-jaw chuck. I got that for less than I thought it'd fetch (less than the seller hoped for too!)... the irony being that it may even be the original one for my lathe as he had several of them to start with and even admitted that some more tooling 'happened to turn up'. Hmmm. Anyway, a week or so later I found an ex-Harrison L00 faceplate for sale about 40 miles from me; I 'won' that auction and when I went to collect it the seller produced an L00 catchplate as well. It was a bit rusty so I haggled and got it for an additional few pounds. A couple of years previously I'd been given a brand-new 3-jaw 'Bison' chuck that had a plain-bore backplate fitted. Of course it wouldn't fit either my old Mellor or AUD so had languished in a cupboard, gathering rust (to my annoyance). I cleaned it up, machined a register on the 'new' catchplate to take it and to my surprise it works AND is accurate! Funny how these things work out, and proof that you should never throw anything away. The chuck-on-a-catchplate can be seen in the photo of the lathe above.
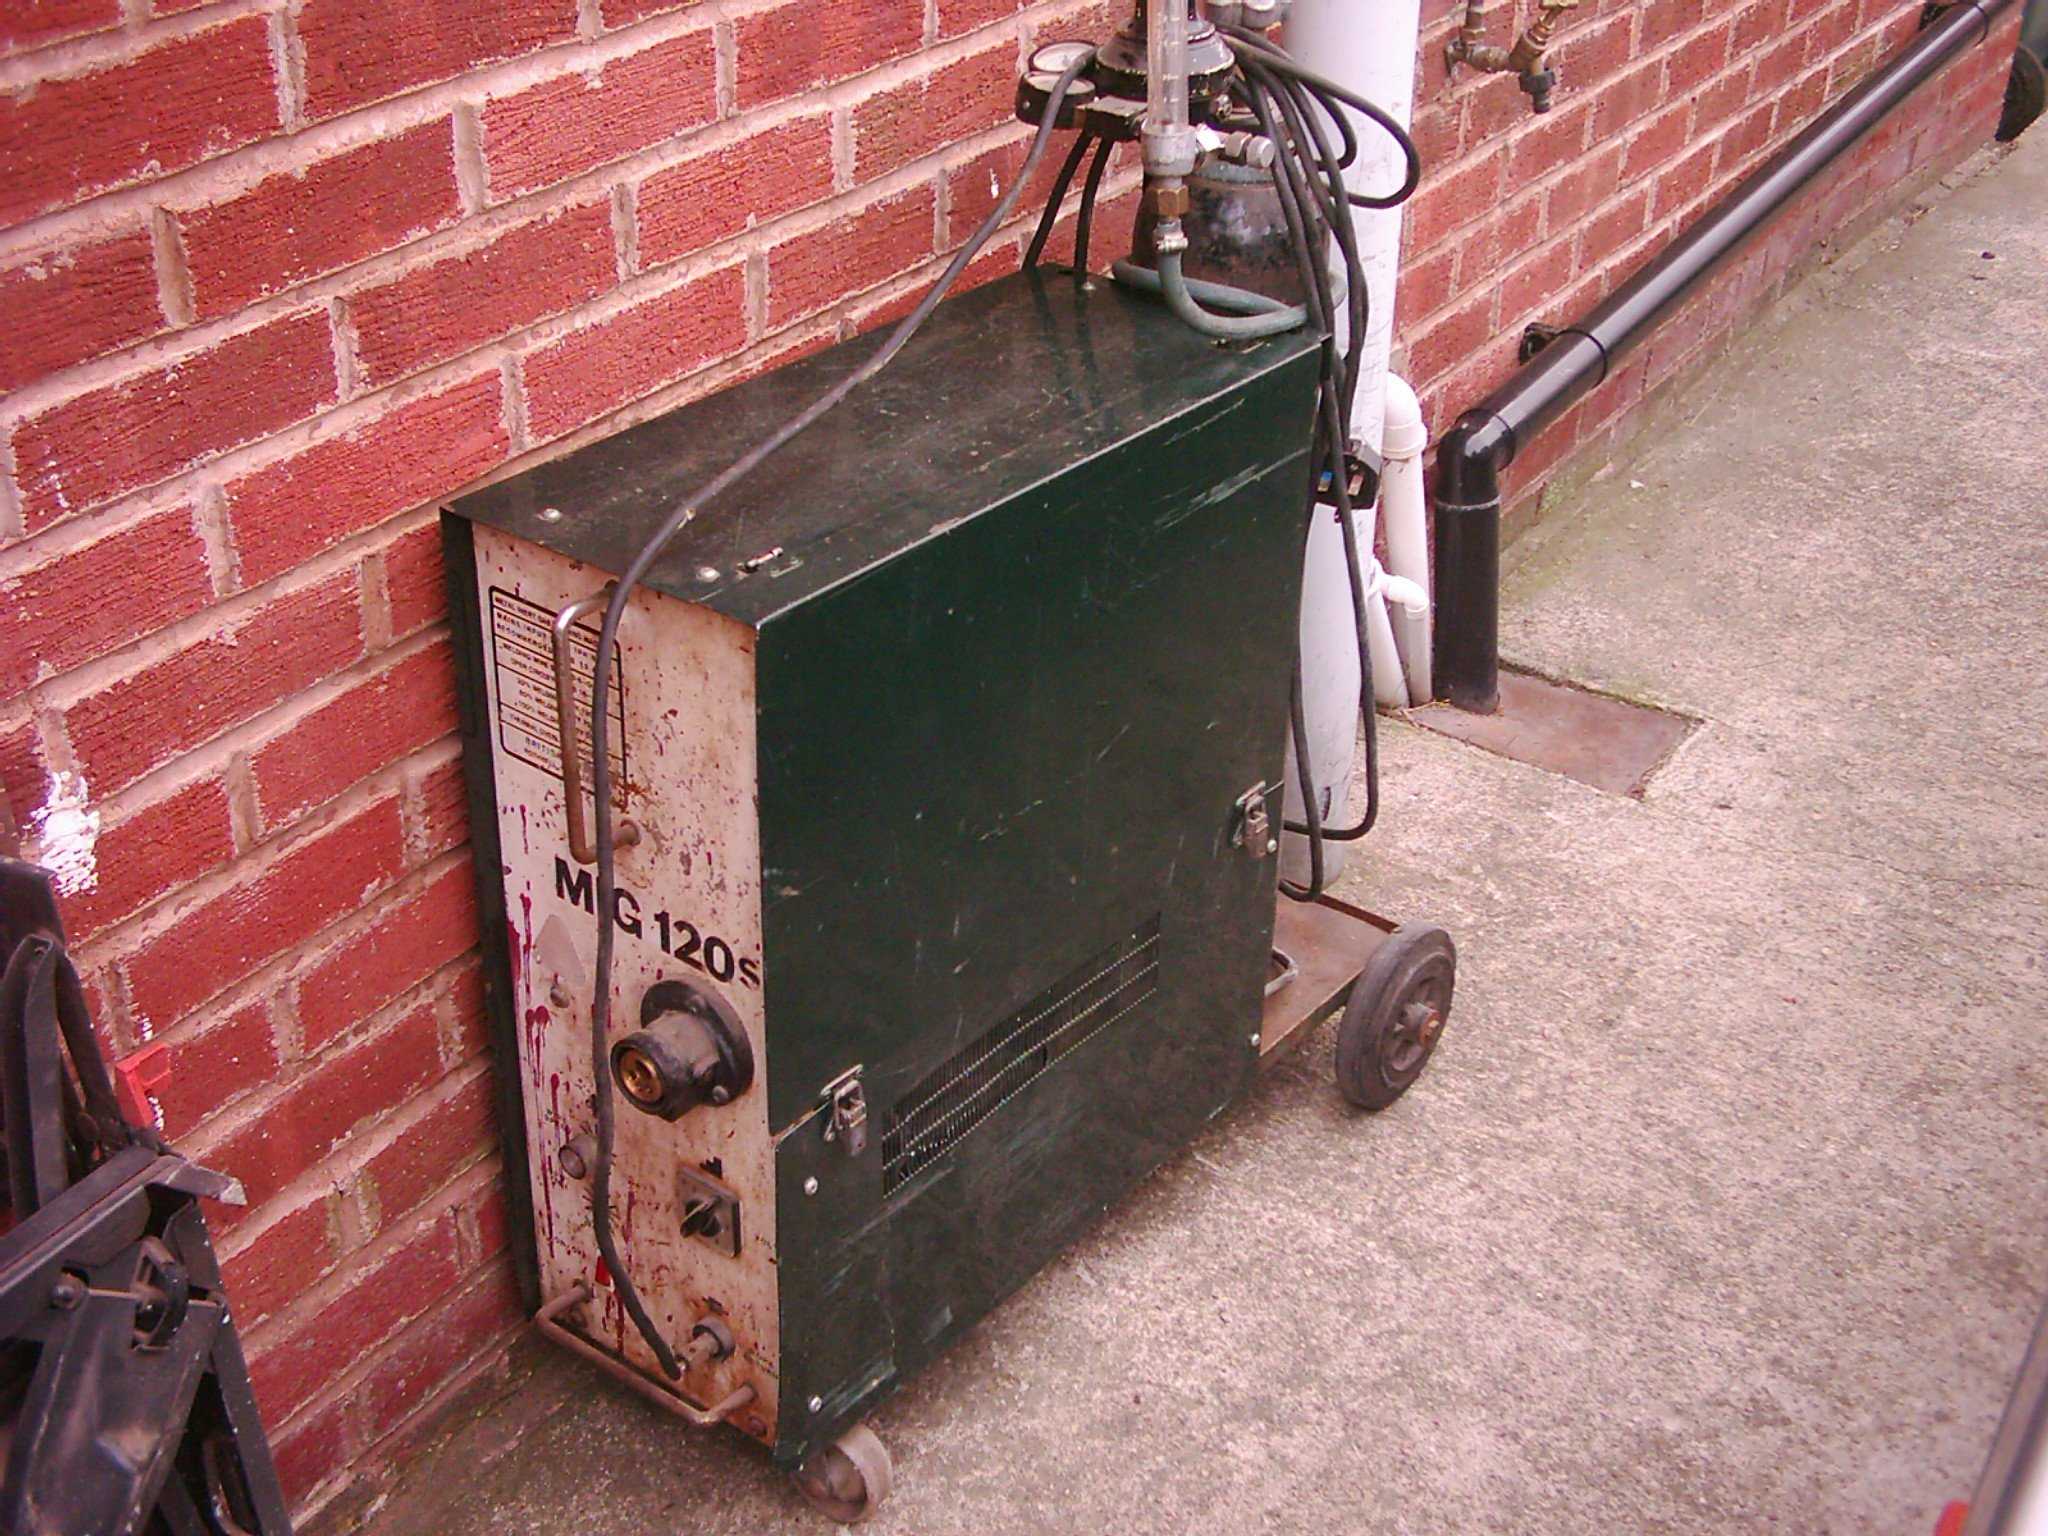
There seem to have been a lot of English welding equipment makers over the years, Oxford being just one of them. Probably best-known for their chunky oil-filled arc ('stick') welders, at some point they found time to make MIG sets as well, and this is one of them. Probably classed when new as a 'light industrial' unit, the MIG 120s dates from the 1980s. It had lain in a mate's garage for some years in a faulty condition, having been given to said mate by his brother who couldn't fix it. As the brother worked for a welding hire company I suppose he thought it was probably scrap, but as I got it for free I thought it was worth a look!
In the event it just needed a couple of new relays and has proved to be a reliable piece of kit. I added a cooling fan under the main transformer (copper-wound, none of that modern aluminium rubbish here!) and, when it was pressed into service for a job at work, the boss insisted that I buy a new torch for it! I stripped most of the outer paintwork off and repainted it but apart from the cosmetics, it's a nice enough unit. I keep it supplied with CO2 in pub-sized bottles and it accepts wire spools up to industrial 15Kg size, which is handy. As it's a 'proper' MIG set it has a 'Euro' connector so the torch can be detached and stored when not in use (it coils up under the side panel)... but one tradeoff of the copper transformer is weight: it's a bit of a heave to get it in and out of a van!
As with Oxford, SMP are (or were) another small-volume English welding equipment supplier. Based in Kidderminster, they started advertising this unit on Ebay in mid-2005. So I bought one! :-D
Why? Well, I've always fancied being able to make 'stuff' from aluminium, but of course welding it is a black art and requires an AC-output welder. I started by trying to find a used unit at local auctions, then moved on to Ebay but it seems that decent branded kit fetches top money regardless of age or condition. Unless I'm just too picky... or more probably, in the wrong place at the wrong time.
There are any number of DC-only units on the market now, especially the inverter designs which tend to be cheaper - Ebay is awash with Chinese-built inverter units. Once it looked as though I was going to have to spend a lot of money to get an AC-capable machine, I thought I may as well buy a new one, and the SMP fitted the bill.
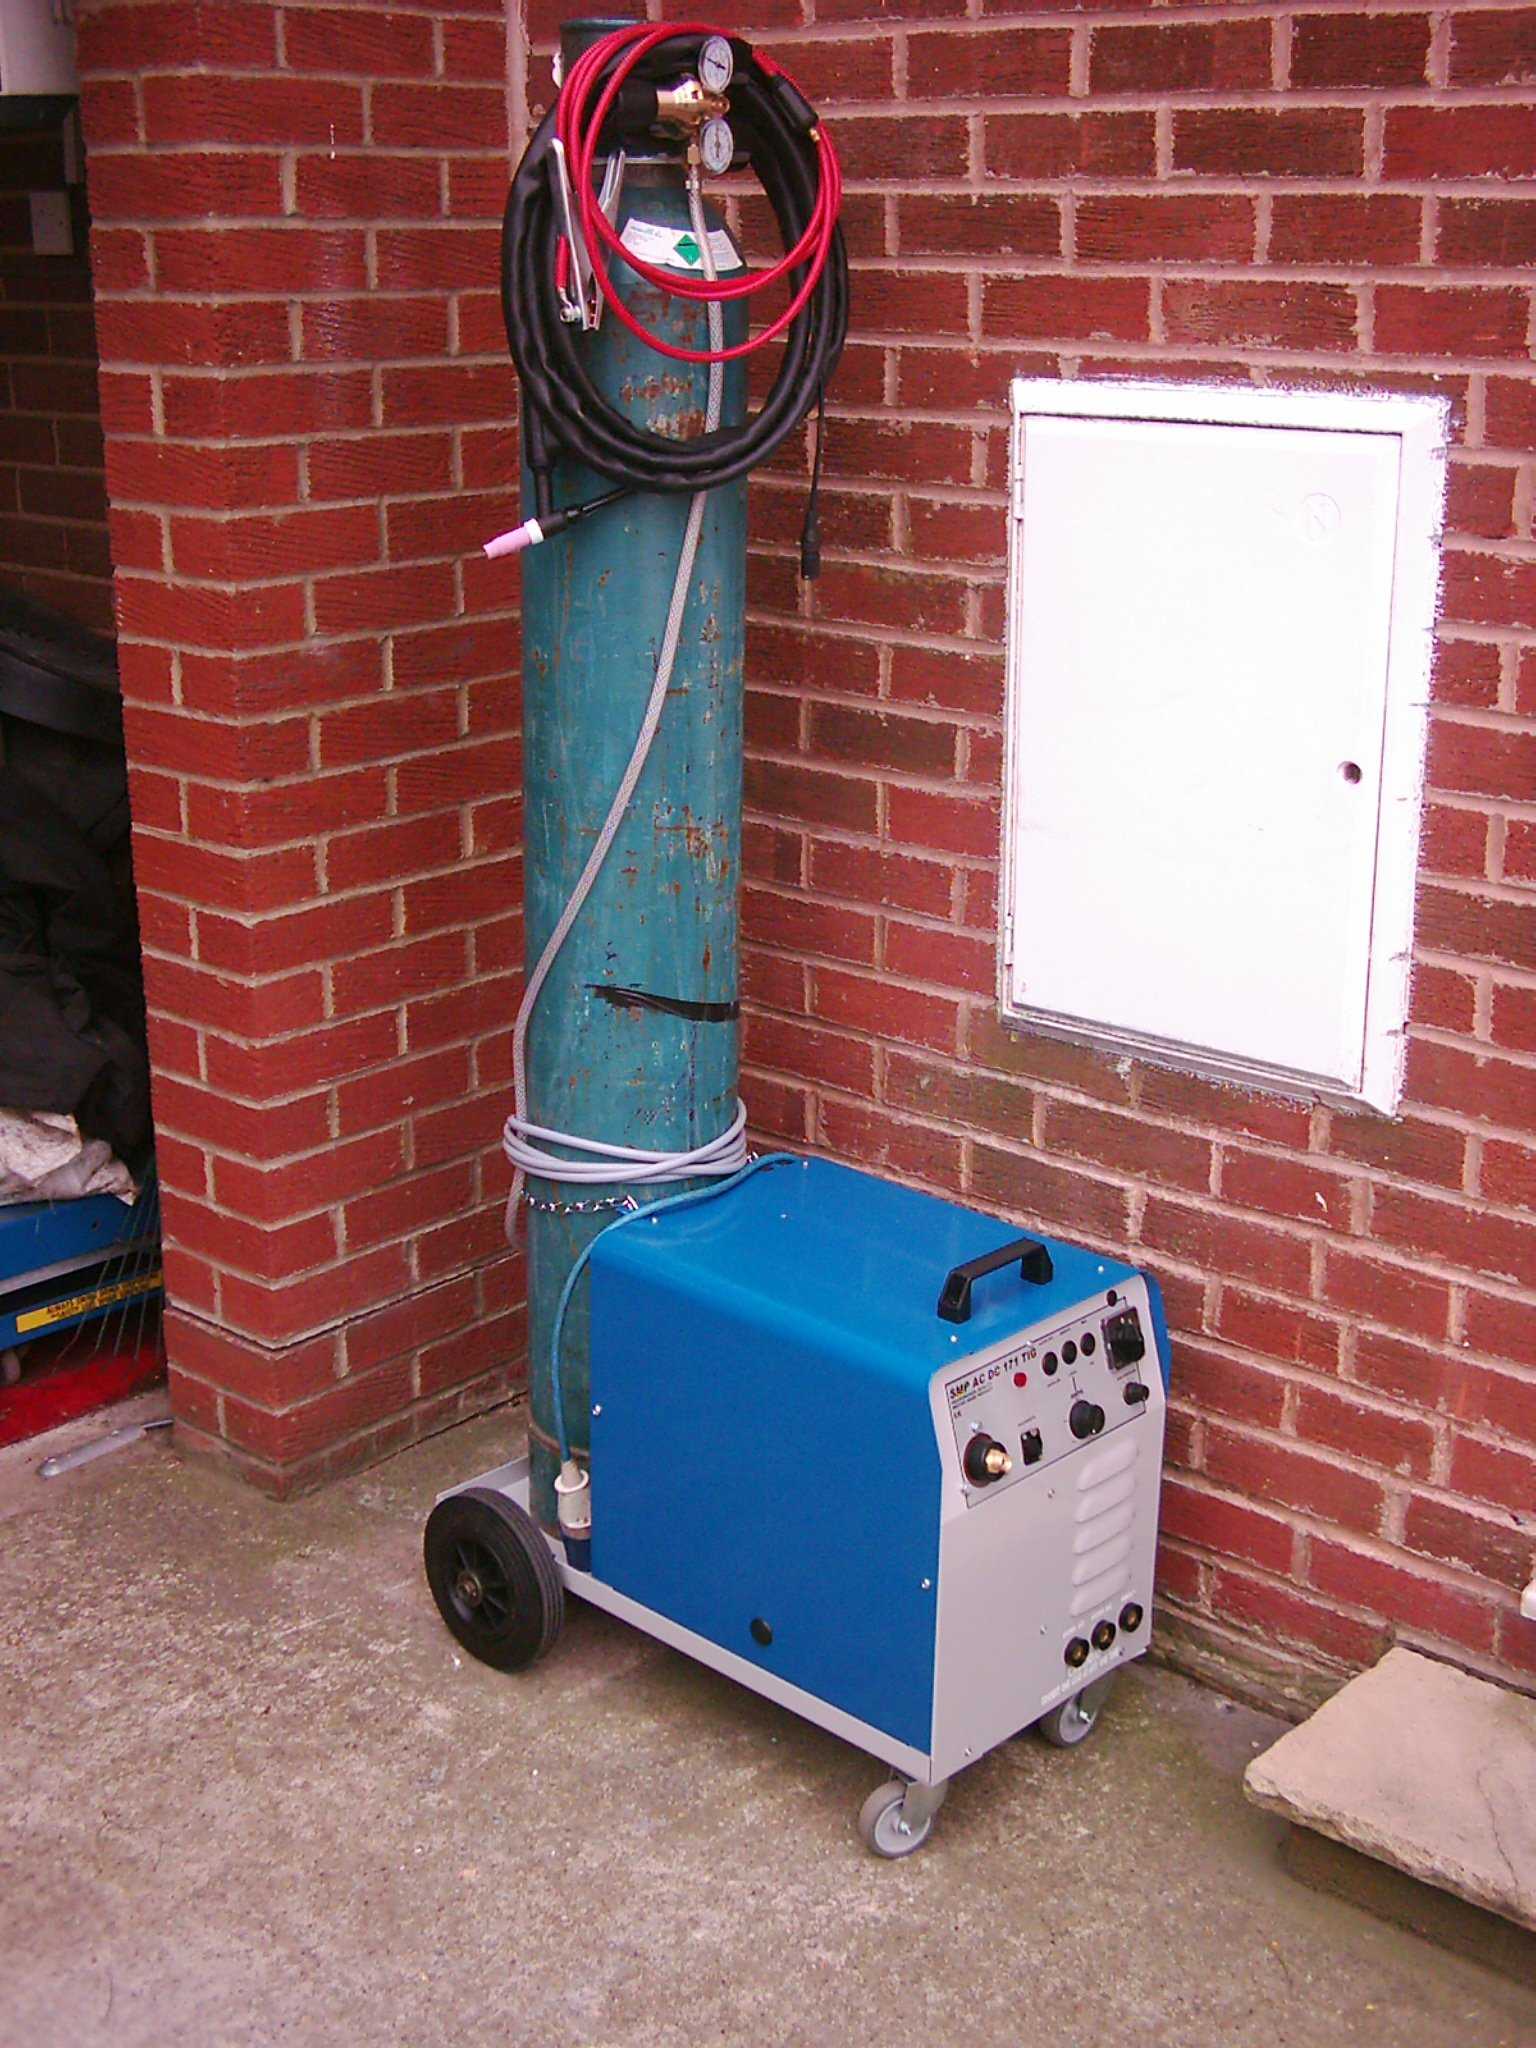
Close inspection reveals the 'cottage-industry' construction of the welder, but it's presentable enough. Interestingly, the welder bears more than a passing resemblance to the products of Portamig, which I understand are built in York by a specialist manufacturer (Technical Arc Services) on Portamig's behalf, so I suspect that the SMP unit was built under a similar arrangement (I believe Oxford welders are now also made in York!).
The welder can take full-size Argon bottles as shown. SMP supplied only the basic necessities of regulator, TIG torch, earth lead and a few tungstens, so I added a stick torch, assorted tungstens and various spare ceramics, collets etc. for the TIG torch. I've also built a foot pedal (to control the output while you weld) because I thought SMP's £125 was a bit steep for a case, a switch and a 1K pot! At the time of writing I can make two bits of aluminium stick together, but I wouldn't call it pretty. As the welder will run as low as 10 Amps it's possible to weld very thin steel; a rule-of-thumb is one Amp per thousandth of an inch, so 10 thou" or about 0.25mm!
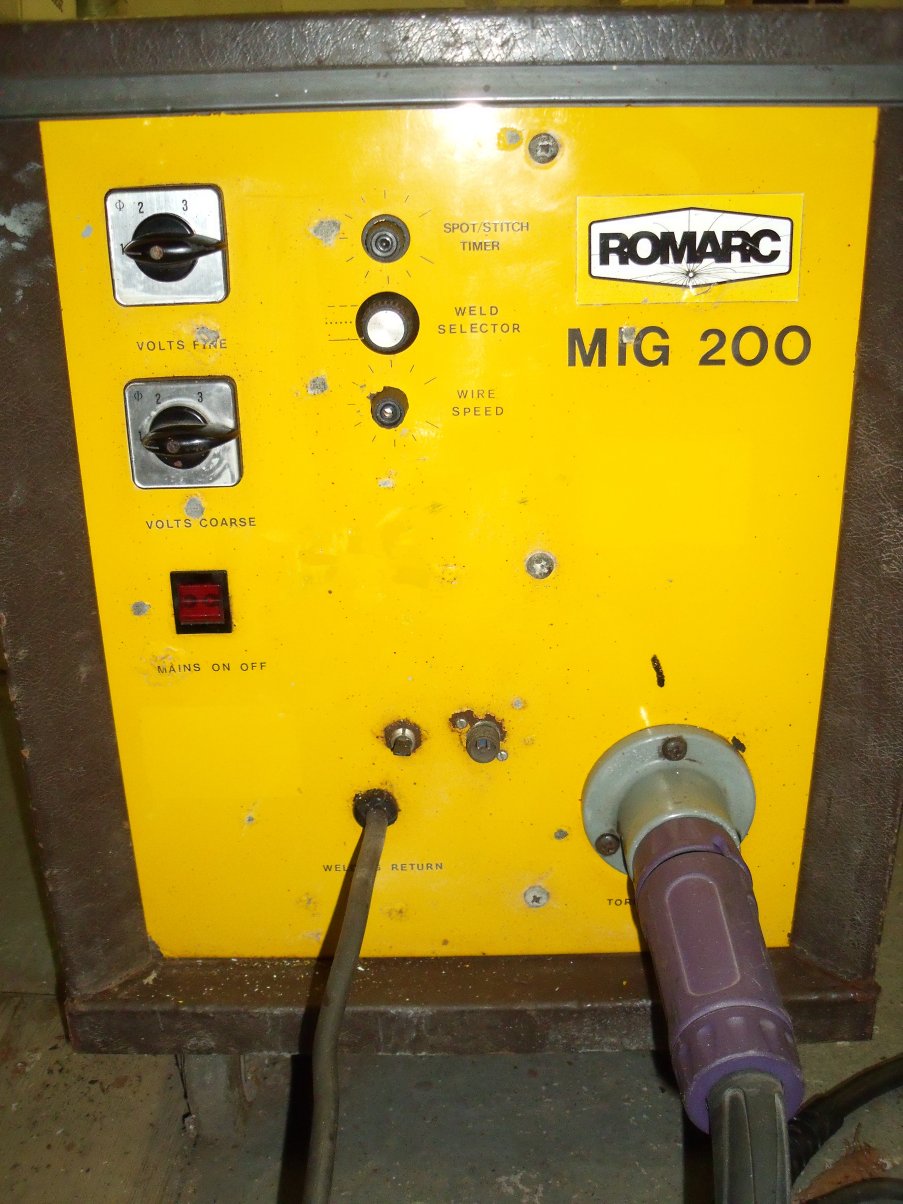
You know how it is: you're browsing a welding forum and spot someone flogging some welding sets for scrap value. So you jump in the van and nip over, thinking you might buy one of them, but when you get there the seller tells you he needs the space and you can have two for the price of one. Well, what's a chap to do? Thus it came to pass that I acquired a Romarc 200 MIG and a Portamig RL35swf wire-feed unit. OK, I concede the wire-feed is not much use without a power-pack... but having poked a few test voltages into it I've worked out what it's supposed to do and it all seems to be working as far as I can test it, so I'll bung it in a dark corner until I come up with a plan.
I've sorted out the wire feed issue and a few other glitches that the Romarc had and it too seems to be working fine! It looks like it could be a useful set; with 16 output current steps, stitch- and spot-weld functions. As to weight: I thought the Oxford was heavy, but this thing needs a ramp to get it in and out of the van, and that's without a gas bottle! I had thought of selling my Oxford 120 once I'm satisfied that the Romarc won't go pop on me, but I may keep it as a 'mobile' unit! I deduce from various markings on both Romarc and Portamig units that they were made in York: the name Technical Arc Services just keeps on appearing... photos of the welders:
I occasionally visit a certain forum aimed at DIY welders. Recently one of the contributors was having a workshop reshuffle and offered his plasma cutter for sale. As I had one on my 'wishlist' (see bottom of page!) I thought I ought to at least consider it. So I did. For about half a second; then I emailed the guy and made an offer. Now I'm the proud owner of an Oerlikon Citocut 10i plasma cutter :D
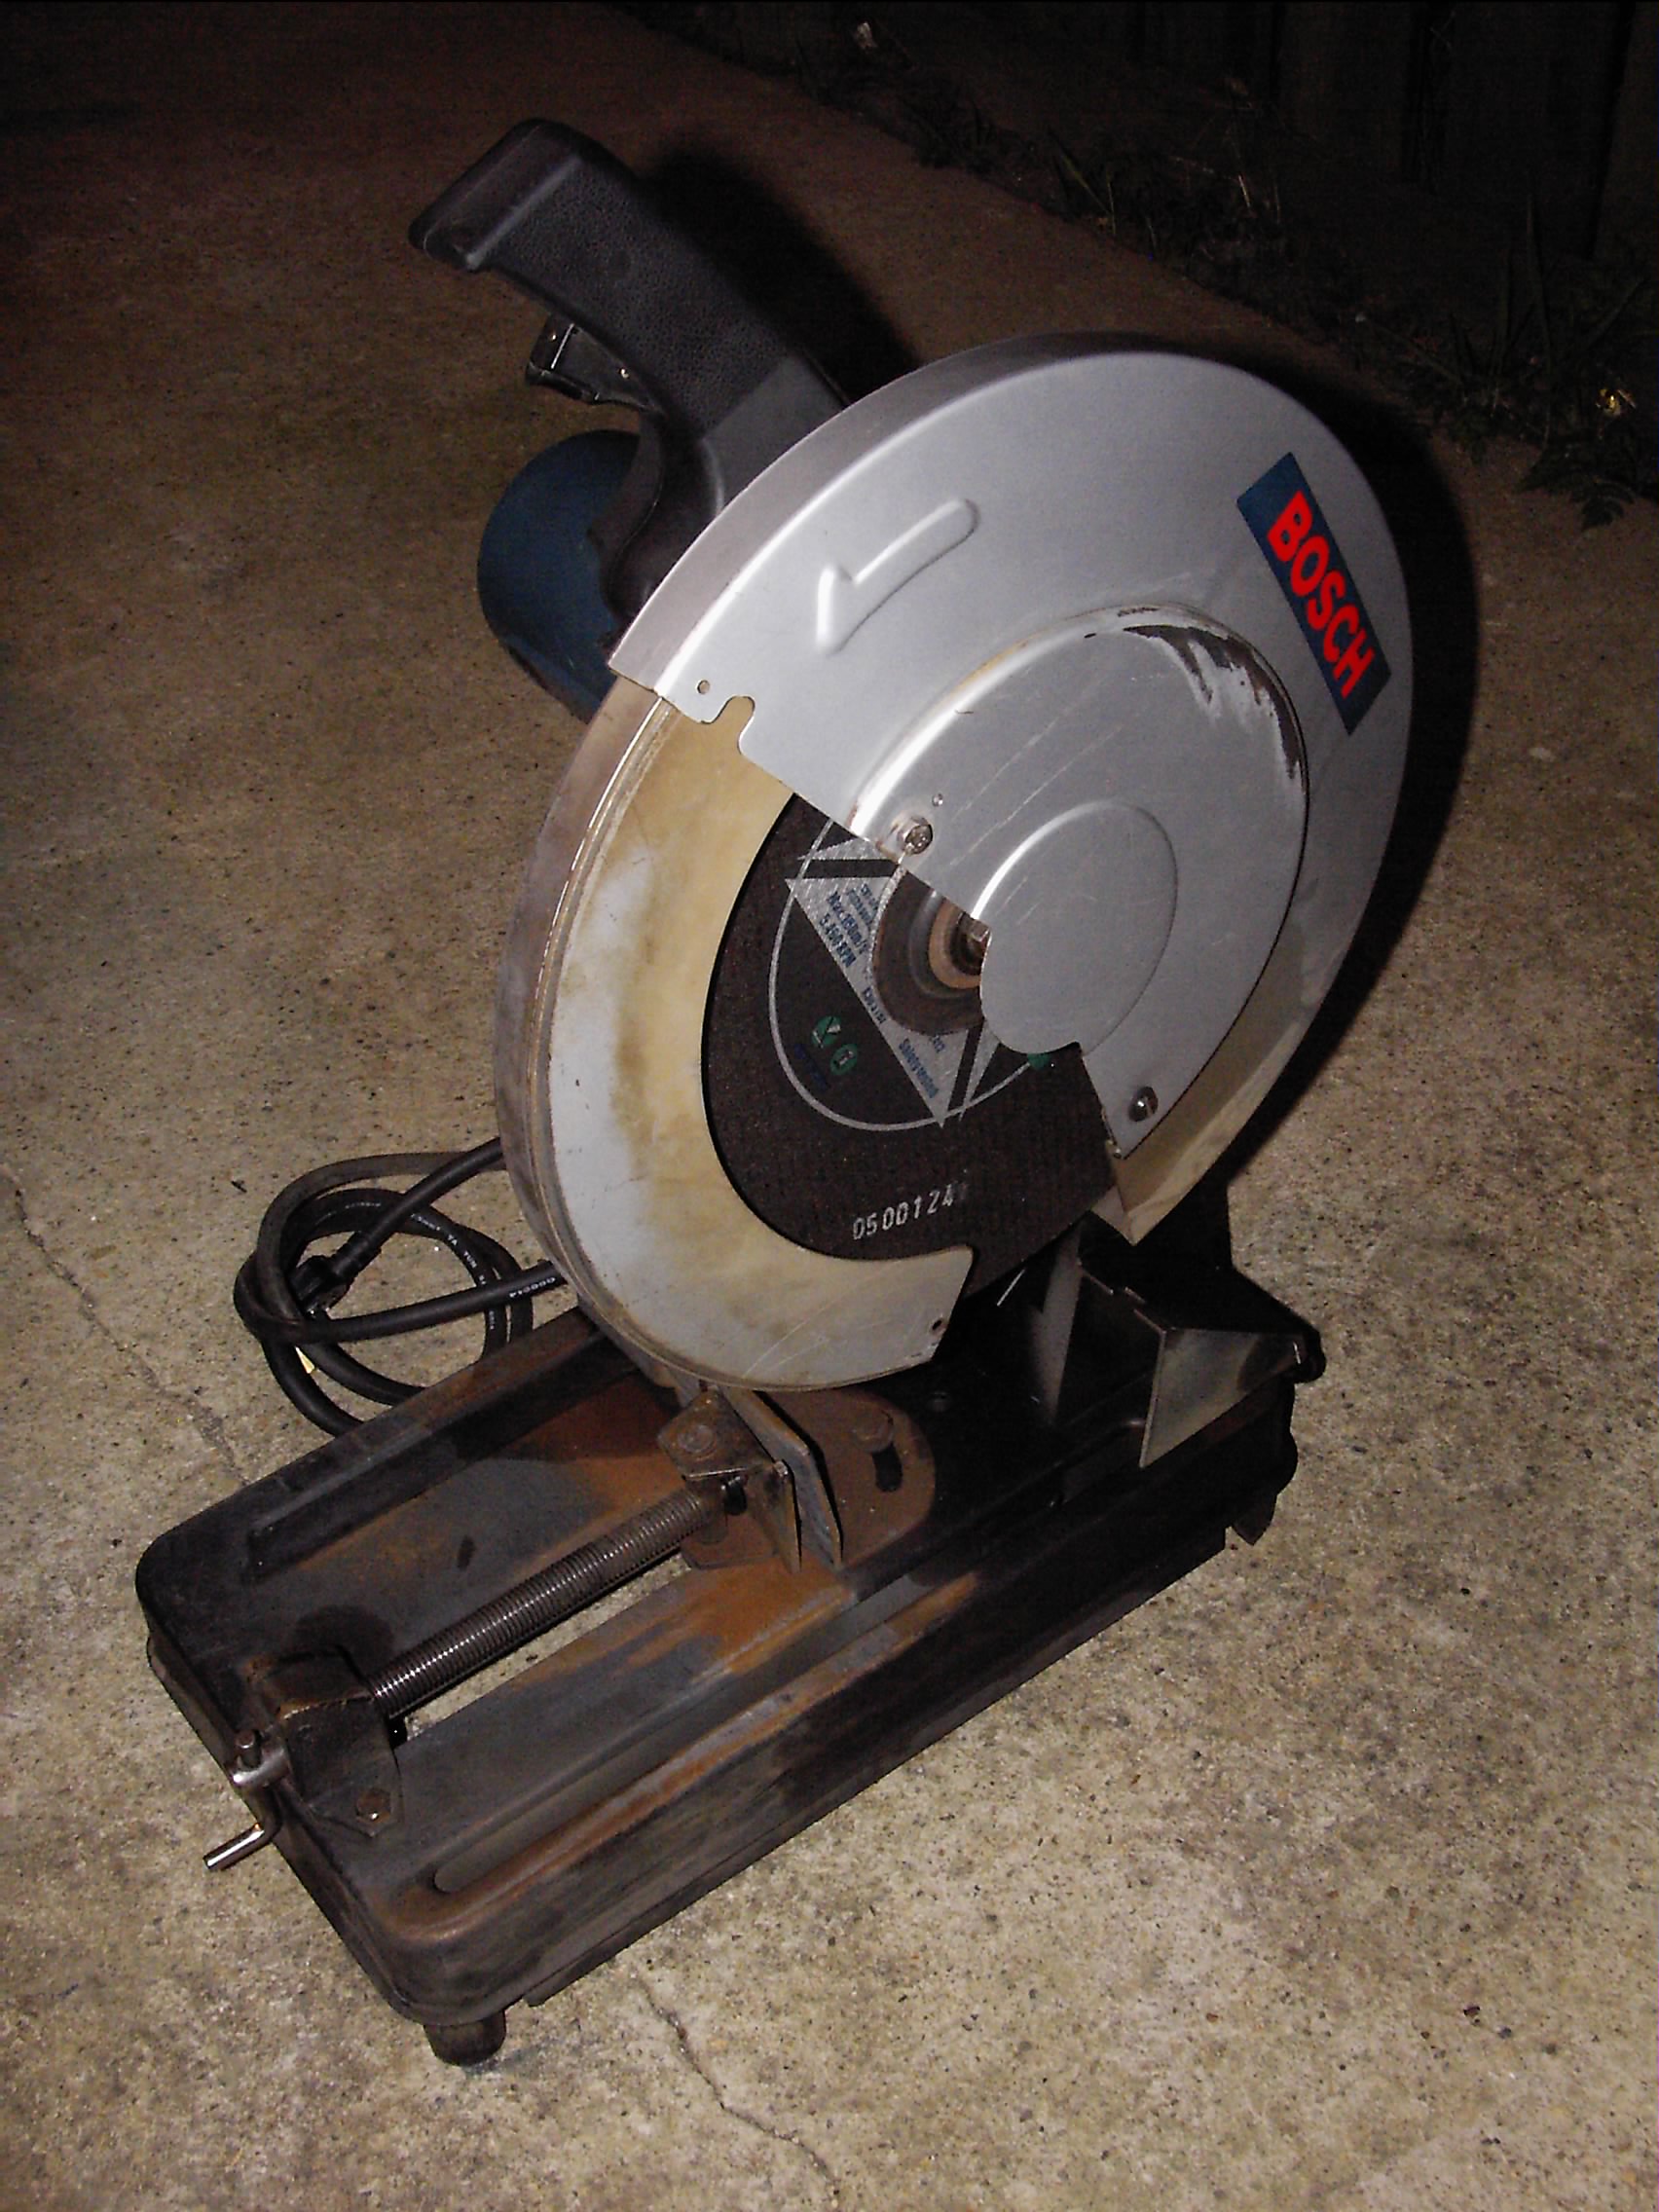
Bosch Cut-off Disc ('chop saw')
If you're going to weld stuff together it's always useful to be able to cut the material to the size you need and after years of persevering with angle grinders I finally bit the bullet and bought a chop saw. Via Ebay, where else. It came from a small company that made aluminium window frames and was used on-site a lot, hence the scratches and scrapes. However the brushes had plenty of length remaining and the motor sounded smooth enough... and several years on it still works fine.
Guyson Blasting Cabinet and Extractor
Look, it seemed like a good idea, OK!? :-D
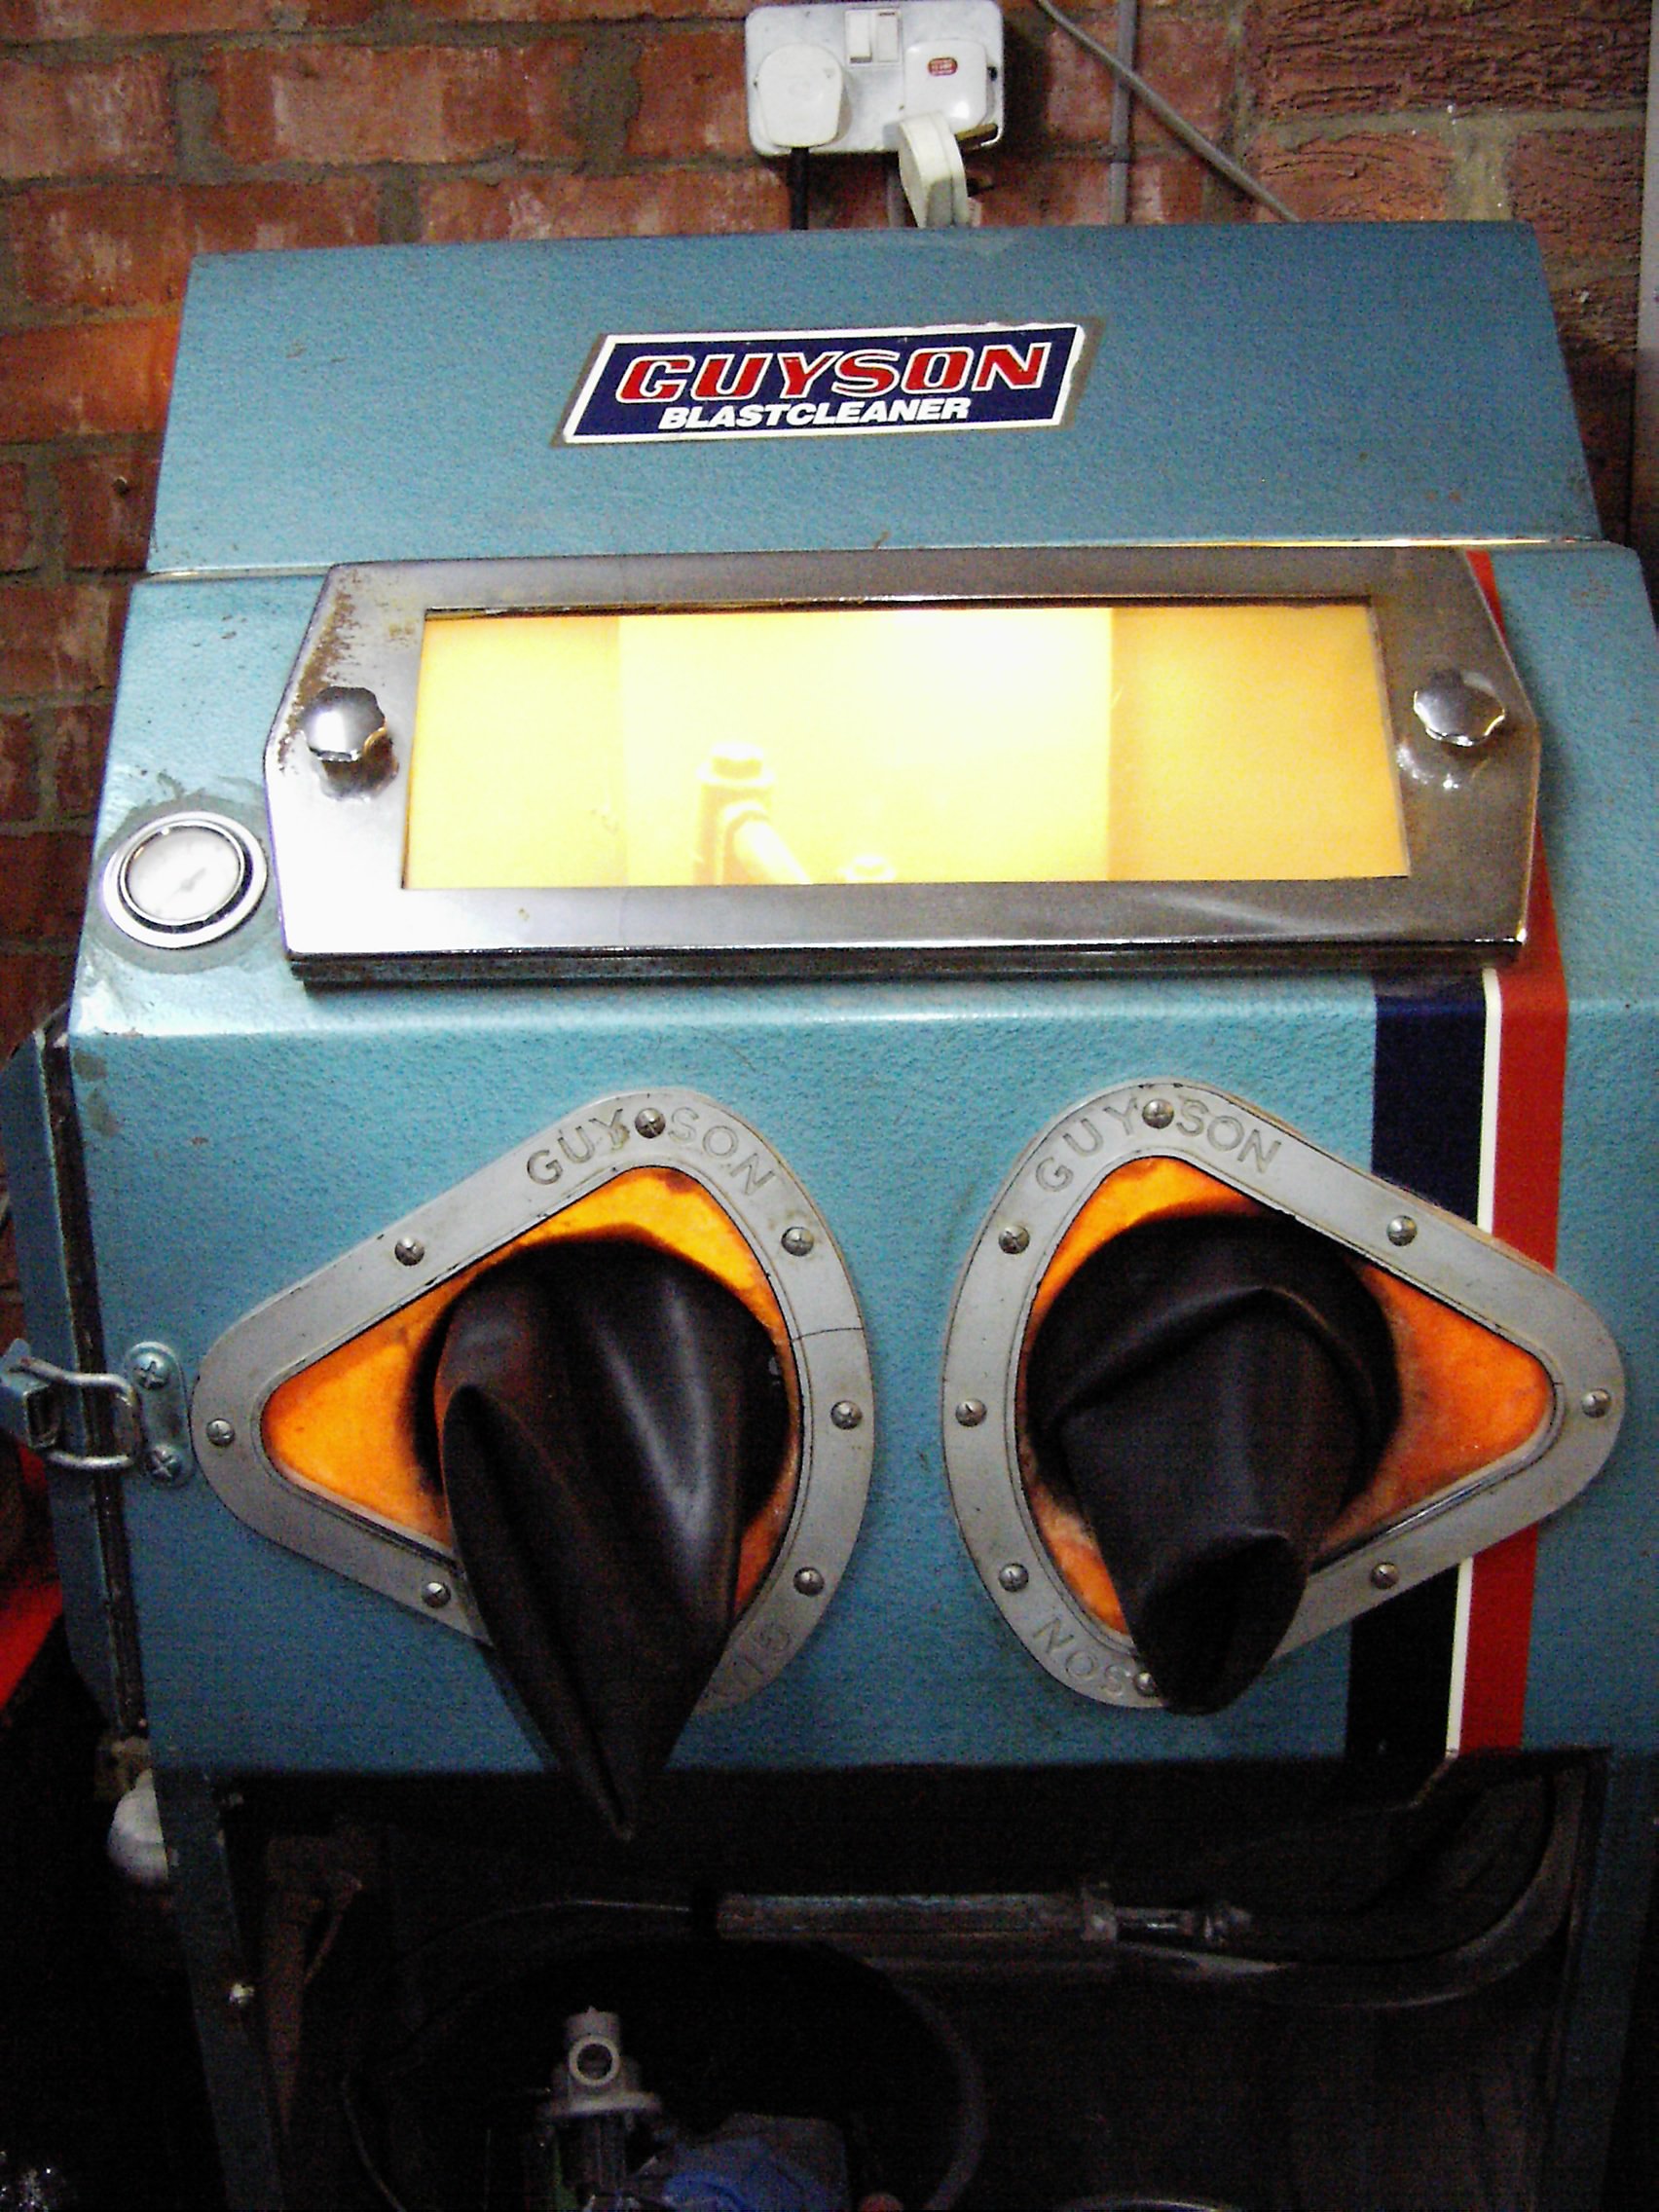
Another Ebay find, the Guyson DBH2 was bought from a machinery trader in Daventry. The extractor (not shown) was a three-phase unit but I had a spare single-phase motor of the right size that fitted straight onto the fan.
The cabinet needed new gauntlets; these are an absolute fortune from Guyson as they're moulded to fit the triangular openings in the front of the cabinet (presumably done to make sure you buy their spares!). I made a mould and created two 'fillers' that allowed me to fit standard long black gauntlets, £20 a pair instead of £80! I've also had to replace the viewing glass as it was blasted to hell, and the blasting gun ceramic nozzle eventually wore out necessitating replacement (with a tungsten one - £30!). Add to that the price of blasting medium and it's an expensive hobby (I reckon I must have spent about £500 on the sandblast by now; that would buy a lot of time at the powder-coaters - but it's damned convenient to have!). Quite by chance I came across a bag of glass bead media from the same source as my Perrin mill; unfortunately it gets pulled out by the extractor rather quicker than the 80 grit aluminium oxide, though it gives a much nicer finish on alloy parts. I think I've found the limit of the cabinet's capacity as it was JUST possible to blast the sump from the Esprit's engine!
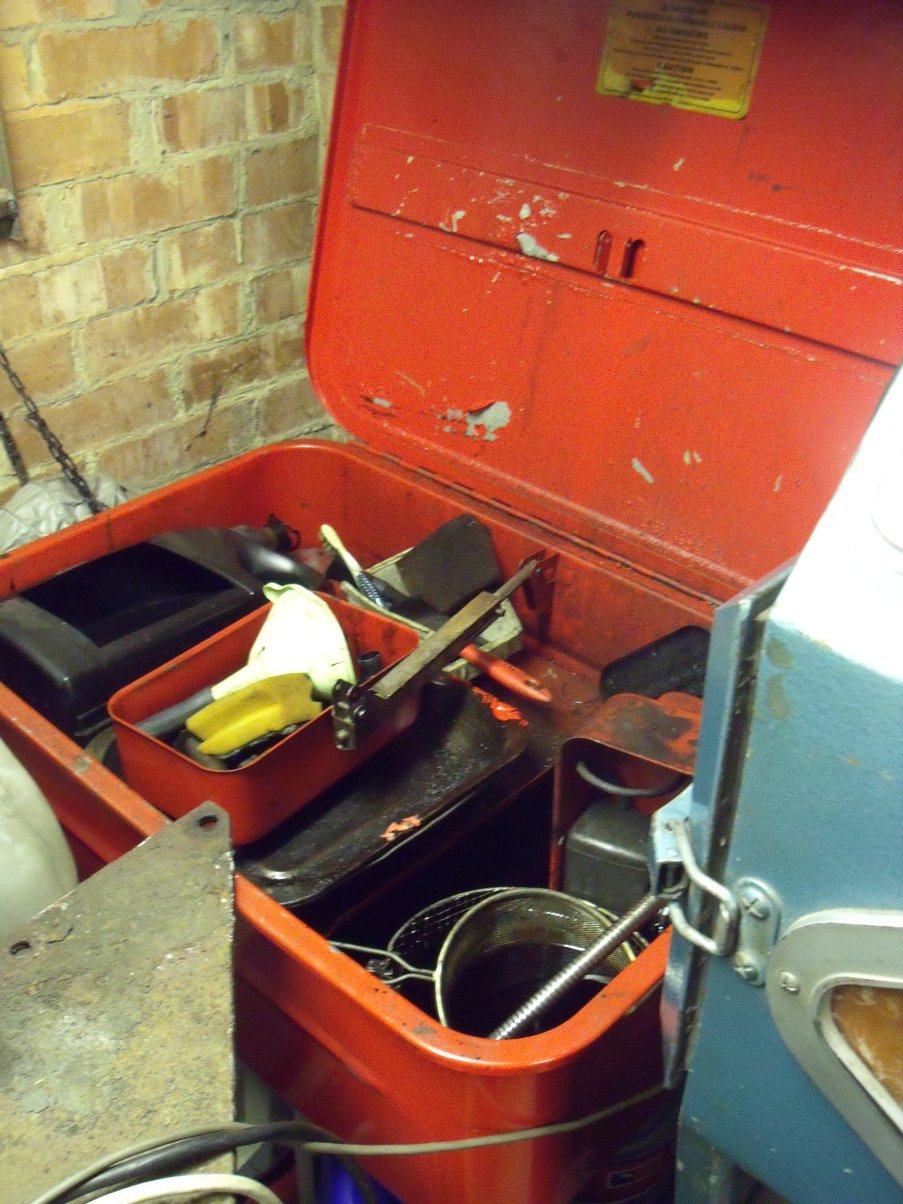
Tucked away in the corner is my parts washer: bought new from an importer in Tyneside, I think it cost £27! It's a 10-gallon tank with recirculating pump, exactly the same as sold by Machine Mart and others. I use Jizer degreaser in it; the tank makers don't recommend you use anything other than water with a mild detergent but what bloody use is that? As you can see, Jizer does a good job of stripping paint as well as muck and oil and it hasn't killed the pump yet (four or five years of permanent immersion). The collection of baskets, trays etc. helps prevent losing small items in the layer of 'clart' (as my grandma would have called it!) that collects at the bottom of the tank.
The generous mate who gave me the MIG welder also gave me his old air compressor! Originally a SIP 'Workshop' range unit, its 100 Litre red receiver had been repainted a fetching shade of metallic green. But did I care? Not likely! Paul had decided that his car-spraying days were over as he'd met a guy who could do the work for him at a price too good to miss, so the compressor was duly heaved into my van and took up residence here. I blew the cobwebs off, cleaned out the filter and, er, well that's it, really! It sits there and compresses air. Next, of course, I needed some air tools.... and once again, Ebay is your friend! :-D
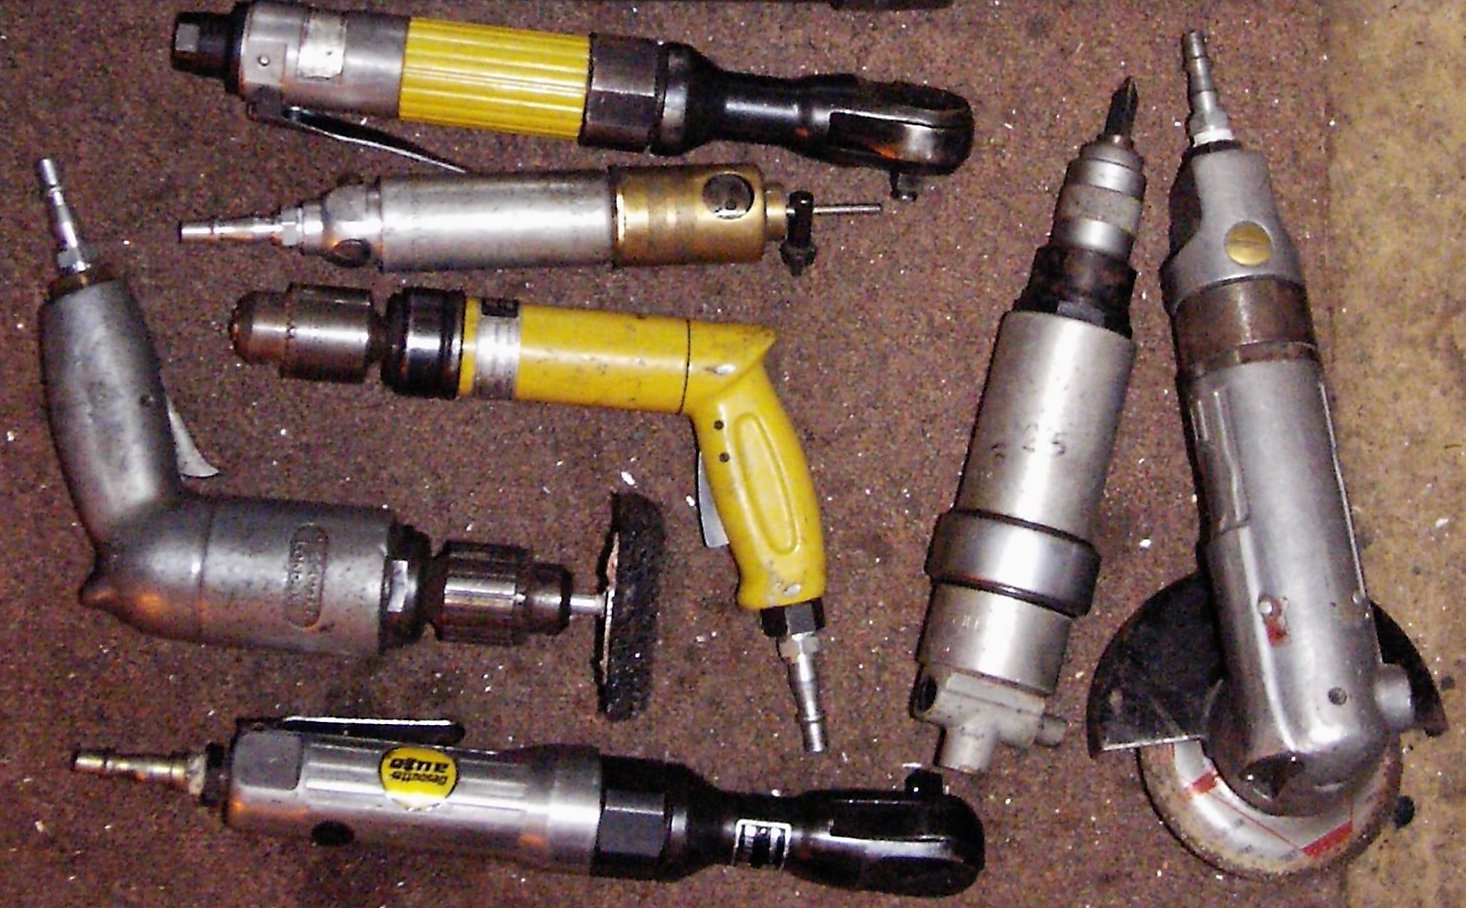
Well, apart from the larger pistol-grip drill, which my dad gave me. He'd been given it by one of his clients years back, but his portable compressor couldn't run it. Made by DeSoutter, it's in fine working order, though it must have lain unused for 25 years! The only problem I had was finding a chuck key to fit it; it's a bizarre size.
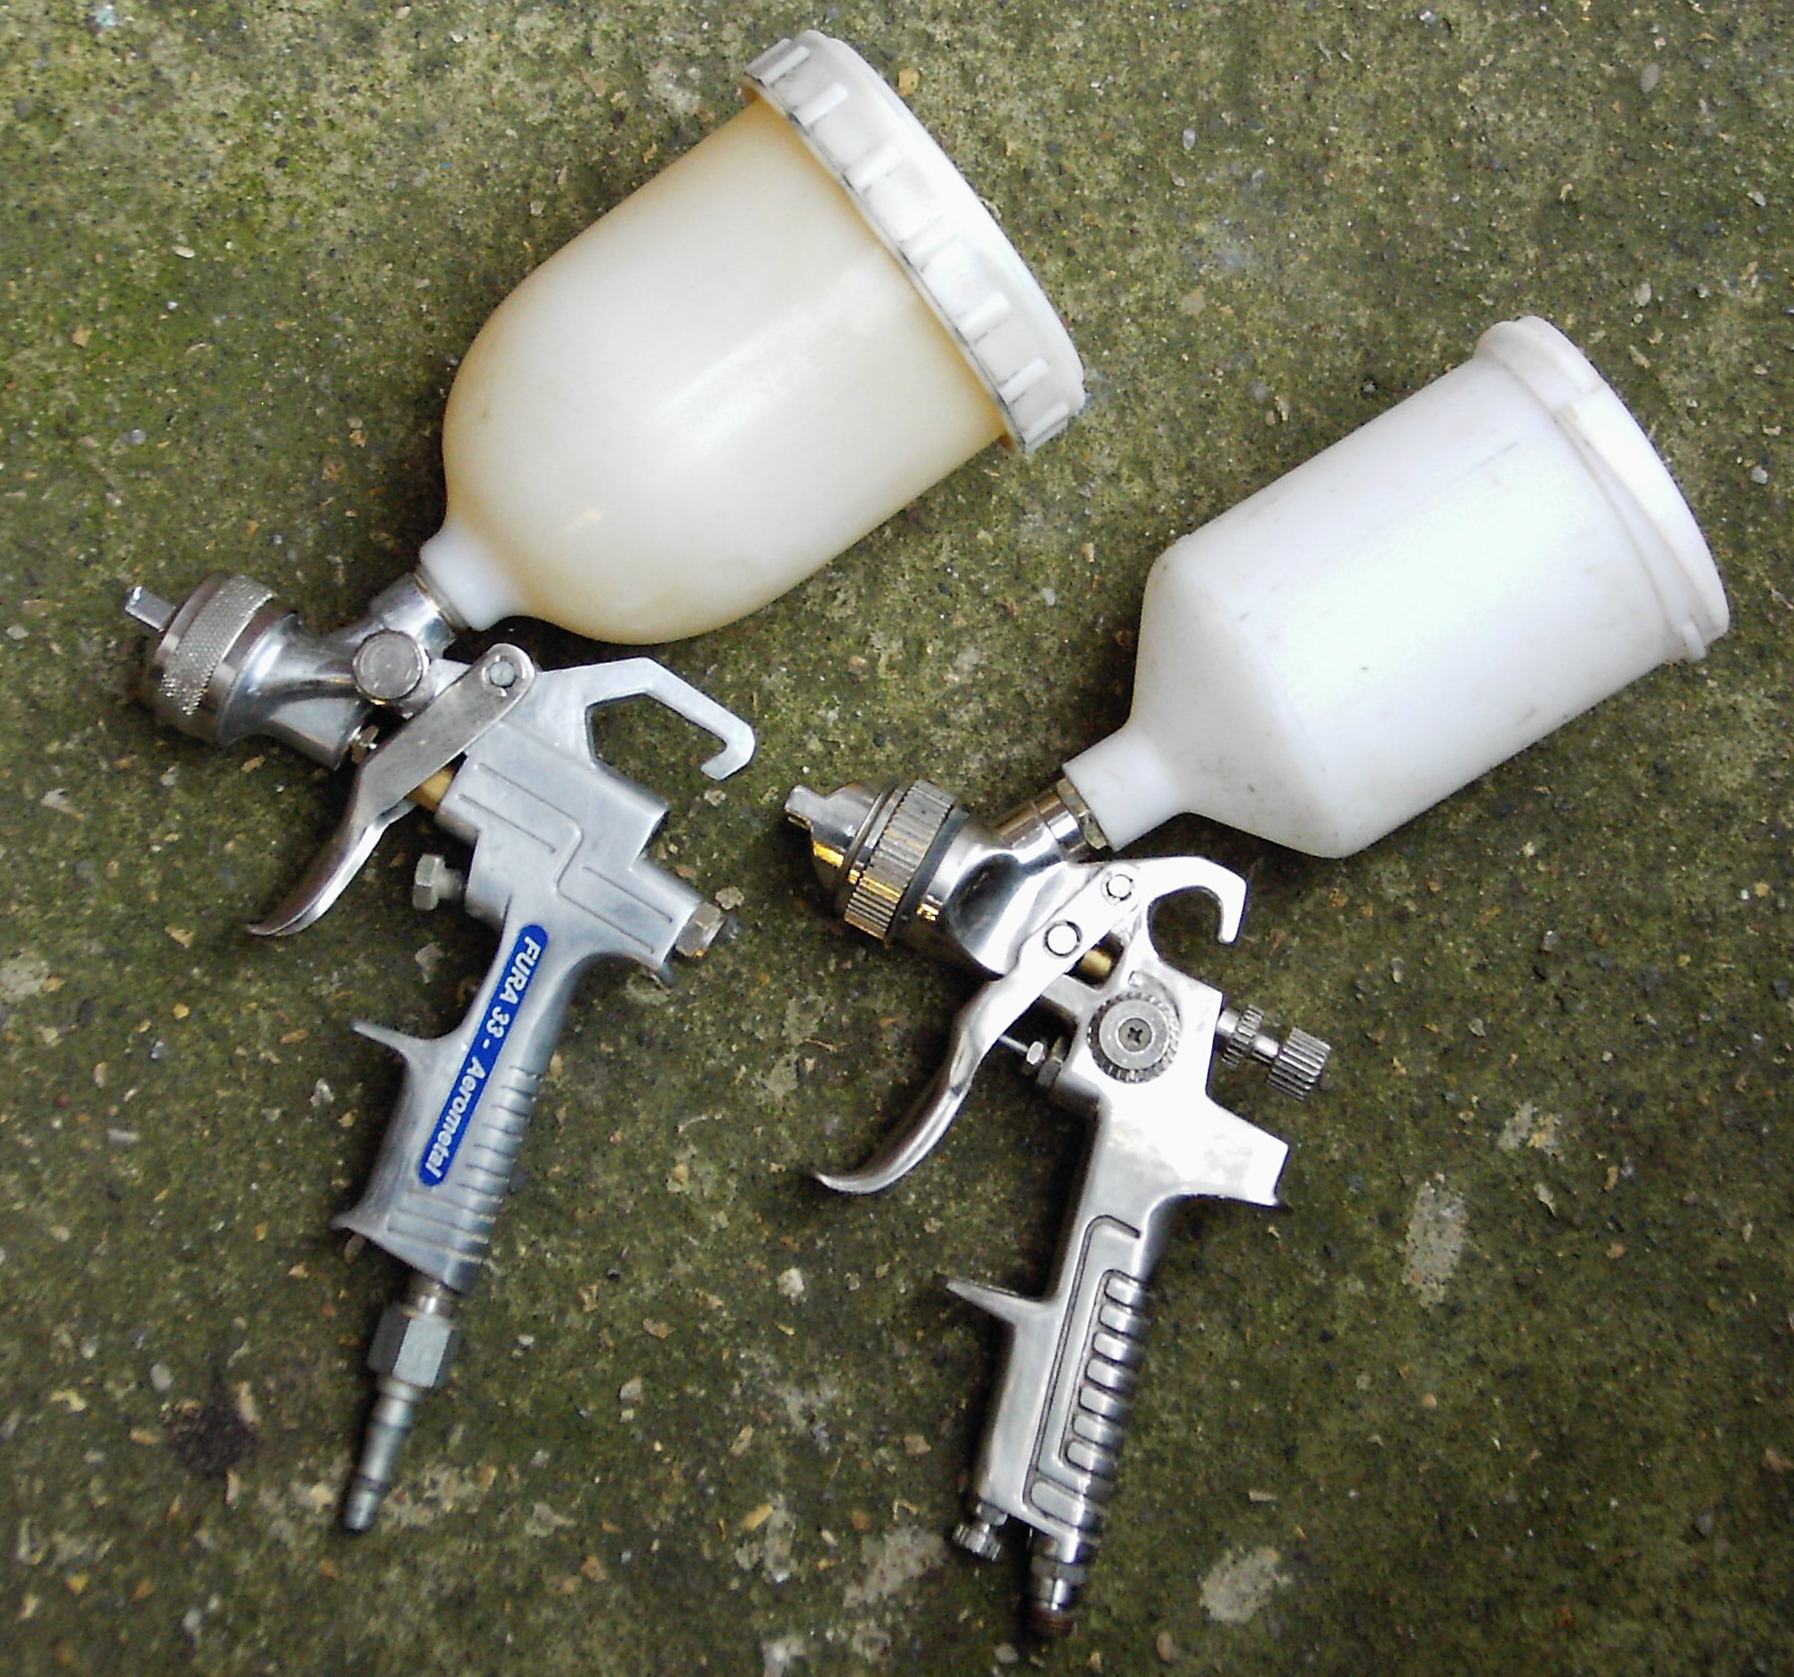
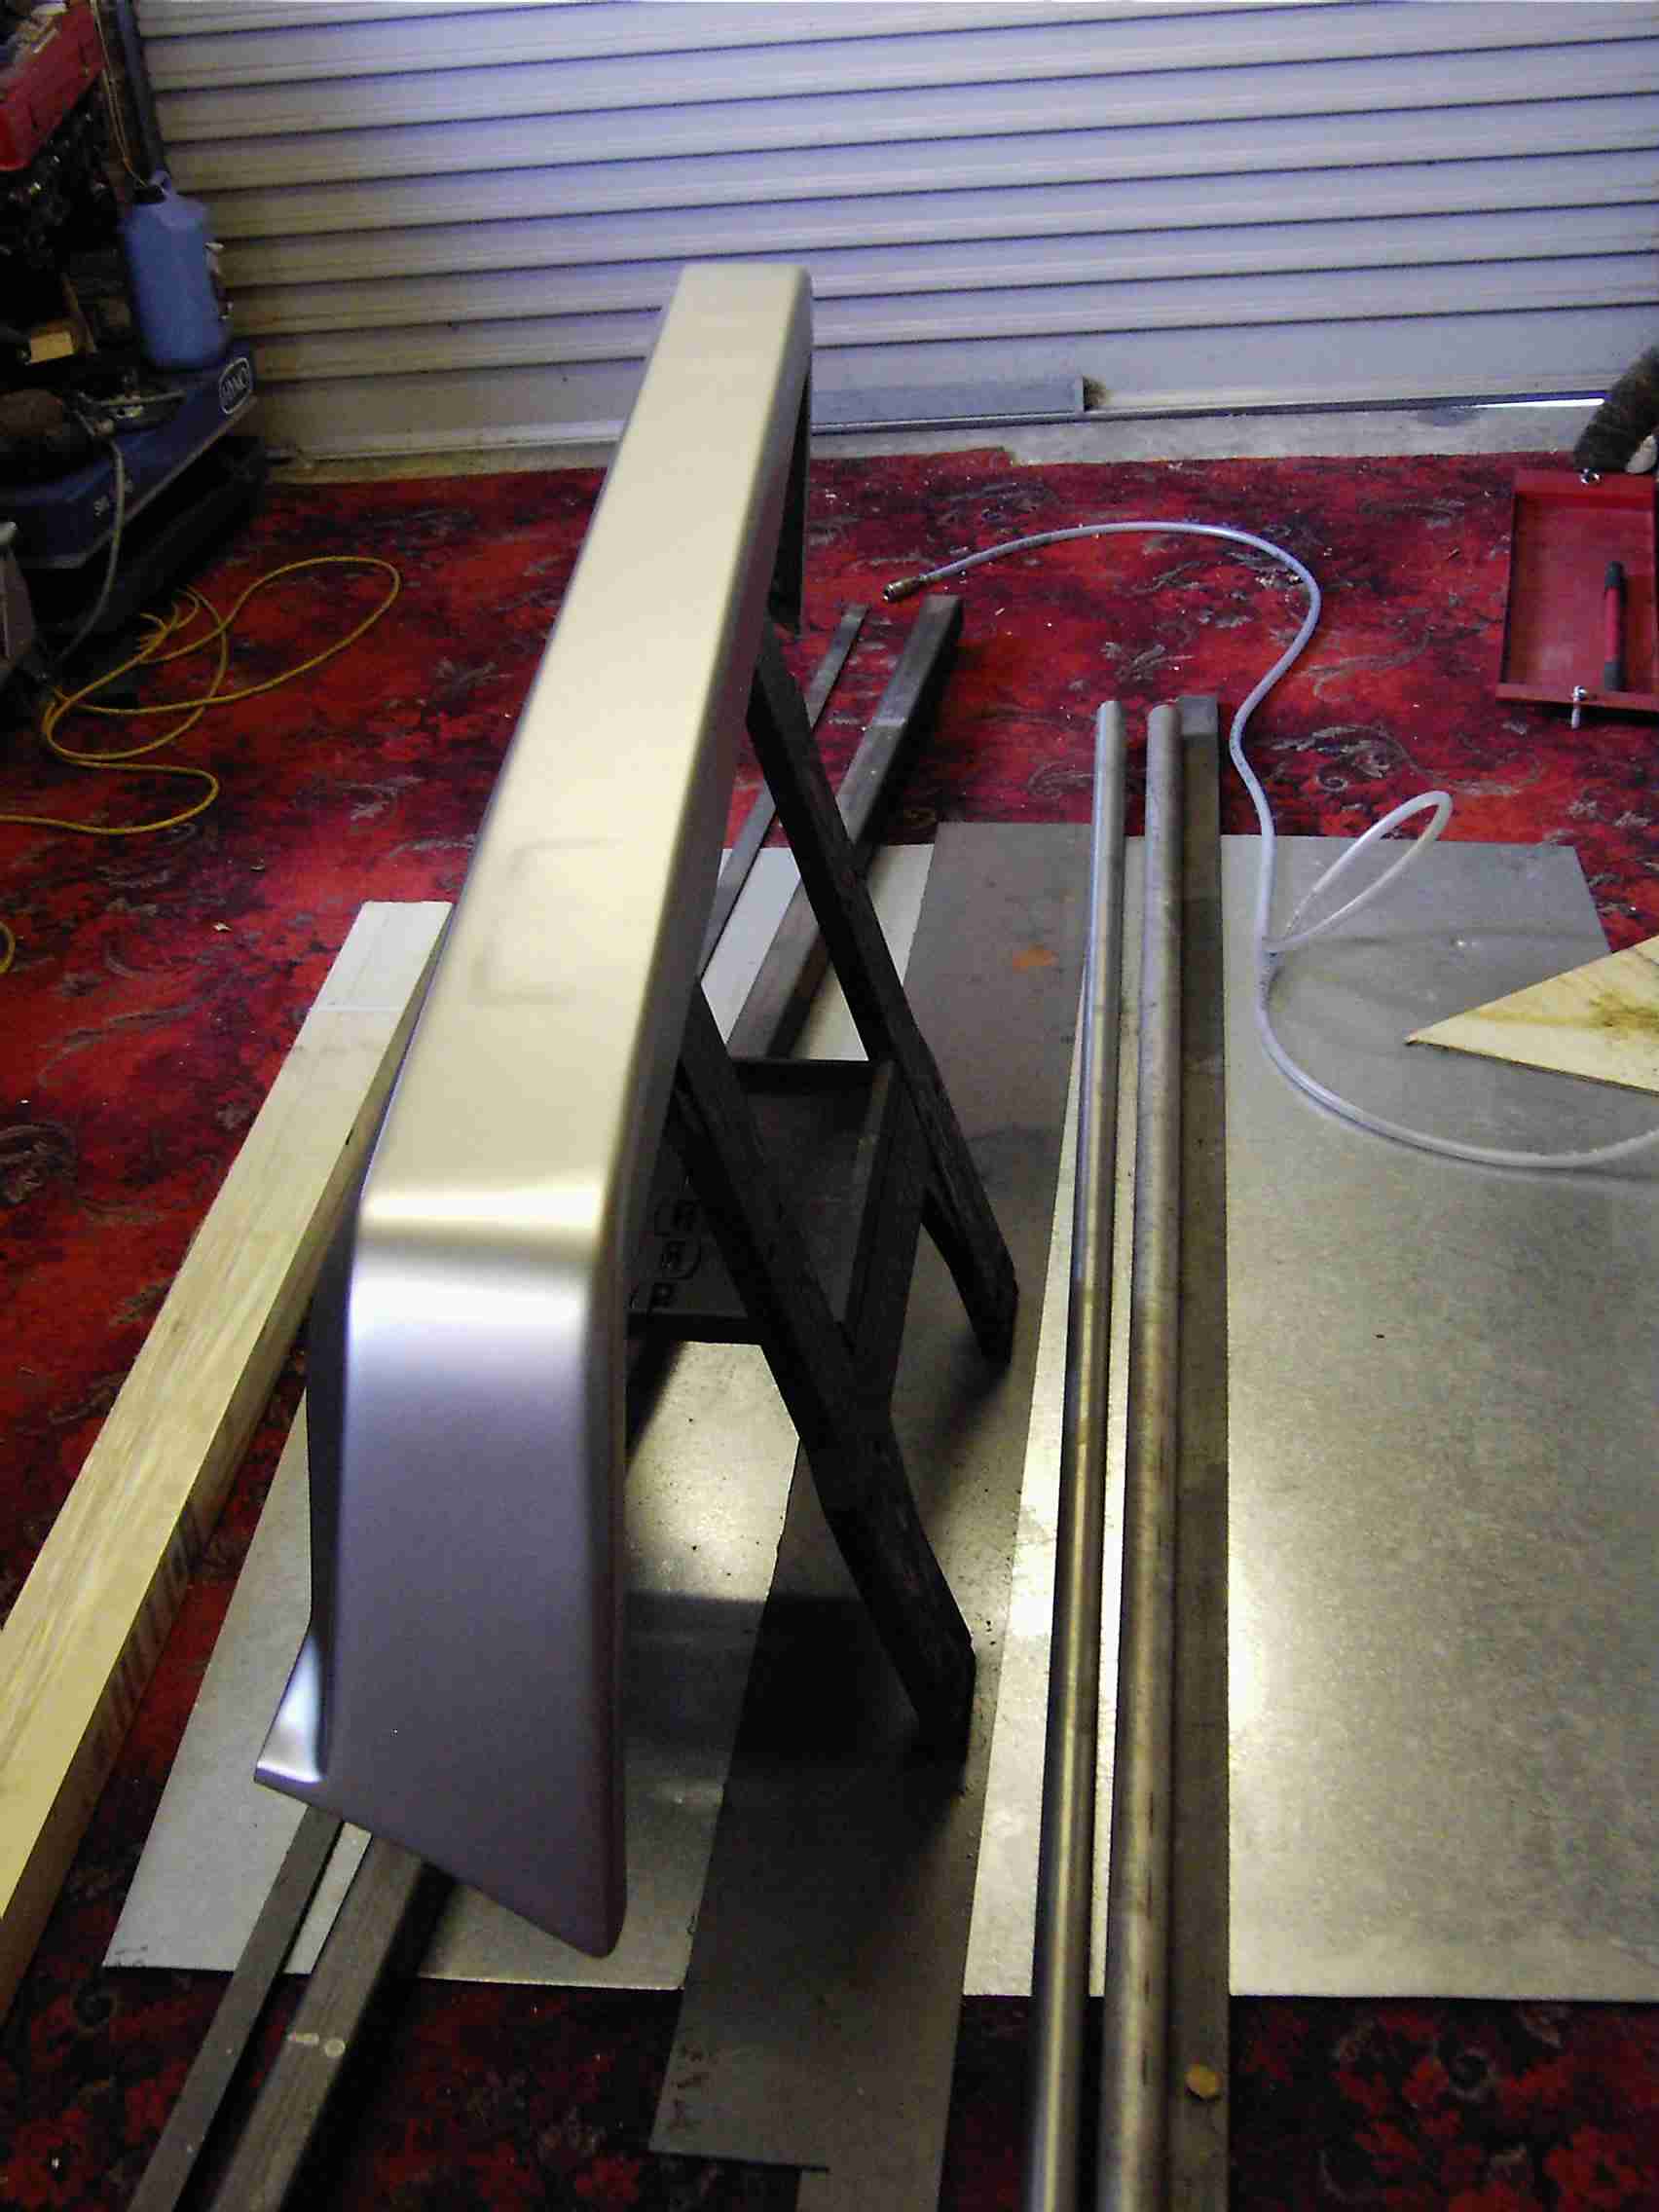
The sprayguns were gifts too, from a mate who did custom paint jobs on motorcycles. Essentially they were old guns he'd thrown in the cupboard after they got choked with primer once too often, but with a good clean they're more or less serviceable. Here's the 390SE's rear bumper just after I resprayed it (with the gun shown at right, above - I used cling film as a lid!)... the various lengths of steel tube and box etc. on the floor are normally hidden by the car!
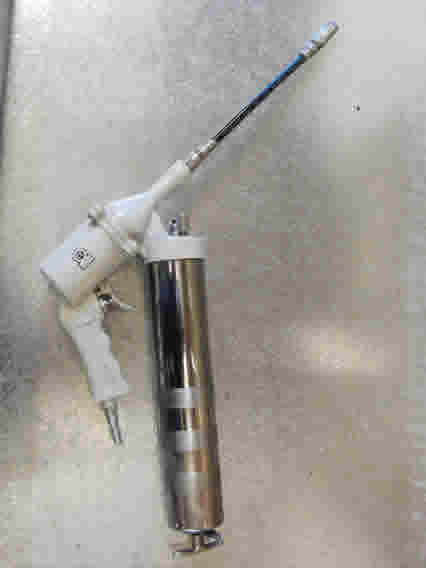
Ebay turned up most of the other air tools: two DeSoutter 1/4" drive wrenches, angle grinder, straight drill, small pistol-grip drill, impact screwdriver (all DeSoutter), grease gun (even NuTool can't go far wrong with a grease gun). The tyre inflator (not shown) was a B&Q clearance special when they were switching from SIP air tools to Rockworth or whatever Chinese junk it is they do now. I also have one of those SIP cut-off tools with the small (80mm) disc and a micro die-grinder. On the subject of junk, Aldi stores have periodic 'special offers' of pneumatic equipment and one recent Sunday (March 2011) found me filling my trolley with an assortment of air tools. Normally I'd have given this stuff a wide berth, but there are mitigating circumstances, not least the three-year warranty that they offer... and given that several of the items they were selling seem to be identical to those sold by Machine Mart at twice (or more) the price, I'm prepared to give them a chance. So to my air-tool cabinet I added a spare regulator/filter/oiler; an impact wrench; another cut-off tool; a sheet-metal nibbler and a spot-blasting gun!
I acquired another compressor from my son-in-law: he got it as a project but it was too big for his space. It's too big for mine really, but the intention was to get it serviceable then sell the smaller one... I just haven't finished putting it together yet. Fact is, they're bloody expensive things to buy parts for. The link pipe between cylinder head and tank cost me £68! Then it needed a pressure switch (£17) and a motor start/run capacitor (£10) and after all that I think the piston rings are shot! Would have been cheaper to buy a complete working unit but hey ho, you live and learn. The unit is a 'BluePoint' device with a 150L tank (it has occurred to me to build one compressor out of the two, using the larger tank!) but the pump unit (made by Abac) is identical to the one on the SIP. For some reason the Italians seem to have the market in compressor pumps; at least spares are easy to get!
One day, I went to a local powder-coating place with some components from work. We'd used them for years but this time the owner was really shirty about 'those bits of crap' so I went elsewhere. I got one of the lads to demo the actual process to me, and that led to me mooching round the 'net looking for equipment. Professional kit of course costs a fortune, but I came across this system from 'Electrostatic Magic'. In essence it's a modified blow-gun fitted with a 'paint' hopper and an electrode system that applies a charge to the plastic powder as it's blown through by compressed air. The charge (several kV!) is generated by the power supply unit when a footswitch is pressed.
Obviously another Chinese product with a manual written in gobbledegook, it retails for about £100. Now I know that would buy quite a lot of time at the powder-coaters, but that bloke pissed me off so I'd rather he doesn't get any more of my, or the company's money (in fact four years later I still haven't been back and I take every opportunity to advise potential clients of his attitude: I guess he won't be writing any books on customer relations). I'd had the PC system for several months before I finally got round to using it; the results of my first attempt can be seen here!
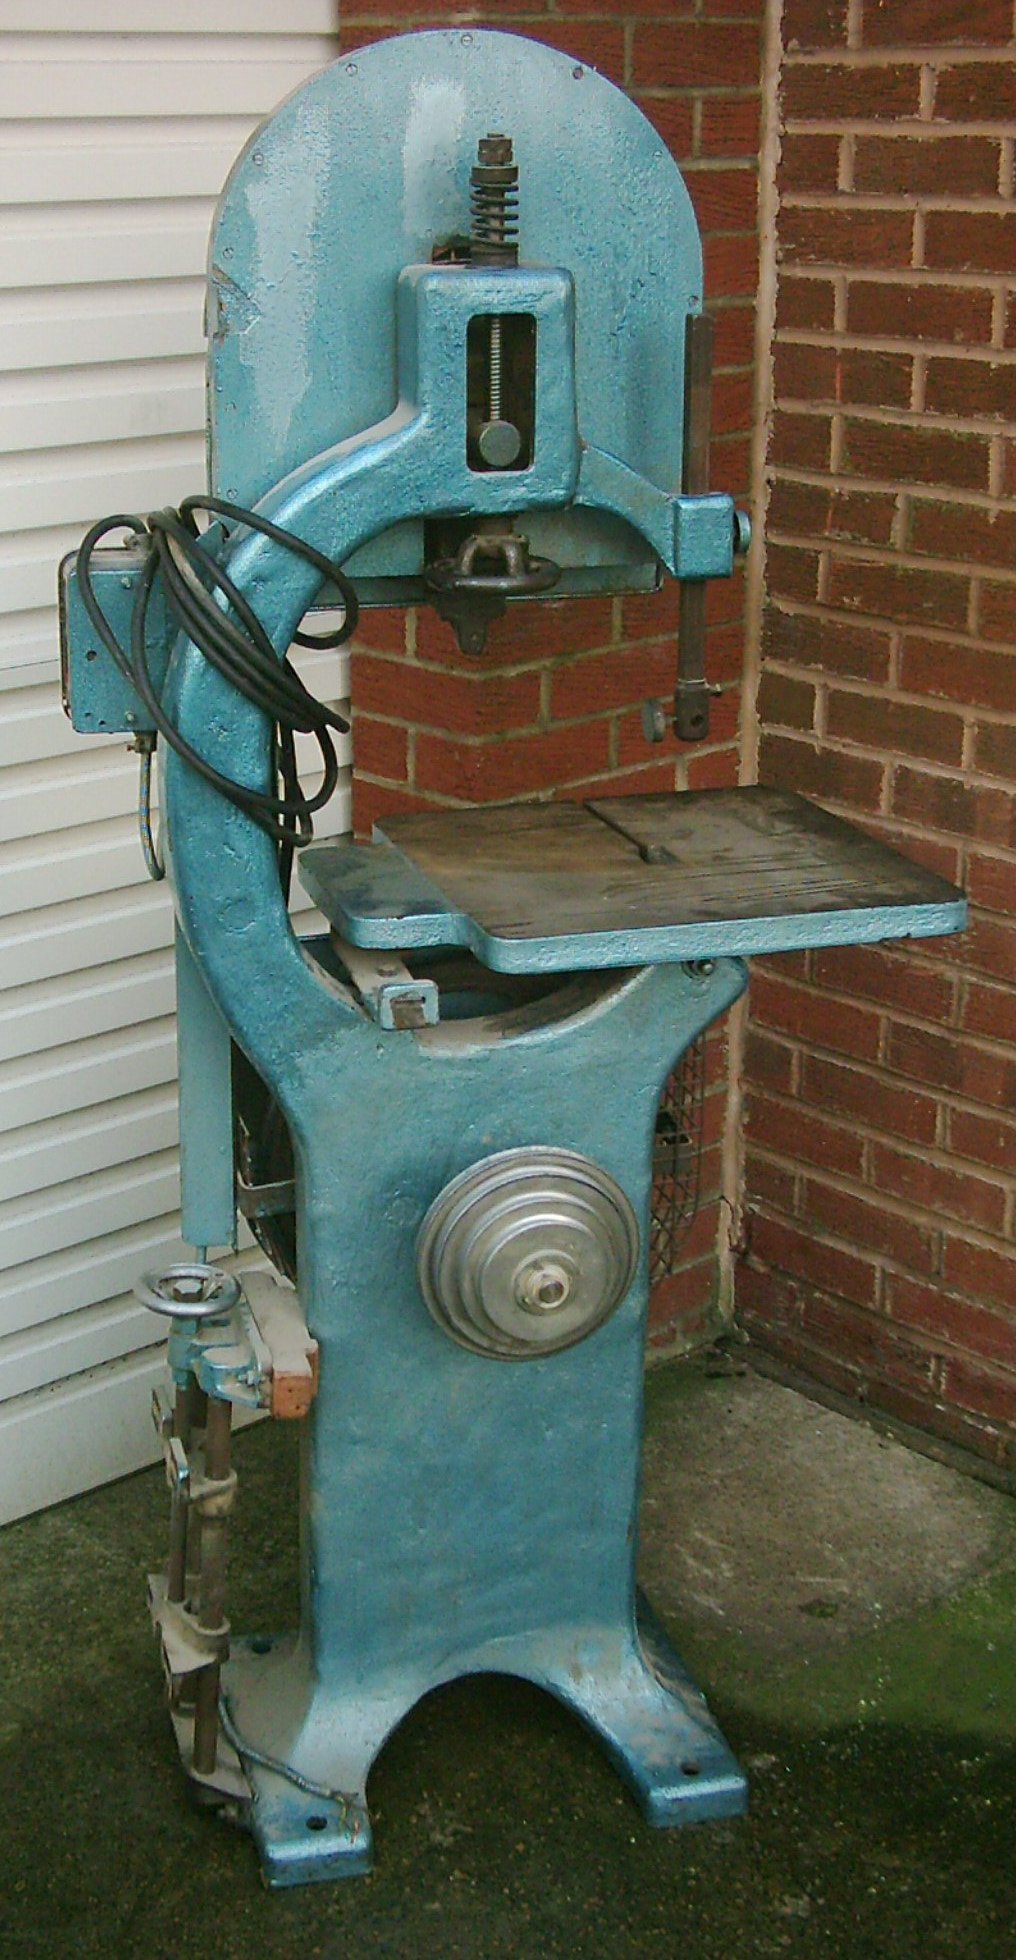
Vertical Bandsaw (maker unknown)
Yet another Ebay find, the bandsaw is an old cast-iron monster that will probably see very little use - but which will also probably prove to be indespensible for certain jobs (like chopping up 12mm alloy plate!). I bought it from a firm in Leicester that makes plastic mouldings; this was their first bandsaw, bought 'used' in 1972 and used in their toolroom till it was squeezed out by successively bigger units! It's not exactly small at 5' 6" high, with a 22" x 38" footprint. I had to lose a workbench just to fit it into the workshop. Nor is it light: although I manhandled it out of the van and into position by myself it's all cast iron - the table alone weighs 25Kg! The saw came fitted with a HUGE 3-phase motor which I reckoned was worth the price I paid, by itself. So it went back on Ebay... and sold for a quid! Oh well... :-D
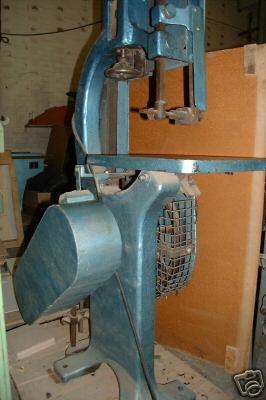
As I expected it uses now non-standard length (108") saw blades but there are a few places that can make them up - I got the most recent ones from justbandsawblades. The drivetrain uses a 4-step pulley to give different blade speeds. The drive shaft runs in BIG bearings that have no play; once I'd cleaned all the sawdust off the machine I used the Stauffer lubricator to add grease to the bearings; also all the slideways for the upper wheel adjustment and the motor belt tension were oiled. There's a chunk out of the rubber coating of the drive wheel but it doesn't seem to affect the blade's running as there's so much of it in contact at any one time (the wheels are 15" diameter). It looks as though the original wire guards have been supplemented over the years, with sheet alloy and plywood covers; probably to keep the sawdust down. No maker's name on the unit although the lubricator was made in Leeds! I found a large 1.5hp single-phase motor that runs the saw OK; I just had to TIG-weld some mounting brackets to make it fit the sliding mounts on the bandsaw (used to tension the drive belt). The pulley set has a 1" bore whereas the motor spindle is 24mm, so I packed it out with some shim steel and left the grub screw slack till the running belt had pulled the pulleys into correct alignment.
Once I'd finally got the motor fitted I turned my attention to the installation of the blade. I realised that the only way the saw was usable in the space I had available was to run it with the blade the 'wrong way' round - the work needs to be fed in from the left of the machine whereas the blade guide assembly is obviously intended to support a blade with the teeth on the other edge! Although I found that without any support I could still cut thick plate, the blade would eventually jump off the wheels, which one day resulted in the blade snapping as it snagged. I made a new blade guide that supports it using three small sealed ball-bearings and now I can shove stuff merrily through without incident - especially Acetal, where the blade goes through even 30mm thick stock as fast as you can push it. Just need to practice my blade-joining technique now...
I did some maths and worked out that from a motor shaft speed of 1430 rpm and with the pulleys giving (approximate) drive ratios of 0.56:1, 0.78:1, 1.27:1 and 1.77:1, the drive wheels will spin at 804,1122, 1818 and 2541 rpm which means, given that the wheels have a 47" circumference, linear speeds of the blade will be around 968, 1346, 2180 and 3050 metres per minute. Whatever it is, the slowest speed fairly rips through thick alloy plate! Having worn out a couple of blades 'dry'-cutting alloy and steel I think I need to look at adding some kind of coolant system; the first blades I bought were a fiver each but now they're more like £15 each, hardly disposable.
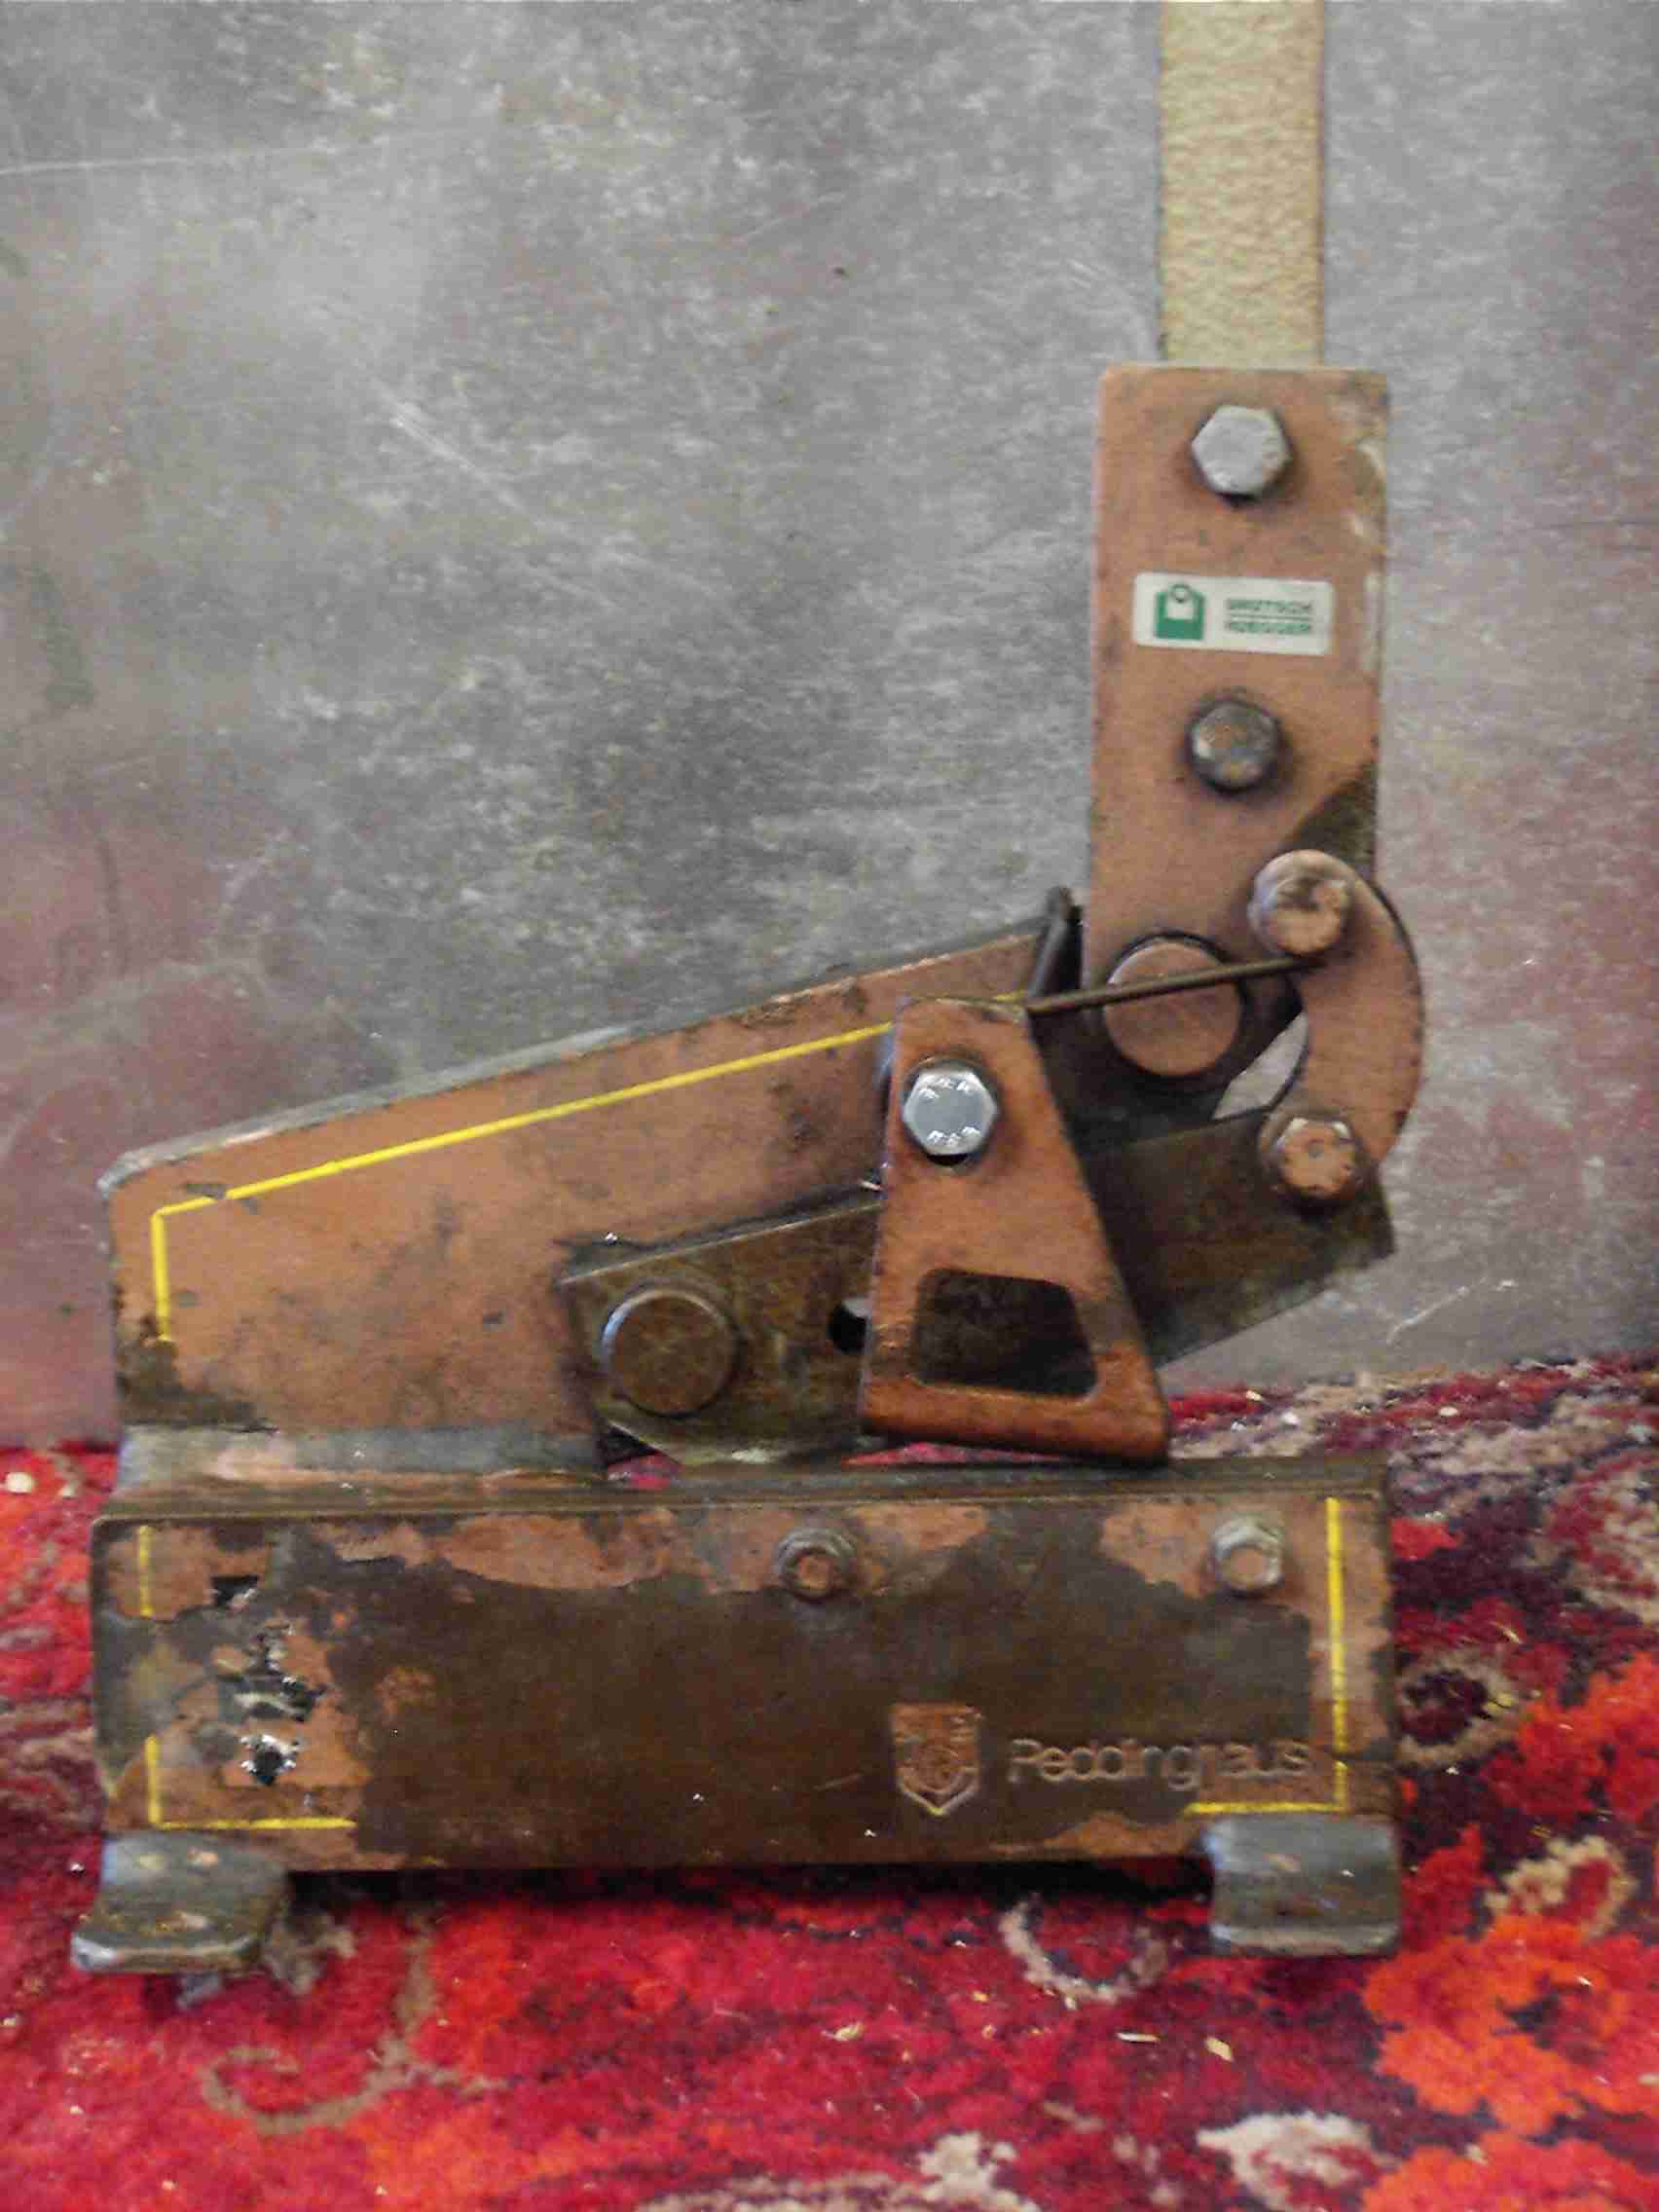
Oh look: another freebie! A customer was having a clearout and this was propped against a skip. You get nothing unless you ask, so I did and here it is. Although it looks a shade rough the blades are undamaged and it works fine... although at the moment I have to resort to clamping the guillotine in the bench vice to be able to get any leverage on it! Good job I built that bench heavy...
Electro-hydraulic scissor table
With 300Kg lift capacity, the table is pictured here bearing a spare RV8 that was later sold:
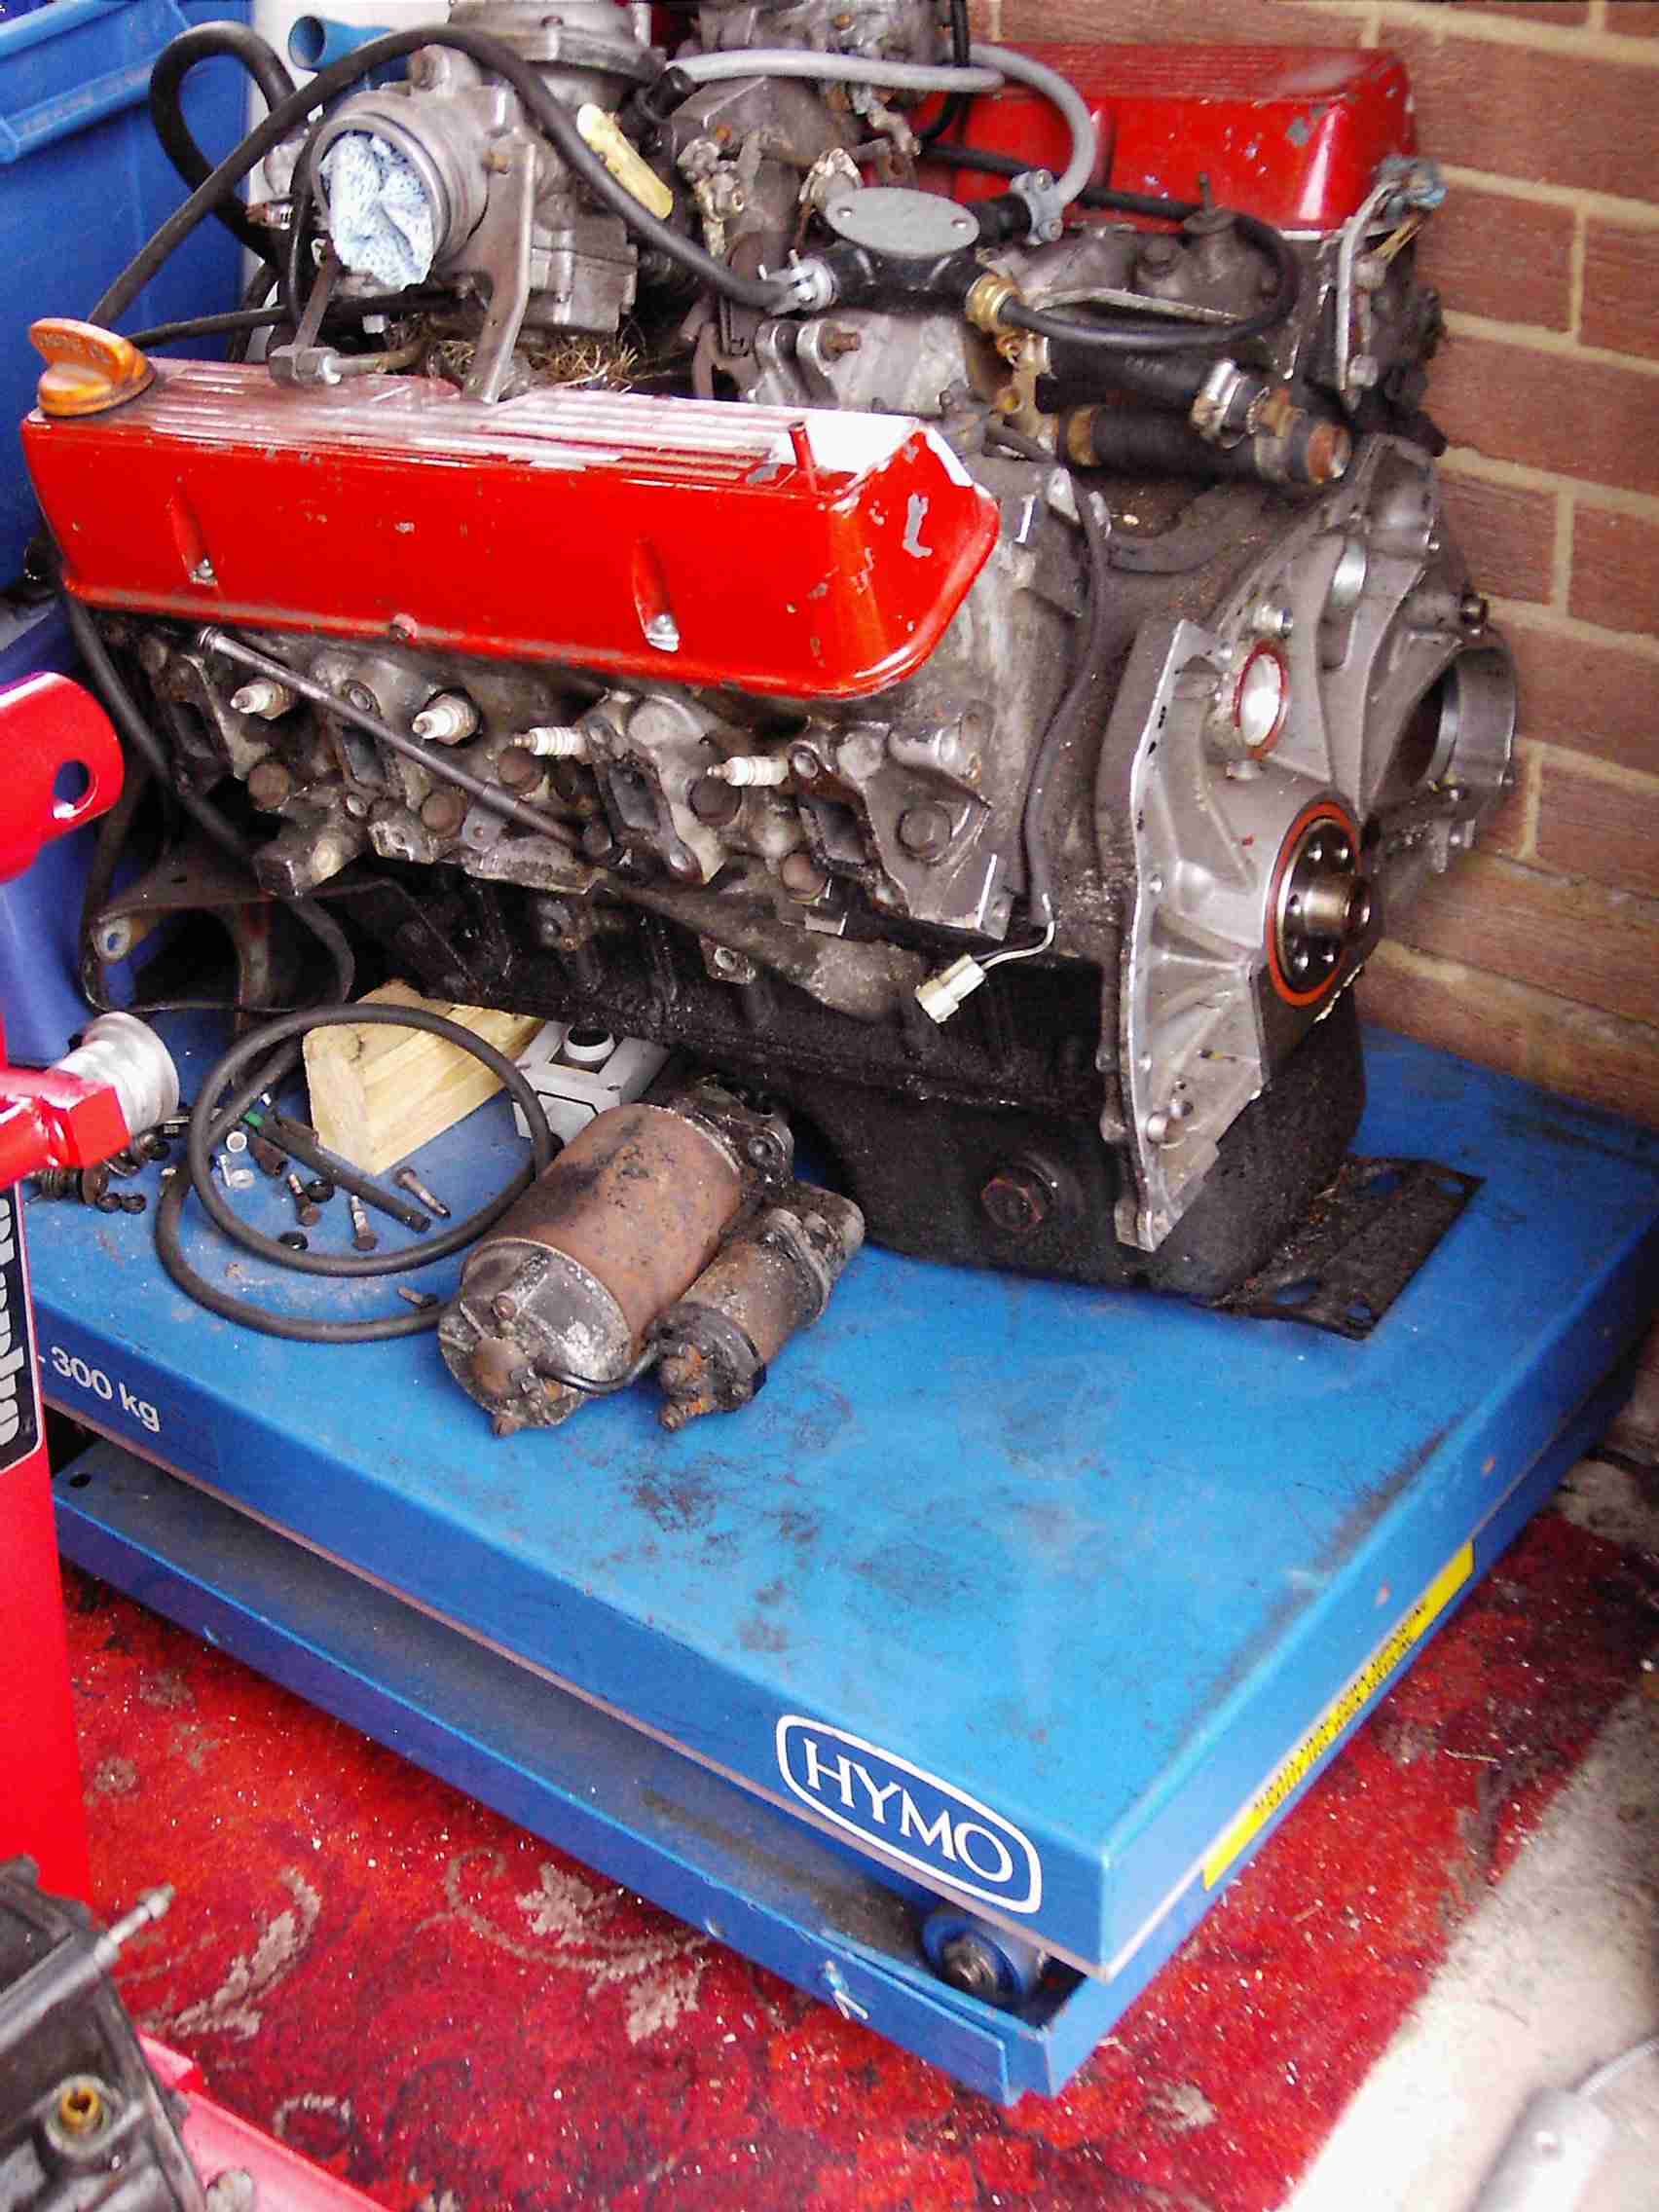
I've acquired another crane, this time a 2-ton long-reach monster. Identical to this one, it's the one I used to lift the Esprit engine in and out; when I returned it to the owner, he said he thought he had no further use for it and I could have it for half what he'd paid only a few months earlier! Well, it would have been rude not to, so I did.
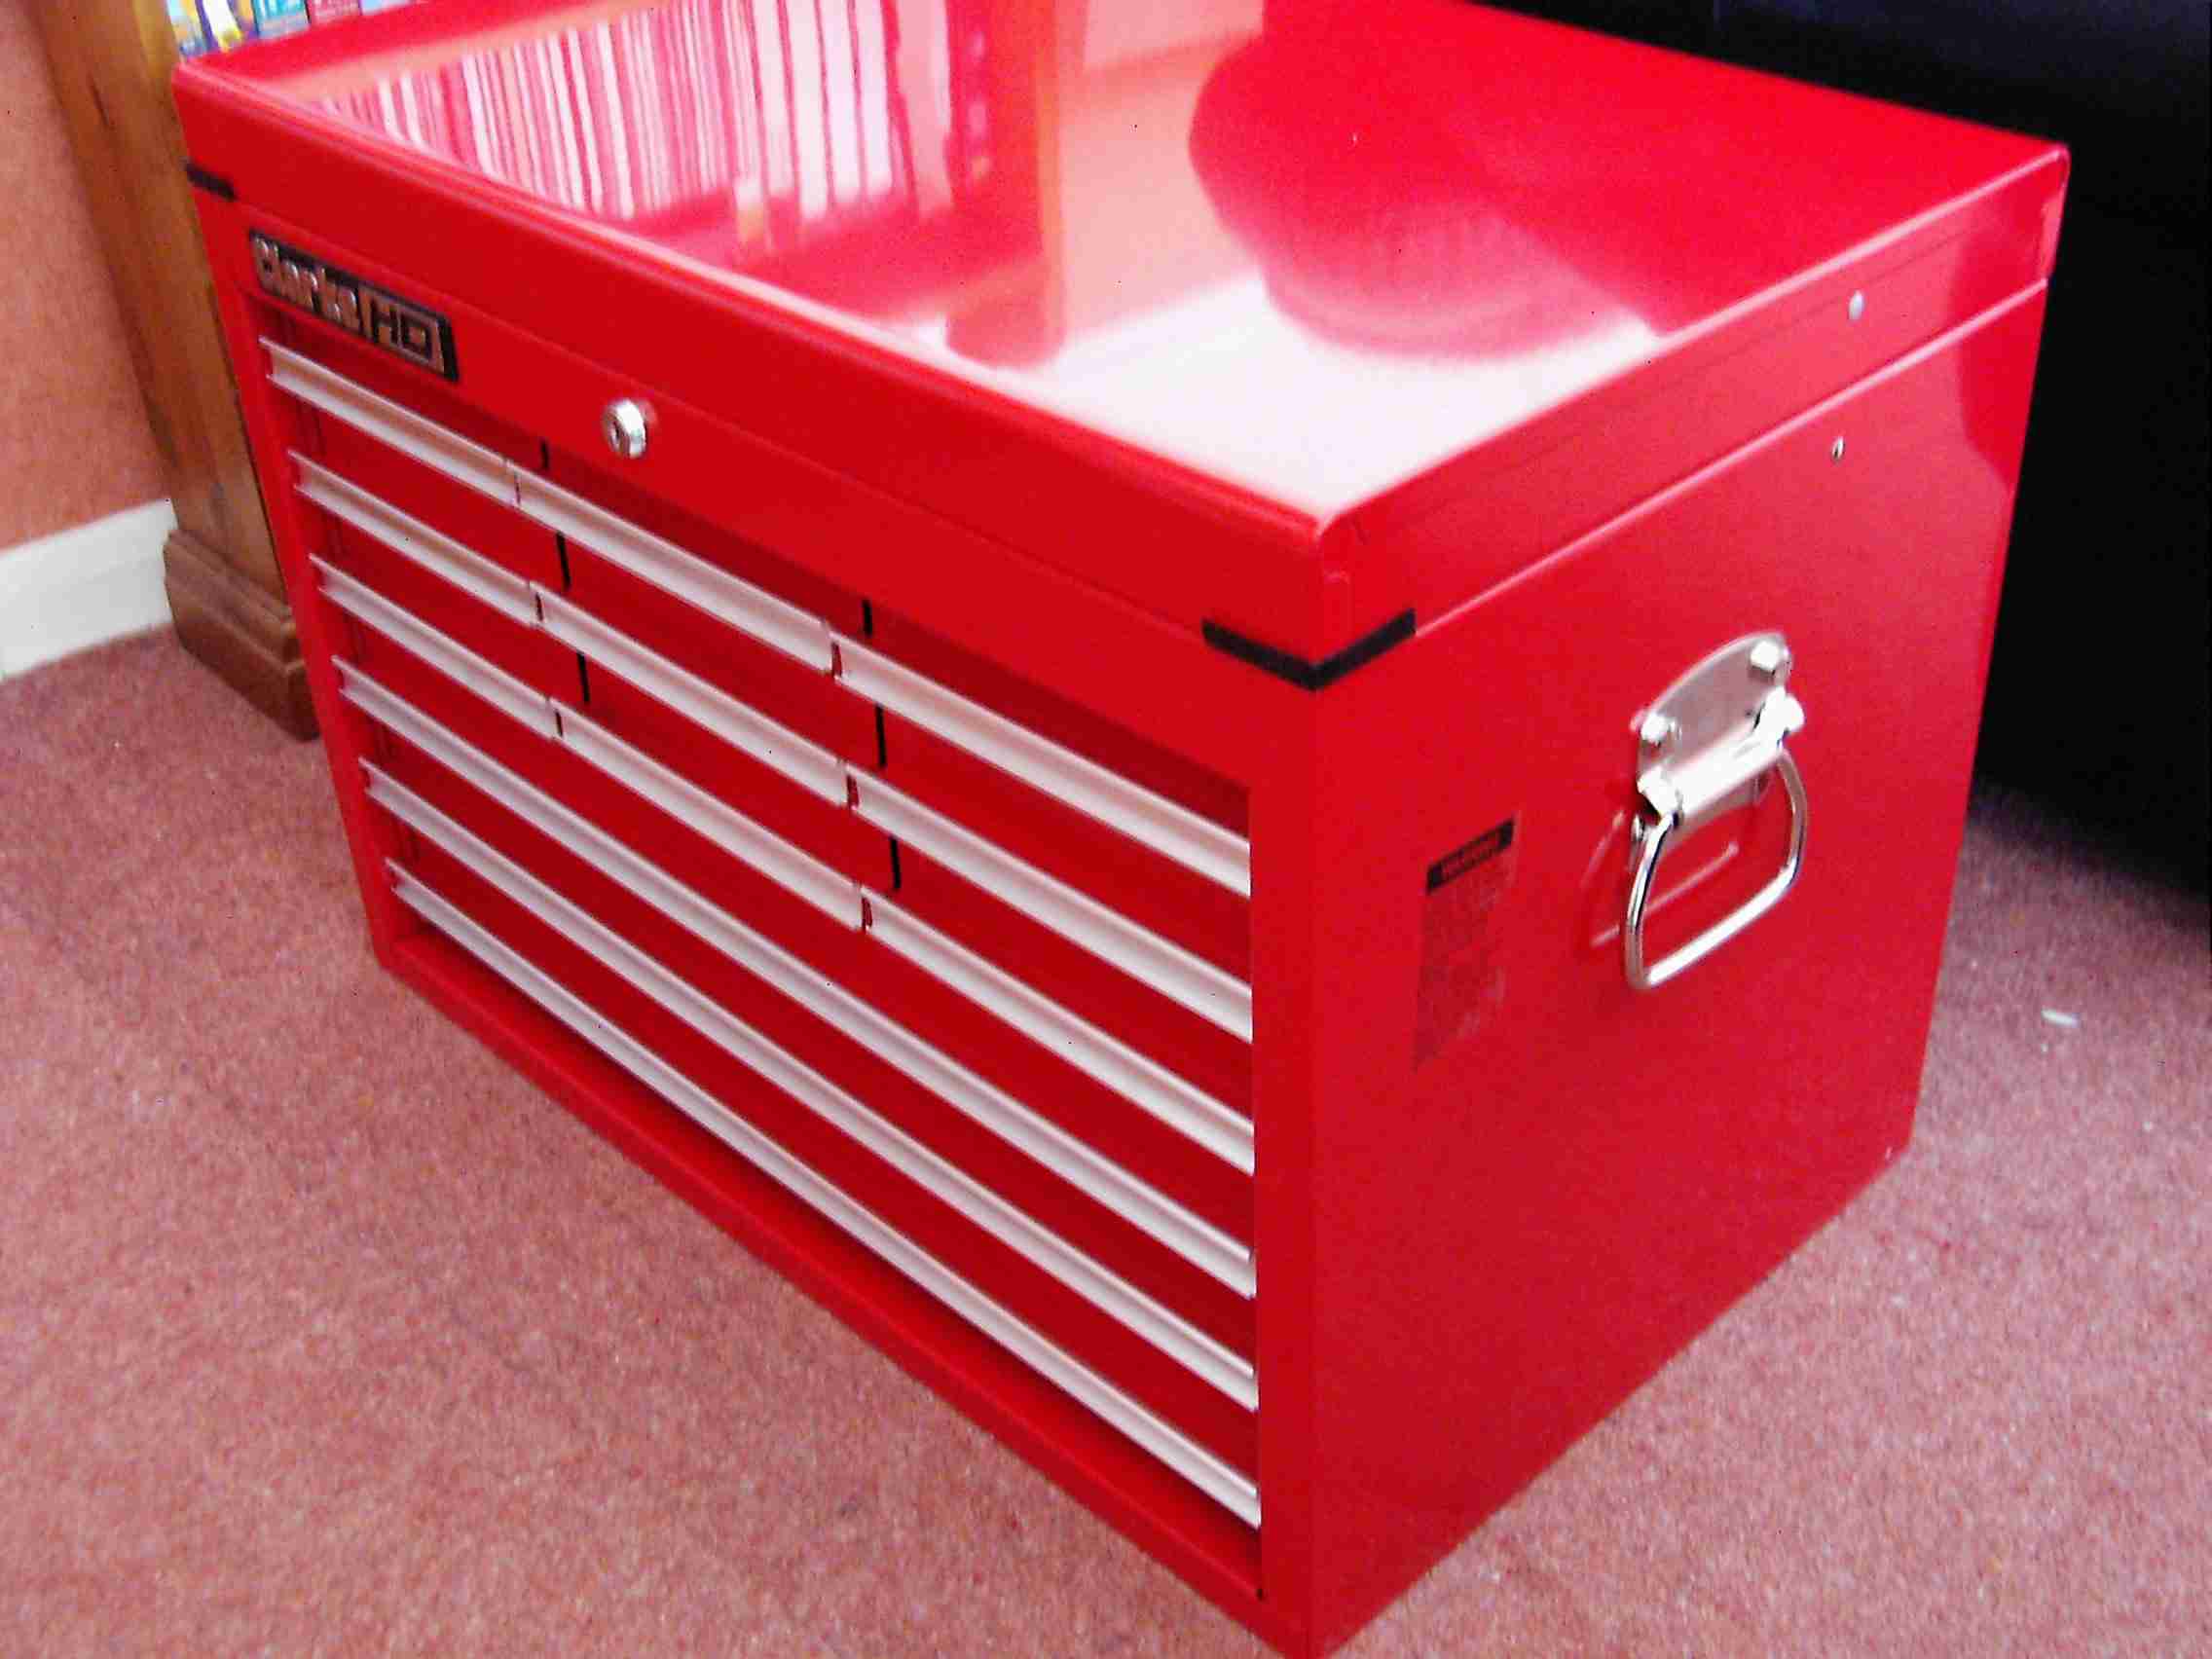
I bought this Clarke (Machine Mart) toolchest from a work colleague: he'd bought it but never even taken it out of the box! At 30% less than than he paid for it I decided I could find room for it ;o)
I suppose this page wouldn't be complete without a 'wish list', so here goes with the sort of kit I'd like to add to my collection:
Sheet metal folder
Surface plate
2-post hydraulic lift
Ah well, we can all dream... :)