I pondered for a while after I sold the Esprit in 2006 (well, OK, about a fortnight...!) and after seeing one getting off the Dun Laoghaire - Holyhead ferry, bought an ST1100 'Pan'. In my biking youth the ST11 was a new bike, way out of my financial reach and anyway not something I particularly fancied back then. Times have changed, of course, and once I'd been reminded of the bike I wondered how much they might go for these days. One thing led to another of course and before I knew where I was, I was in Manchester, counting out the twenties :^D (Interestingly, at time of writing this update, although 16 years have passed since then, ST1100s can still sell for much the same as I paid for that 1998 bike. Inflation's a b%&$£!).
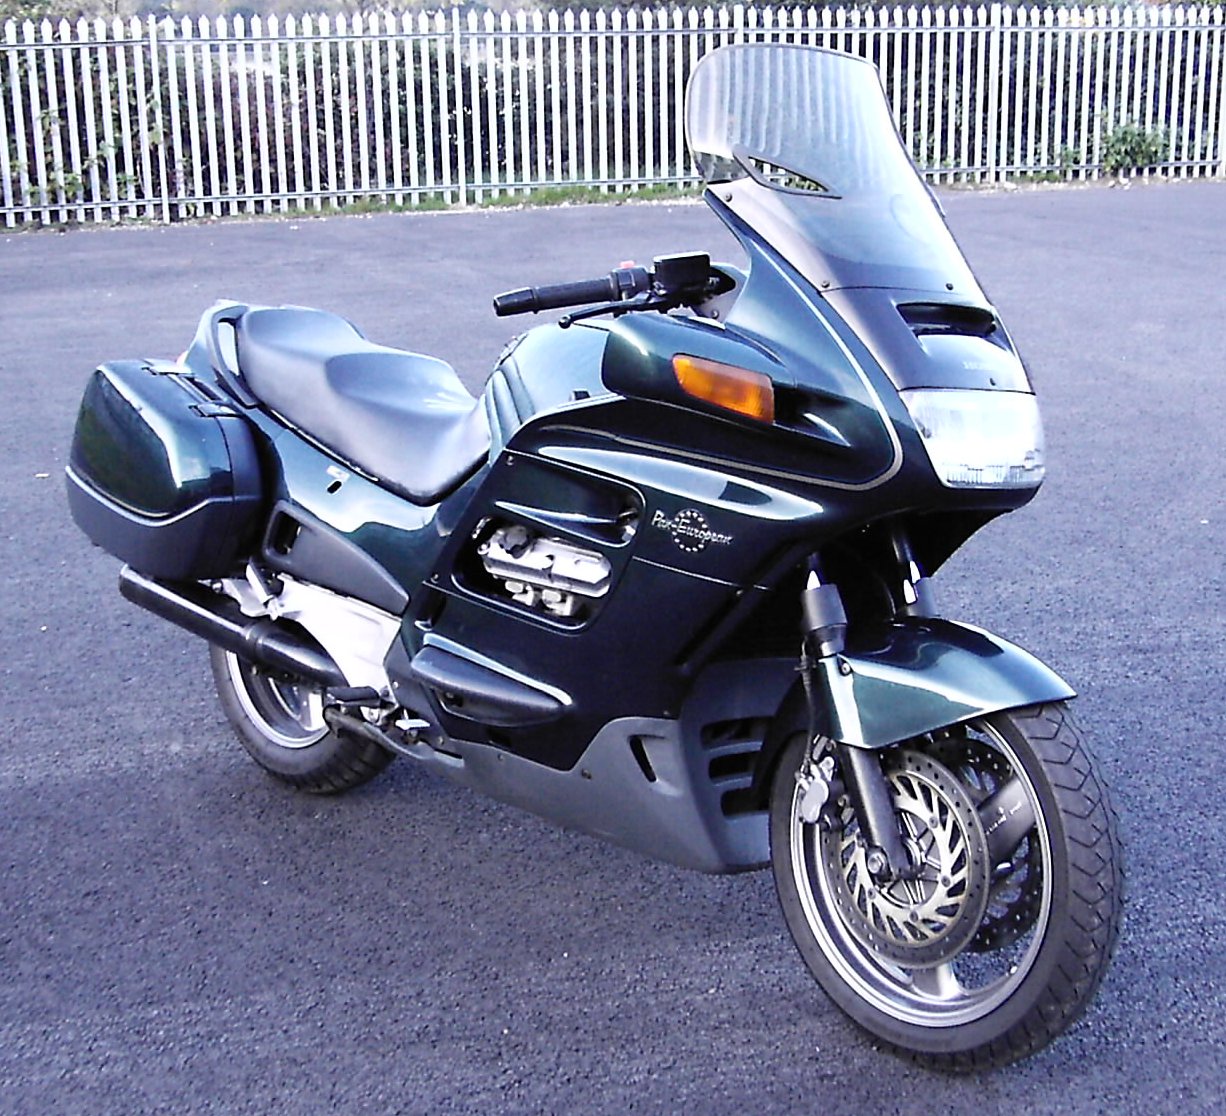
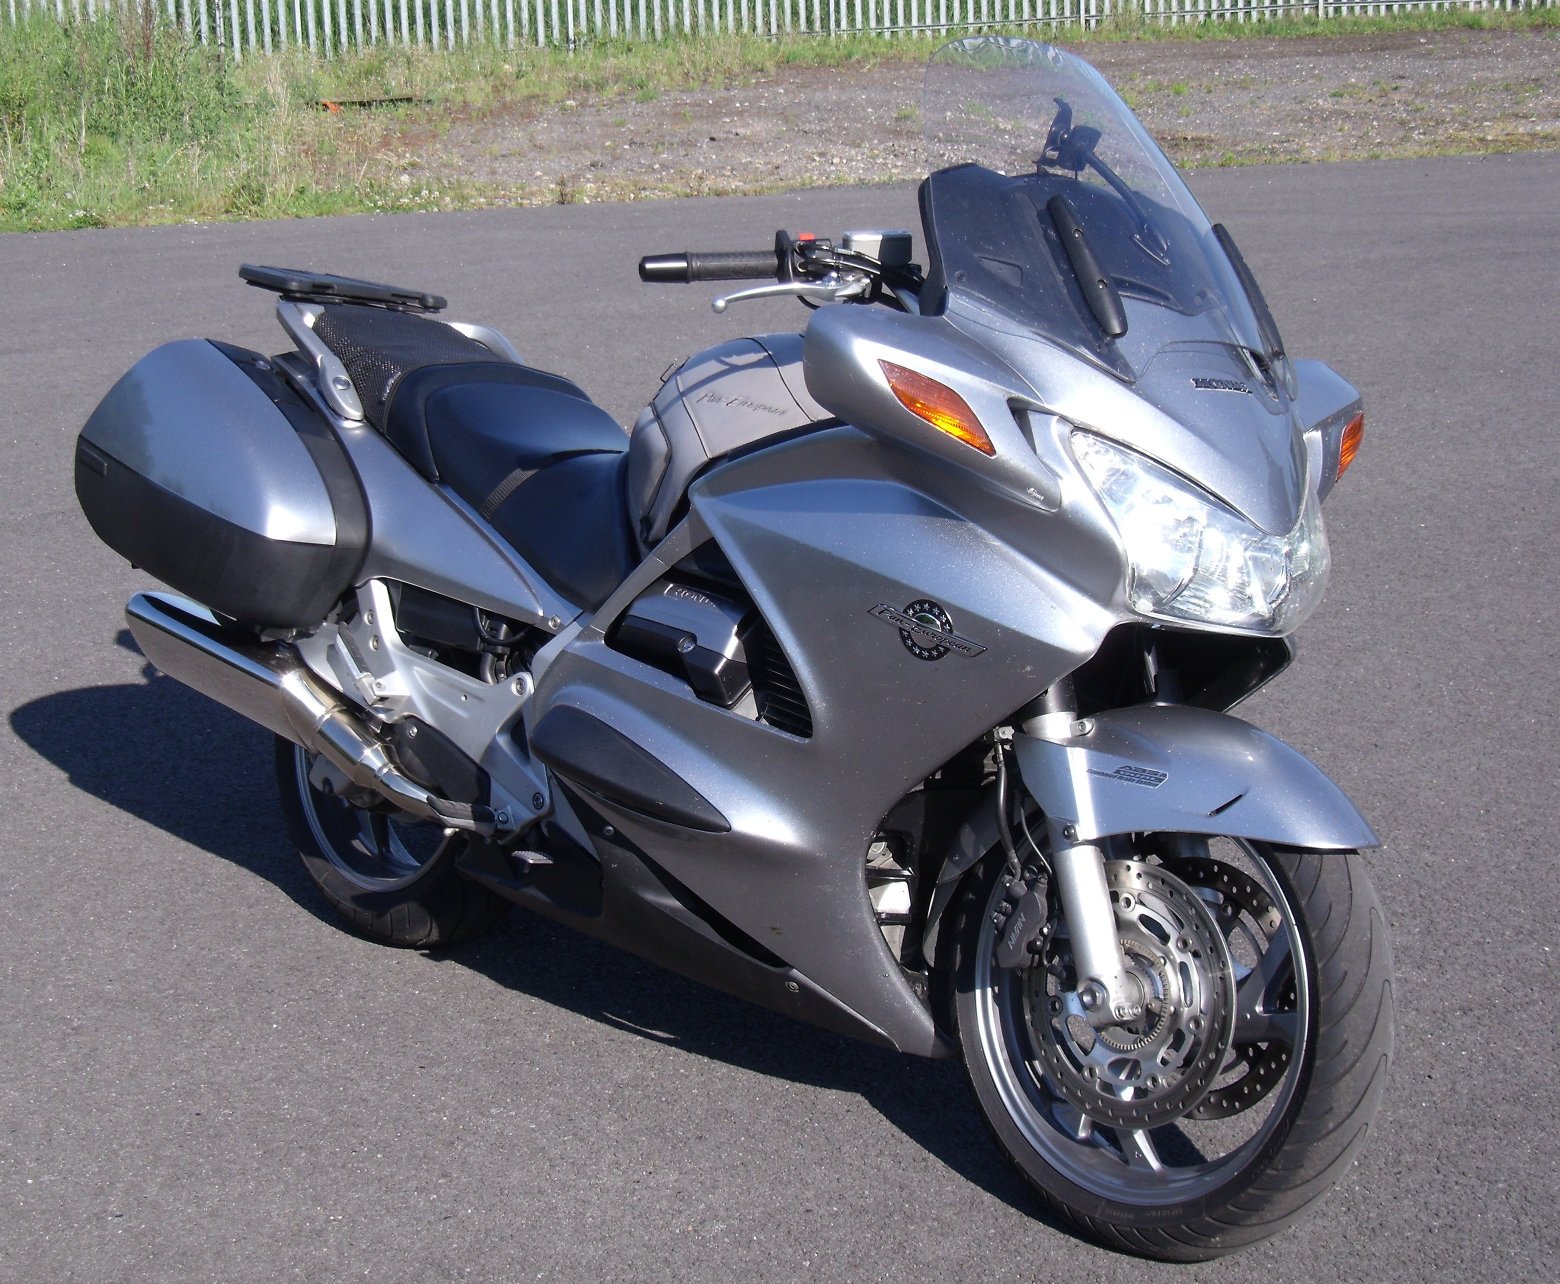
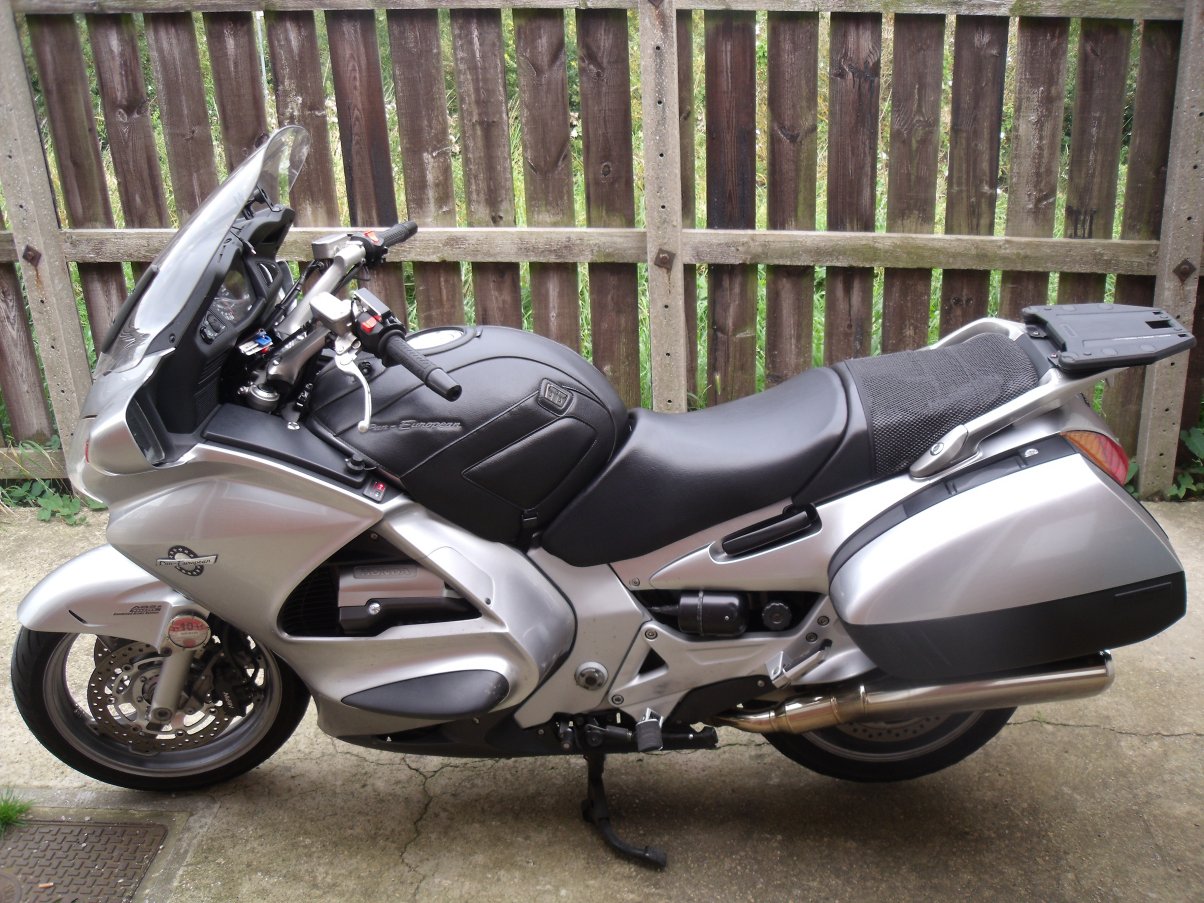
I'd only had the ST11 a few weeks when I was asked by a mate's girlfriend to join her in secret at a local dealers to choose between two used Fireblades: she was buying one for her partner as a surprise 40th/ xmas present! With the bike chosen and her completing the paperwork, I wandered the shop and found myself aboard a brand new ST1300. Needless to say even as I left the shop I was thinking 'Ebay' and within minutes of getting home was surfing for 2-wheeled porn. As it happened early December was a slow time for ST13 sales so I had to resort to Auto Trader's website and it was there that I found an '03 plate 1300 with relatively high miles but at an attainable price. I went to see it (in Preston!), a deal was struck and I collected the bike on 29th December '06. Here it is (registered DF03 NXM if anyone has it now) :
This was a non-ABS machine so also came without the ST13 rider's favourite toy, the power screen. Adjustable screens are common enough nowadays of course (although not usually electric), but a new thing in 2003. I experimented with the limited range of adjustment that the non-powered screen offered and in the end bought the conversion kit which gives full travel. I also added the factory alarm/ immobiliser, Honda heated grips and the Honda topbox which suits the bike better than most aftermarket offerings. A minor dent in the tank was easily hidden by the Bagster cover/ harness pictured, which allows attachment of a tank bag as well for that full-on heavyweight tourer capability! Heavyweight is the word: the ST is a porky 300Kg (nearly 700 lbs) even before you add passengers and fill the panniers. However the 1261cc V4 shaft-drive unit makes it a doddle to ride - as long as the wheels are even slightly turning, it balances well and the weight disappears. I was slightly disconcerted about the linked brake system but have so far failed to provoke a situation where having independant control would have made a difference. In fact one benefit is that if you brake using just the pedal while leaned over, the bike doesn't try to 'stand up', so I often find myself braking much further and much later into a bend than you might think sensible. It also 'dives' a lot less, so less chance of your passenger clashing helmets. Pillions generally like the ST: a big seat, footrests that don't leave your knees in your armpits, huge grab-handles and even a backrest when the topbox is fitted; you can also fit armrests for that wannabe-Goldwing experience :o) The only complaints I have heard: 1) Tall passengers find the footrests a bit high, leading to cramped legs; 2) sitting right up behind the rider is uncomfortable due to the hard edge of the rider's seat - it's adjustable (another novelty way back then) so the pillion gets a separate pad. In fact the rider's seat itself is not as comfortable for long periods as the old ST1100's was - an oft-remarked issue of the '13. The ST1100 set a benchmark which Honda themselves struggled to equal, let alone beat, with the 1300.
With the ST13 resident in the garage, the 102,000-mile '98 ST1100 was listed on Ebay and sold within hours; I got back more than I paid, which is a measure of how well the 1100 is regarded. (EDIT Feb '09: I was recently contacted by a guy in Tyneside who'd just bought the ST11 from the chap I sold it to! He wanted to know if the cam belt had been changed as the bike has now covered 105,000 miles - as far as I'm aware it hadn't been changed before I got it and it was top of my list of jobs until I bought the ST13. If it really was the original belt it speaks volumes for modern engine reliability). At time of writing (April '08) I've replaced the 13's back tyre twice (every 3600 miles!), the front tyre once and fitted a replacement idle speed control assembly after the original seized (the bike lived near the coast in its early life, so there's some deterioration to the finish, hence the lower price... but as a clumsy git I know it's only a matter of time before I wreck the cosmetics anyway so I wasn't prepared to pay extra for a bit more shine!) and given it a service. Several trips of 200+ miles have confirmed that the rider's seat is bloody awful and although I'm tempted to buy a Corbin or Sargent, I'm equally tempted to just buy a spare front seat pad and rework the foam myself. How hard can it be?! Fuel economy seems to work out at an average 8.8 miles per litre (near enough 40mpg) across all my riding - tanking along can see it down to low 30's per gallon though!
Update May '08:
I was determined not to get sucked in to the usual tourer-rider's trap of loading up the bike with as many toys as possible - a la GoldThing :oD - but even so I've succumbed to a couple of things. First up is an Autocom intercom. Why? I'd like to have some music on the bike but don't want to sacrifice the left-hand 'glovebox' to install a full-size car stereo. I'm not bothered about listening to the radio and CDs would be too much chew so I think all I need is an MP3 player. Fair enough, I could tuck my £9.99 Tesco special down my shirt but that has a few drawbacks of its own. The Autocom lets you play music through the headset, then if your passenger speaks or the phone rings (!) or even if the satnav says 'Turn left' the music volume reduces or mutes to let you hear the priority traffic. And it works!
So, MP3 players. Working on the principle that the average MP3 display is too small and the controls too fiddly for bike use, I reckon that what's needed is a bike-specific unit. It should run from 12v (obviously) and have a simple membrane keypad that can be stuck to a suitable area of fairing (thus similar in appearance to the Honda integrated heated grips controller). A simple plug and socket arrangement would allow it to be unplugged from its concealed location on the bike and USBed into the home PC for file management. Controls would merely need to be Start/Stop, Next/ Previous track and volume up/down... essentially what the budget-end units have already, but with a remote keypad... simple! I've already ripped my Tesco special apart to check its suitability for adaptation and, well, it just isn't. However a couple of other units have presented themselves as likely victims so watch this space! Meanwhile the Autocom (it's a 200 Active-Duo, now a deleted model ) does pretty well as claimed and pillions can be heard screaming/ swearing/ backseat riding as applicable ;o)
The other addition to the bike is a pair of Bike-Quip's side covers. The ST1300 stylists clearly never thought that a tourer rider MIGHT just want to ride without the panniers fitted, so they didn't bother drawing anything at that part of the CAD screen, consequently the bike looks utterly silly with the panniers removed. Bike-Quip's solution was to design some 'filler' covers that hide the daft gaps. Made from good old GRP the covers are rather weighty for what they are but then I guess the bike is lighter by the weight of the panniers plus contents and I suppose chunky is good for longevity! The covers fit by using the same mountings as the panniers would: a pair of steel brackets glassed-in to each cover locates the cover securely to the footrest hanger and pannier latch and once locked they can't move. Rubber edging helps to protect paintwork and the colour-match is as good as you could hope for. Needless to say these were an Ebay purchase: as luck would have it they are the right colour for my bike and even though the bidding went over £100 they still cost me £70 less than they would have from the manufacturers. Blingin'. :o)
Update July '08
Well, there goes another back tyre...! In preparation for an overseas jaunt I decided it was time to try a different tyre. After some reading around I decided to go for the Michelin Pilot Road 2. Rather than mix & match with the still-useable BT-020 on the front I've had a matching pair of the Michelins fitted and will report back in due course! My increased confidence in the bikes's handling is reflected by the 'chicken strips' on the outgoing tyres being only a couple of mm or so wide: you really can throw these bikes around more than their appearance would suggest (and I am by no means a 'sporty' rider!) - although the footrests touch down very easily.
In order to extract every last bit of carrying capacity on the ST I've added a carrier rack to the topbox lid: it's just a small frame onto which I can lash a bag of 'stuff'... perhaps waterproofs, spare jumper or whatever else I need access to in a hurry without having to unpack half the bike.
My riding style and the linked brakes seem to favour using the pedal more than the lever with the result that the ST is eating rear pads rather faster then it is the fronts. Have just ordered another pair for the continental cruise just to be on the safe side. With the rear wheel removed for the new tyre fitment I noticed that the final drive coupling bearings are rough; will have to see if I can source some in time to swap over before the trip.
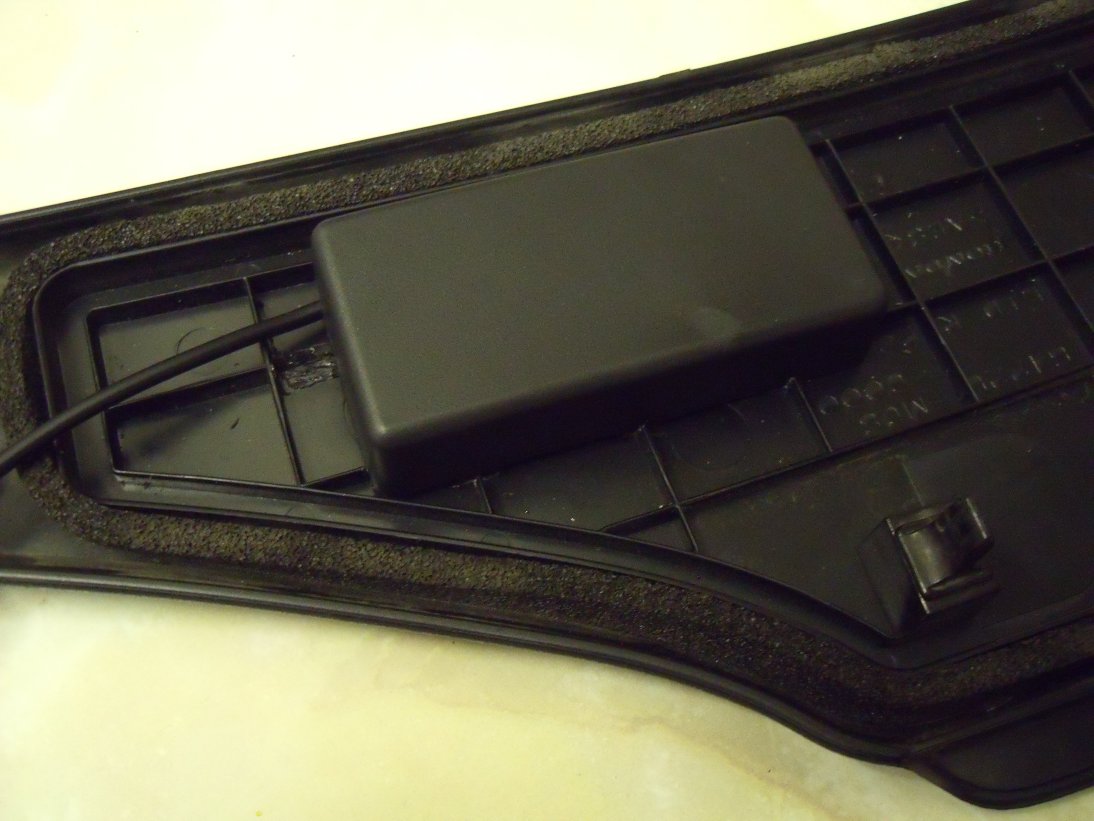
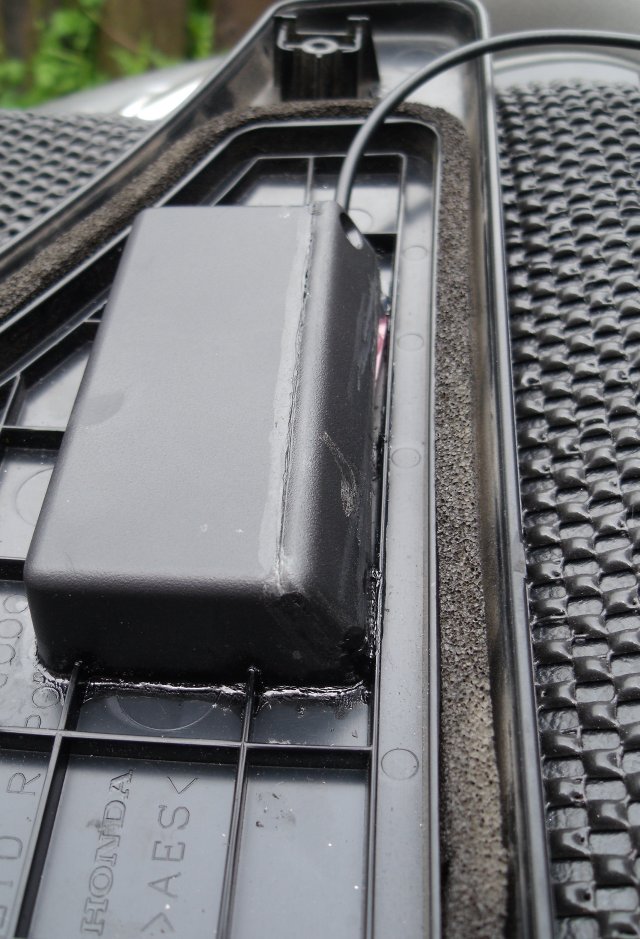
I've made progress with the on-bike audio: the Creative Zen Micro is now a permanent fixture with its remote control hidden away in one of the fairing pockets. The Zen gets its power from a car lighter-socket adapter that I chopped up and housed in a small ABS box. It is hard-wired to the bike and fed when the ignition's on. I've found a company that could make me a membrane keypad but they prefer minimum orders of 100 and even if only a tenner each that's an expensive project! I'll keep looking...
Update 27 July '08
Right, a couple of thousand miles later, and I'm happy to praise Michelin to the skies! The Pilot Road 2's are a huge improvement over the Bridgestones. Thrashing along French N- and D- roads I had both pegs down on every roundabout. Wet grip and feel is much improved and even after hundreds of motorway miles there's no obvious squaring-off of the tread. The seat, however, was every bit as tortuous as I'd expected it to be, to the extent that I was sitting on rolled-up jumpers and a block of foam just to try and make my arse go as far as the tank range could take me. One day saw 9.5 hours on the move, so maybe I'm being unduly harsh. I met another ST13 owner on the Eurotunnel train and his bike had a Corbin seat which I tried, but as I was in so much pain it may as well have been a plank of wood.
On the plus side the bike fuel computer told me that the average economy for the trip (2253 miles) was 10.5 miles per litre, or about 47.5mpg. Cruising at 130kph on the French motorways was returning 11.3mpl (51.3mpg); it must have been the laps of that private test track that brought it down ;O) Pottering along those looooong straight roads that the French love (the ones with bloody annoying 56mph limits) was returning low 60's.
I did change the noisy bearings that I mentioned earlier: cost all of thirteen quid and took about 10 minutes while the wheel was out for the new tyre. One of the bearings was missing one of it's seals, the other had neither (!) and although the balls were all present, one of the cages was nowhere to be seen...
Update 09 January '09
Right, what's new? Well, as of a week ago I've had the ST two years! The Pilot Road 2's are still going strong; the bike has just clocked 49000 miles and the rear tyre has equalled the mileage of the BT-021 but remains largely in shape and looks good for at least a few hundred miles yet, if not another thousand. The front tyre still has a long way to go. The bike itself isn't quite as presentable as it used to be: lots of oxidised fasteners, brake banjos etc. together with scruffy fork legs and bubbly paint on the wheels are all combining to make the old girl look a bit shabby.
Update 16 November '09
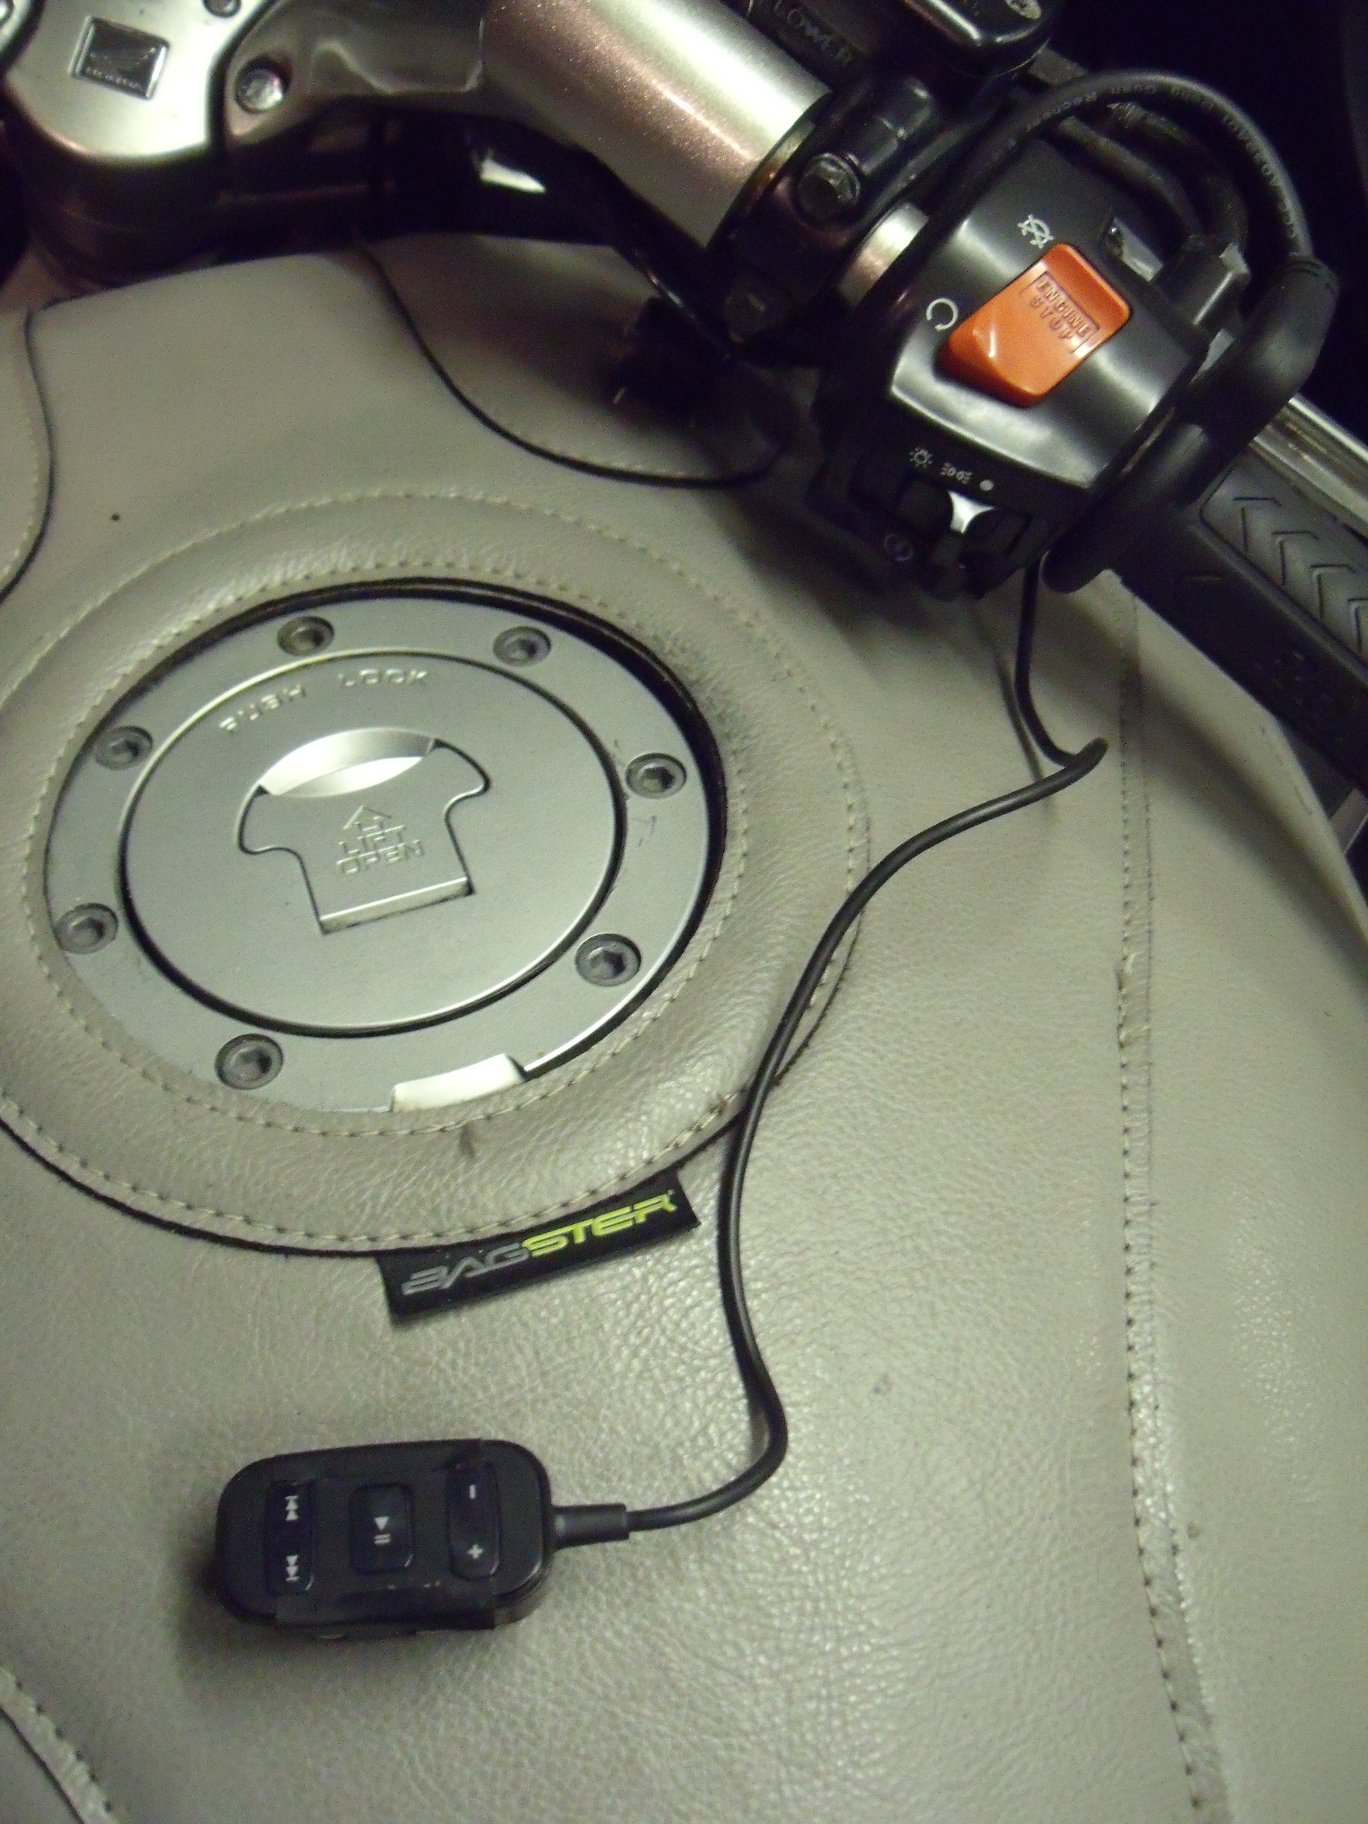
Things are a bit so-so with the MP3 player; the Zen Micro seems to be a bit fussy about vibration, the first I tried having trashed a hard drive for no apparent reason. The next had a random habit of ignoring the settings and turning itself off... not battery related as the thing has a permanent DC supply. The third one works fine, so far. Luckily they're cheap enough on Ebay :D Here's the wired remote control hanging out of the glovebox (tape is holding front panel on until I find some glue!) :
The ludicrously expensive Honda heated grips failed. Fortunately I didn't pay list price (£150!) for them but in essence they lasted one winter. The left one broke a wire just where it leaves the rubber moulding. I was able to cut the rubber back and effect a repair, but it was only a matter of weeks before the right one failed. Expecting to find the same issue I slit the rubber back only to discover that the heating element had broken somewhere inside the grip and couldn't be fixed. David Silver Spares ask about £40 for one replacement grip. I thought I could find an alternative ;o)
Oxford Products have been selling heated grips for a while: my ST1100 had a set fitted. Their latest version eschews the older dial-type controller in favour of a 'push-button' unit remarkably similar in design to the integral Honda one, except that the Oxford unit is intended to bolt to the clutch lever bracket for a universal fit. Trawling eBay one day (yes I know, you wouldn't think that of me, would you) I happened upon an identical system to the new Oxford equipment, but badged 'Roxter'. The best part? They're about half the price of the Oxford set. I Paypal'ed my £33 and the heated grips duly arrived. I was pleasantly surprised. From the sturdy packaging to the instruction manual that reads as though it was written in Bedford rather than Beijing to the most important bit: the components themselves, there's a reassuring air of crispness usually lacking in anything from the People's Republic of Toytown. Made in Huang Chung they may be but at least someone who's worked under ISO9001 has been put in charge.
The Roxter grips use a different type of 2-pin connector to the Honda system. The Honda ones are weedy but stand a chance of remaining waterproof: the Roxter ones are chunky but not sealed. I predict oxidisation and premature failure. So I chopped the plugs off and used the old Honda ones instead :D Fitting the grips was no more difficult than were the Honda ones; one difference is that the Honda grips had ribbing on the inside... not for extra pleasure, I'm sure, more likely something to do with giving the adhesive a good key. The Roxter ones rely on their smooth bore being a tight fit. Ooer, missus.
Once fitted it was time to try the system. I'd already done a bench lash-up to make sure the grips worked OK but that was indoors before the weather got nippy. I substituted 'nice warm kitchen' with 'freezing fog on the A19' and... they were crap. I could just detect a faint glow of warmth with bare hands but absolutely nothing got through my gloves. Which seemed odd, because not only did they seem OK on bench-test but I'd read of other people using them and finding they were toasty. I measured the current drain: on full power the grips were taking 0.75A. At a nominal 12v that's about 9W... and that's for both grips combined because the Honda controller feeds them in series! The controller was stepping through the settings OK so I presumed it was working correctly (I know, I know...). I then measured the resistance of the Roxter heating elements (8 Ohms) versus the Honda ones (2 Ohms). Ahhhhhh. I think I know what's happening. I bet the Roxter controller feeds the grips in parallel: 8 Ohms across 8 Ohms = 4 Ohms. 12v into 4 Ohms = 3A, or about 18W per grip. Based on the Honda system being two grips of 2 Ohms each in series you'd have 12v into 4 Ohms... ie virtually the same heat output. Of course my installation was running 8 Ohms in series with 8 Ohms, giving 12v into 16 Ohms which equates, unsurprisingly, to 0.75A...
I duly rewired the loom to put the grips in parallel and Robert's your mother's sibling: it worked! Toasty hands again. It strikes me that feeding the grips in series is a pants idea: if one grip fails (as mine did) then you lose the other as well. At least wiring in parallel would give you one warm hand! Anyway, I now have a spare Roxter heat controller. Hmmm. I wonder how hard it would be to make a heated seat...?
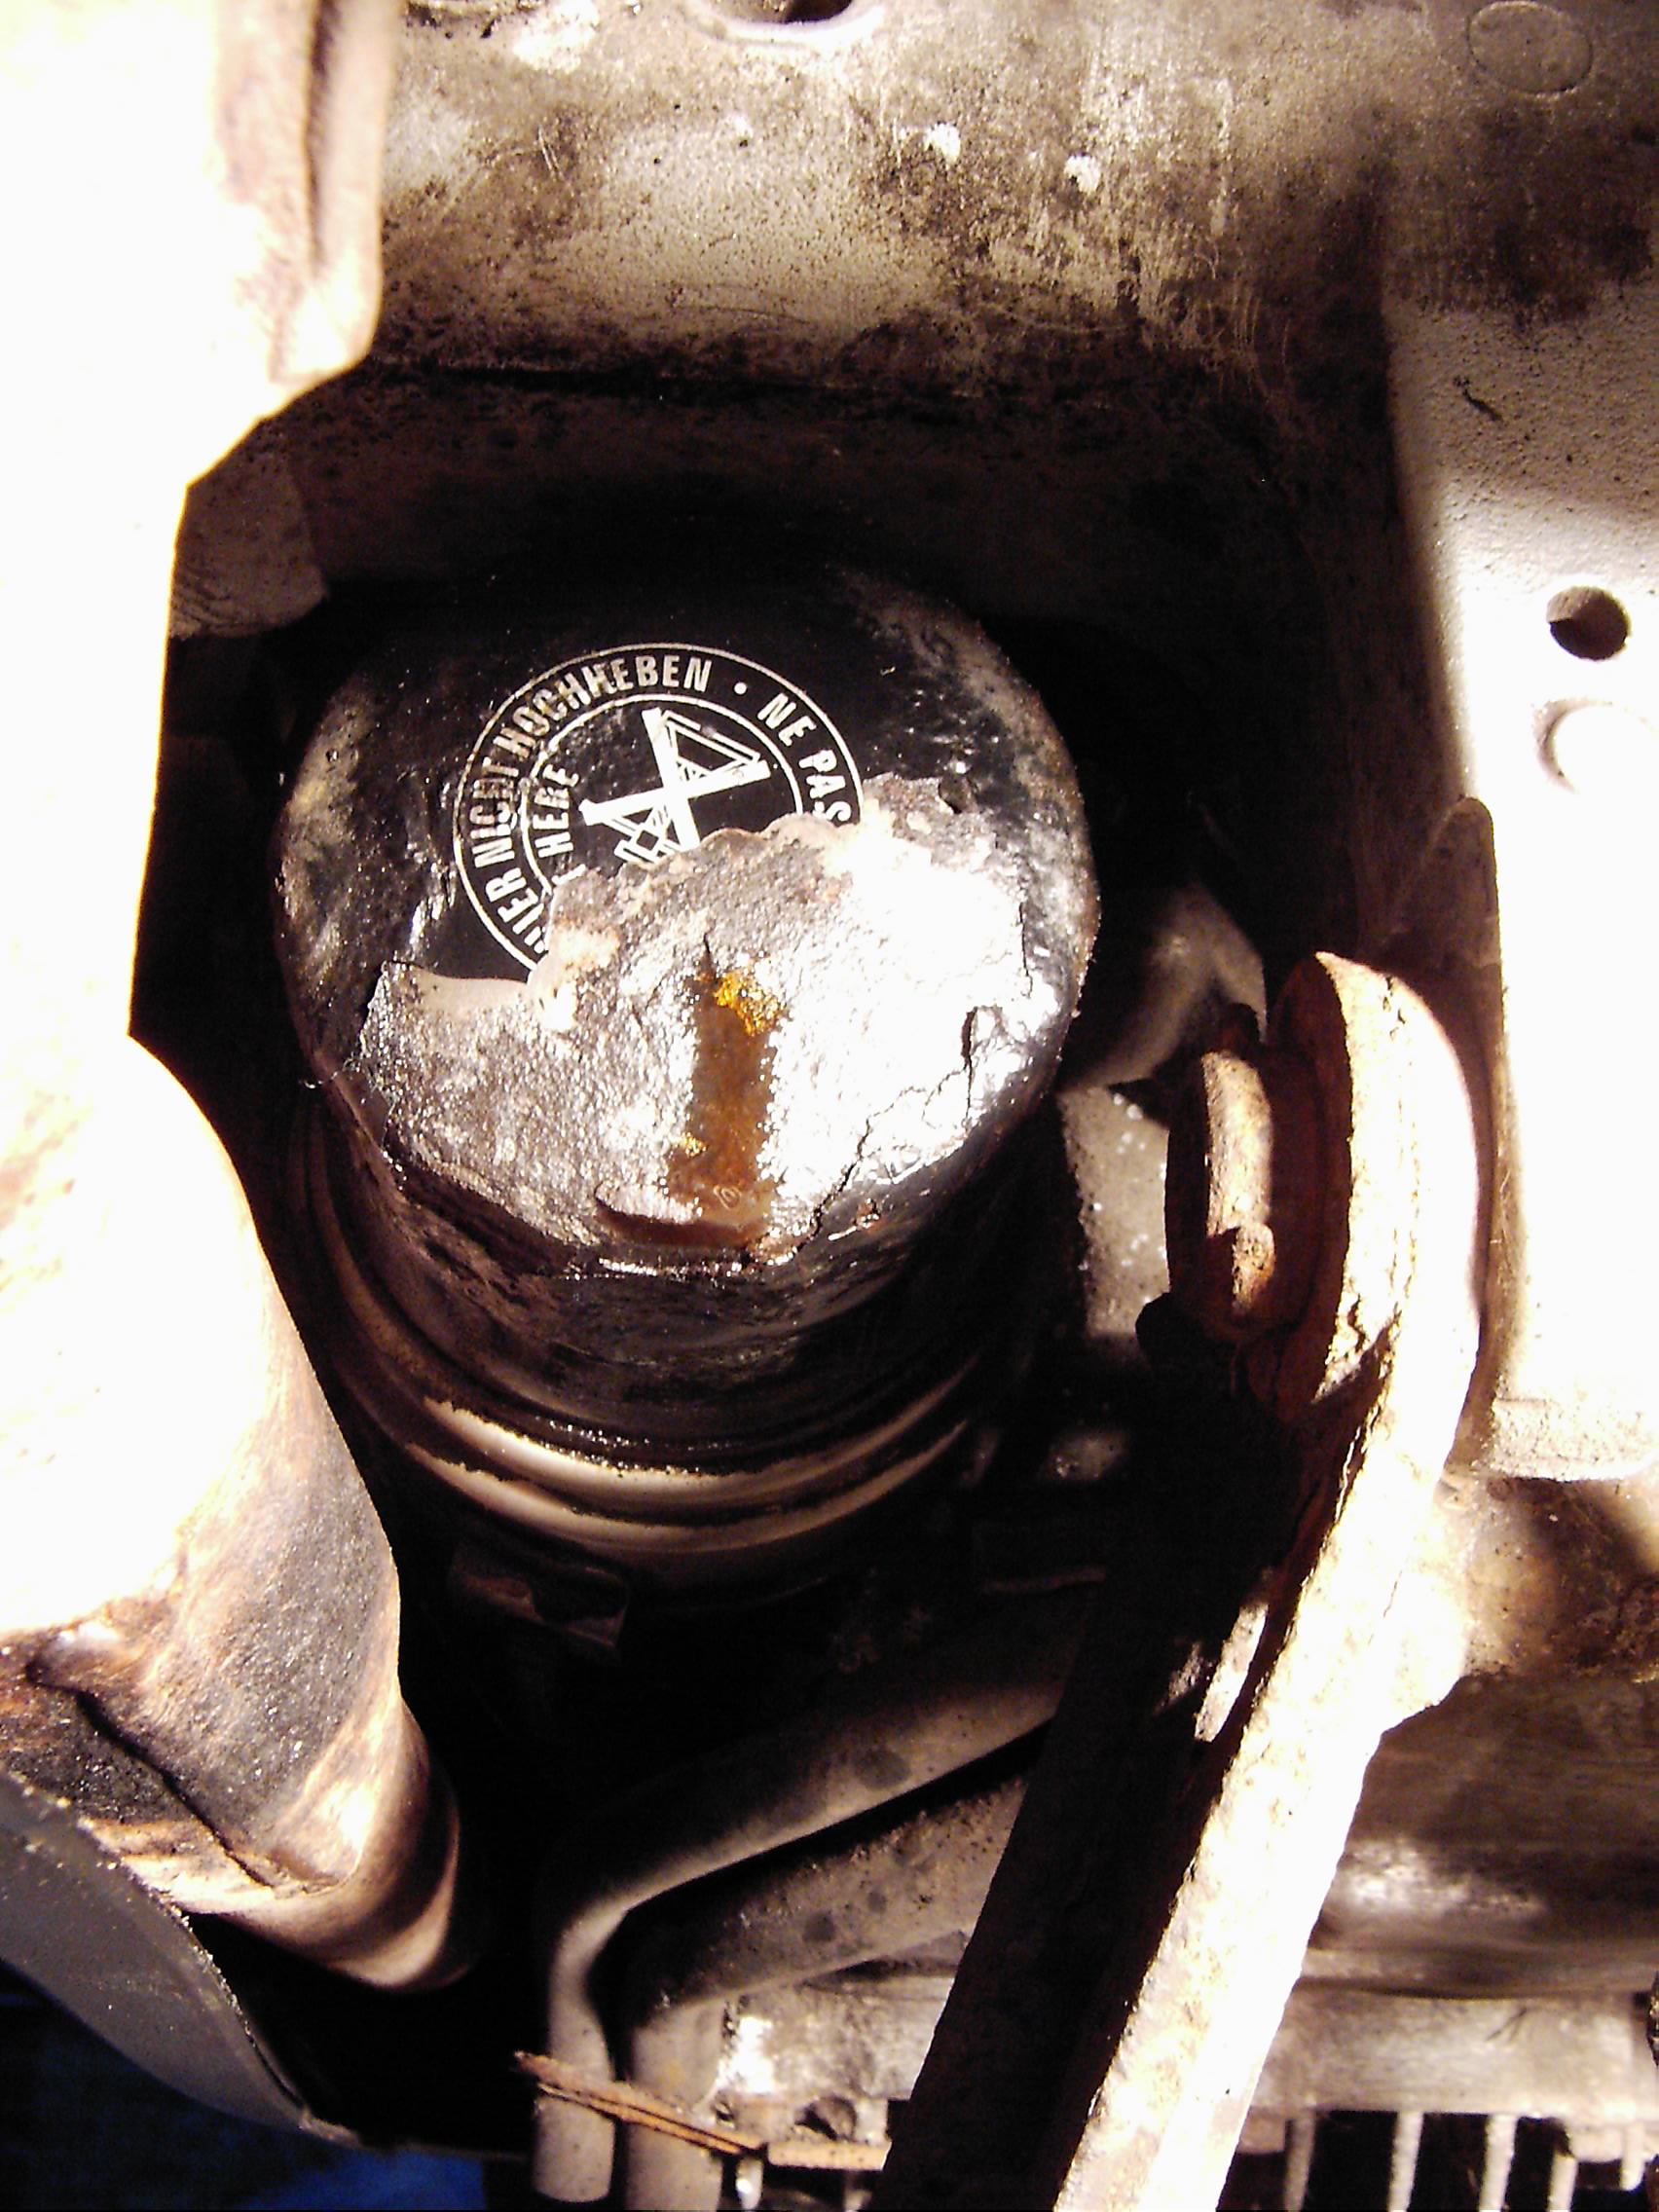
The other issue of note concerned the oil filter. I'd returned in the early hours from a visit to a mate and when I went back out to put the bike away I spotted, in the glare of the security light, a small pool of oil under the bike. A quick glance showed it to be coming from somewhere around the oil filter; a wipe with a rag was followed by a scrub with a wire brush to reveal a pinhole in the end of the oil filter that was allowing oil to escape... all over the exhaust, swingarm, stands and worst of all the back tyre! A swift oil and filter change followed (not, I hasten to add, at 2AM!) and normal service was resumed. The filter was well within its service life and was a genuine Honda item. I'll have to keep an eye on that, I think... maybe a rubber flap or something to keep the road crud away. Good job I spotted the leak or an unexpected slide into the scenery could have been on the cards, to say nothing of a seized engine!
Quick wipe with a rag...filter looks a bit rusty:
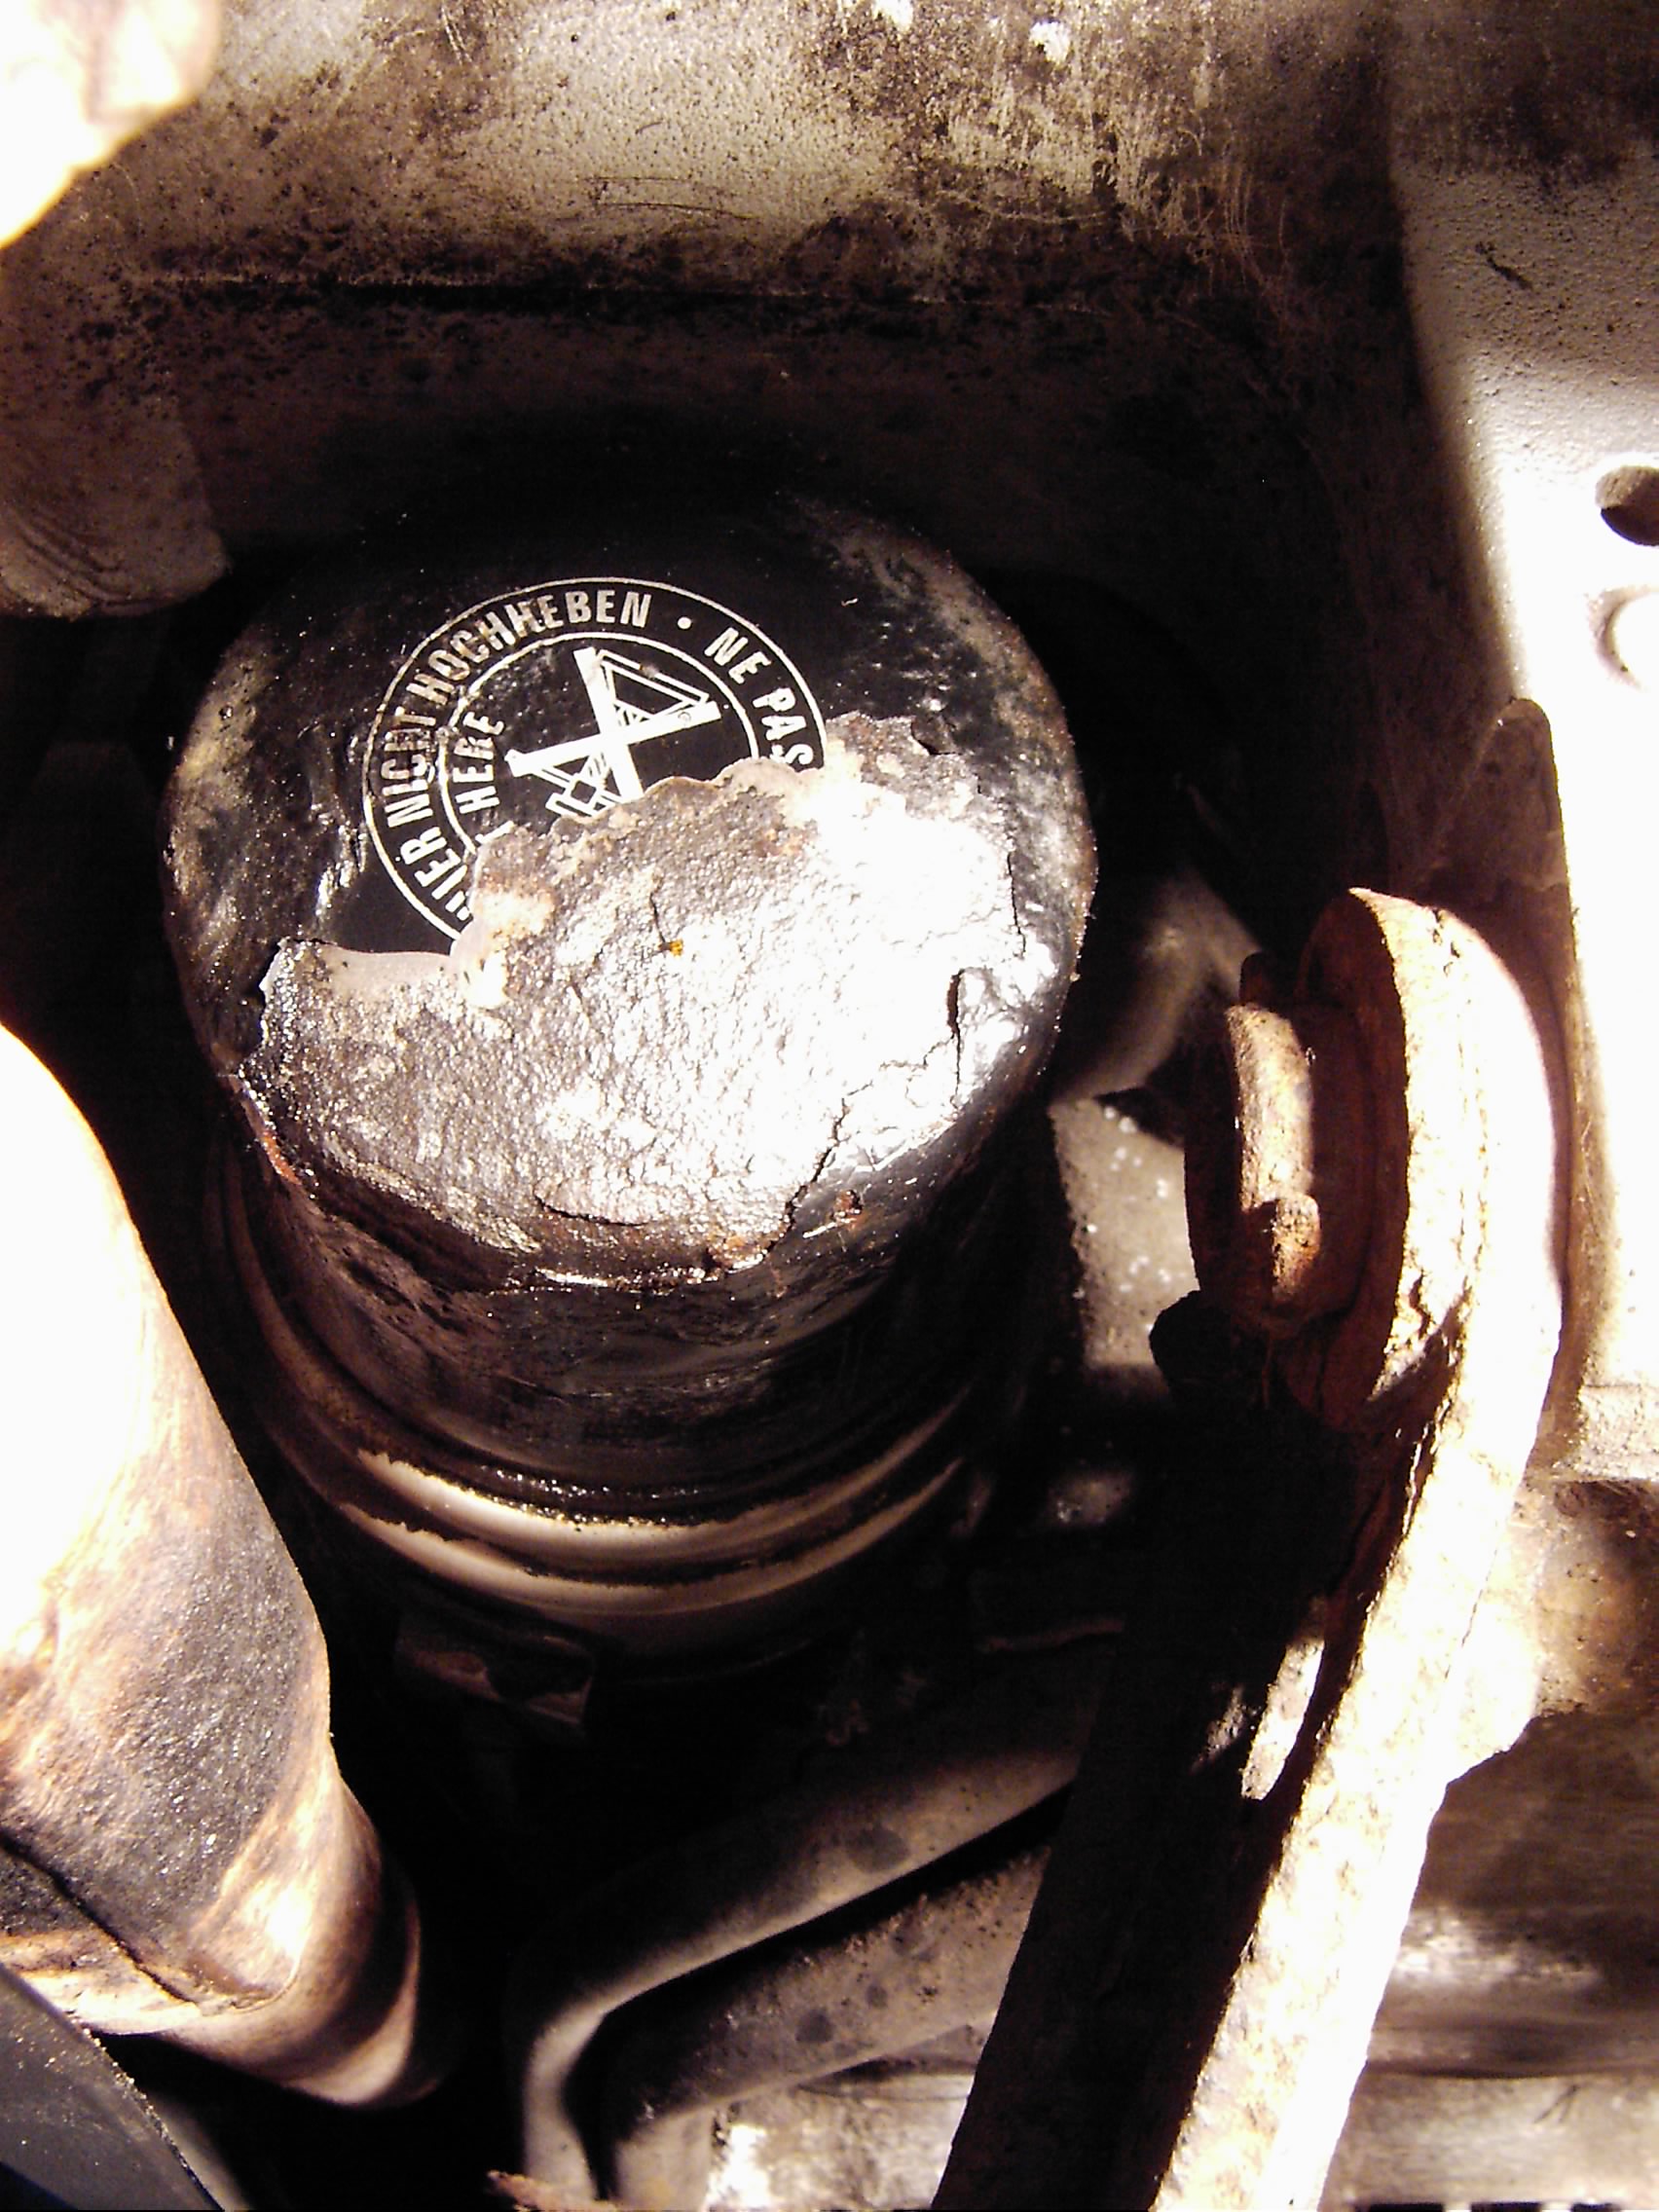
What have we here...?!
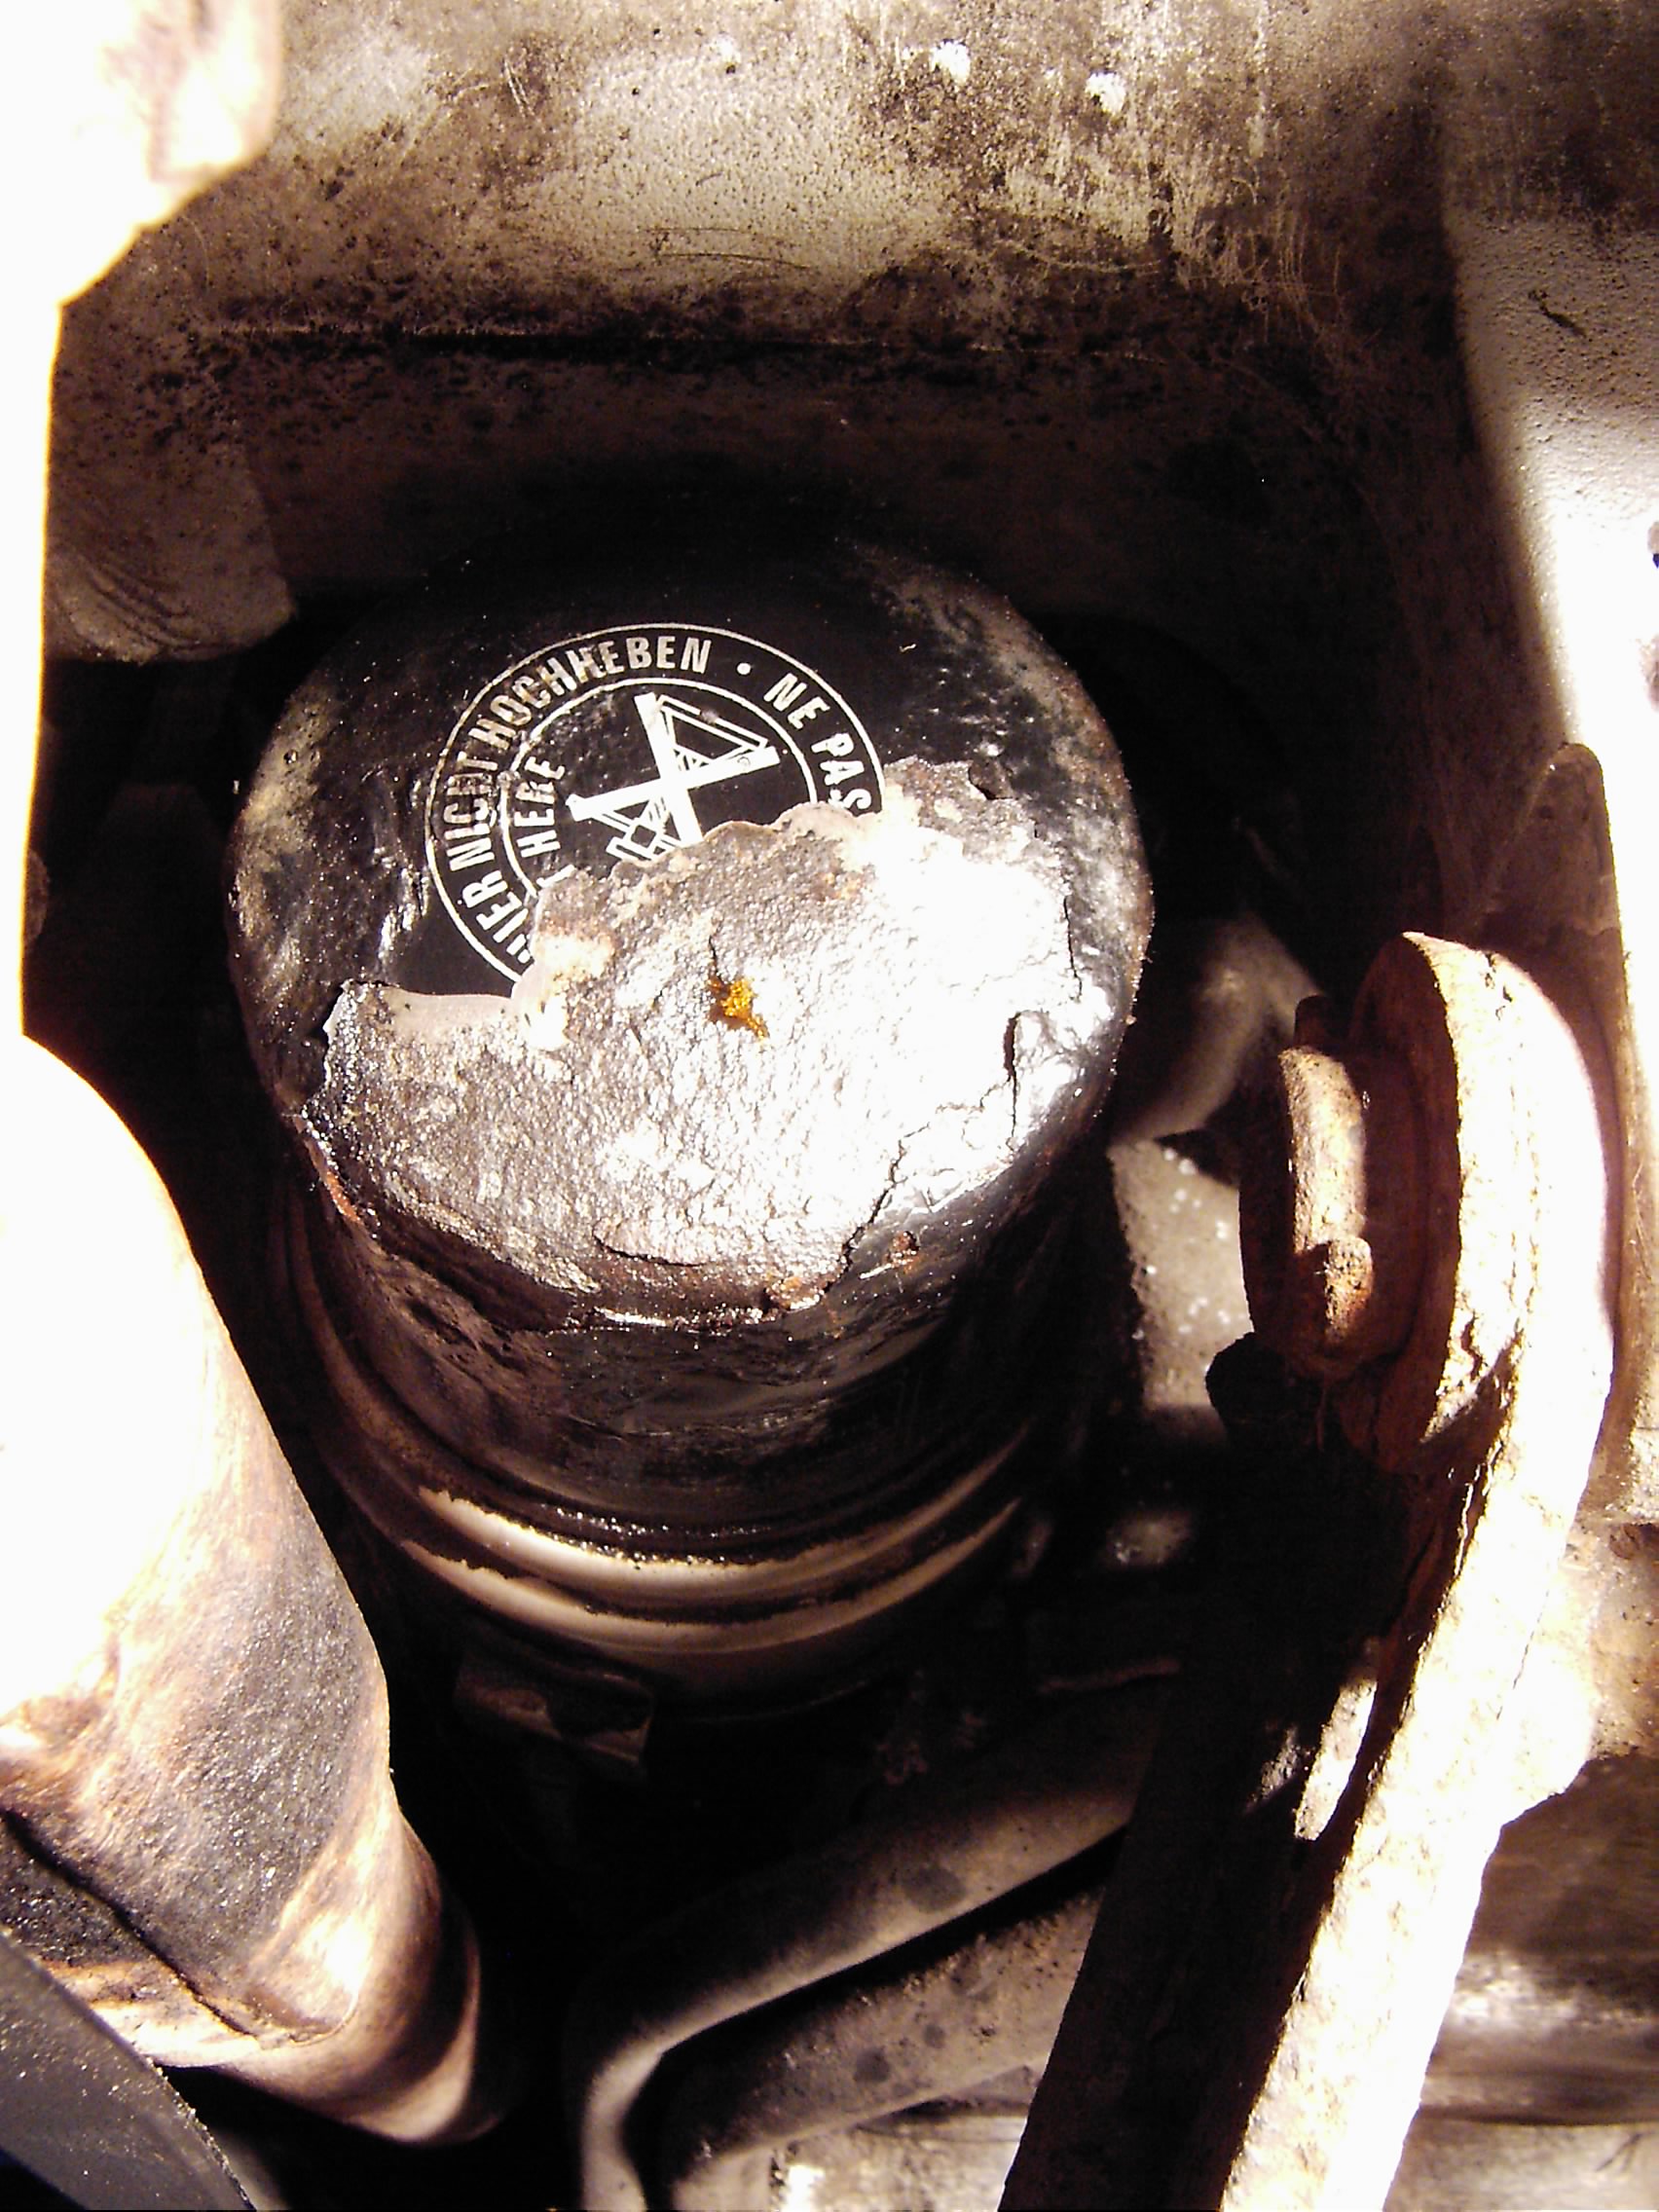
Hole-y filter, Batman!
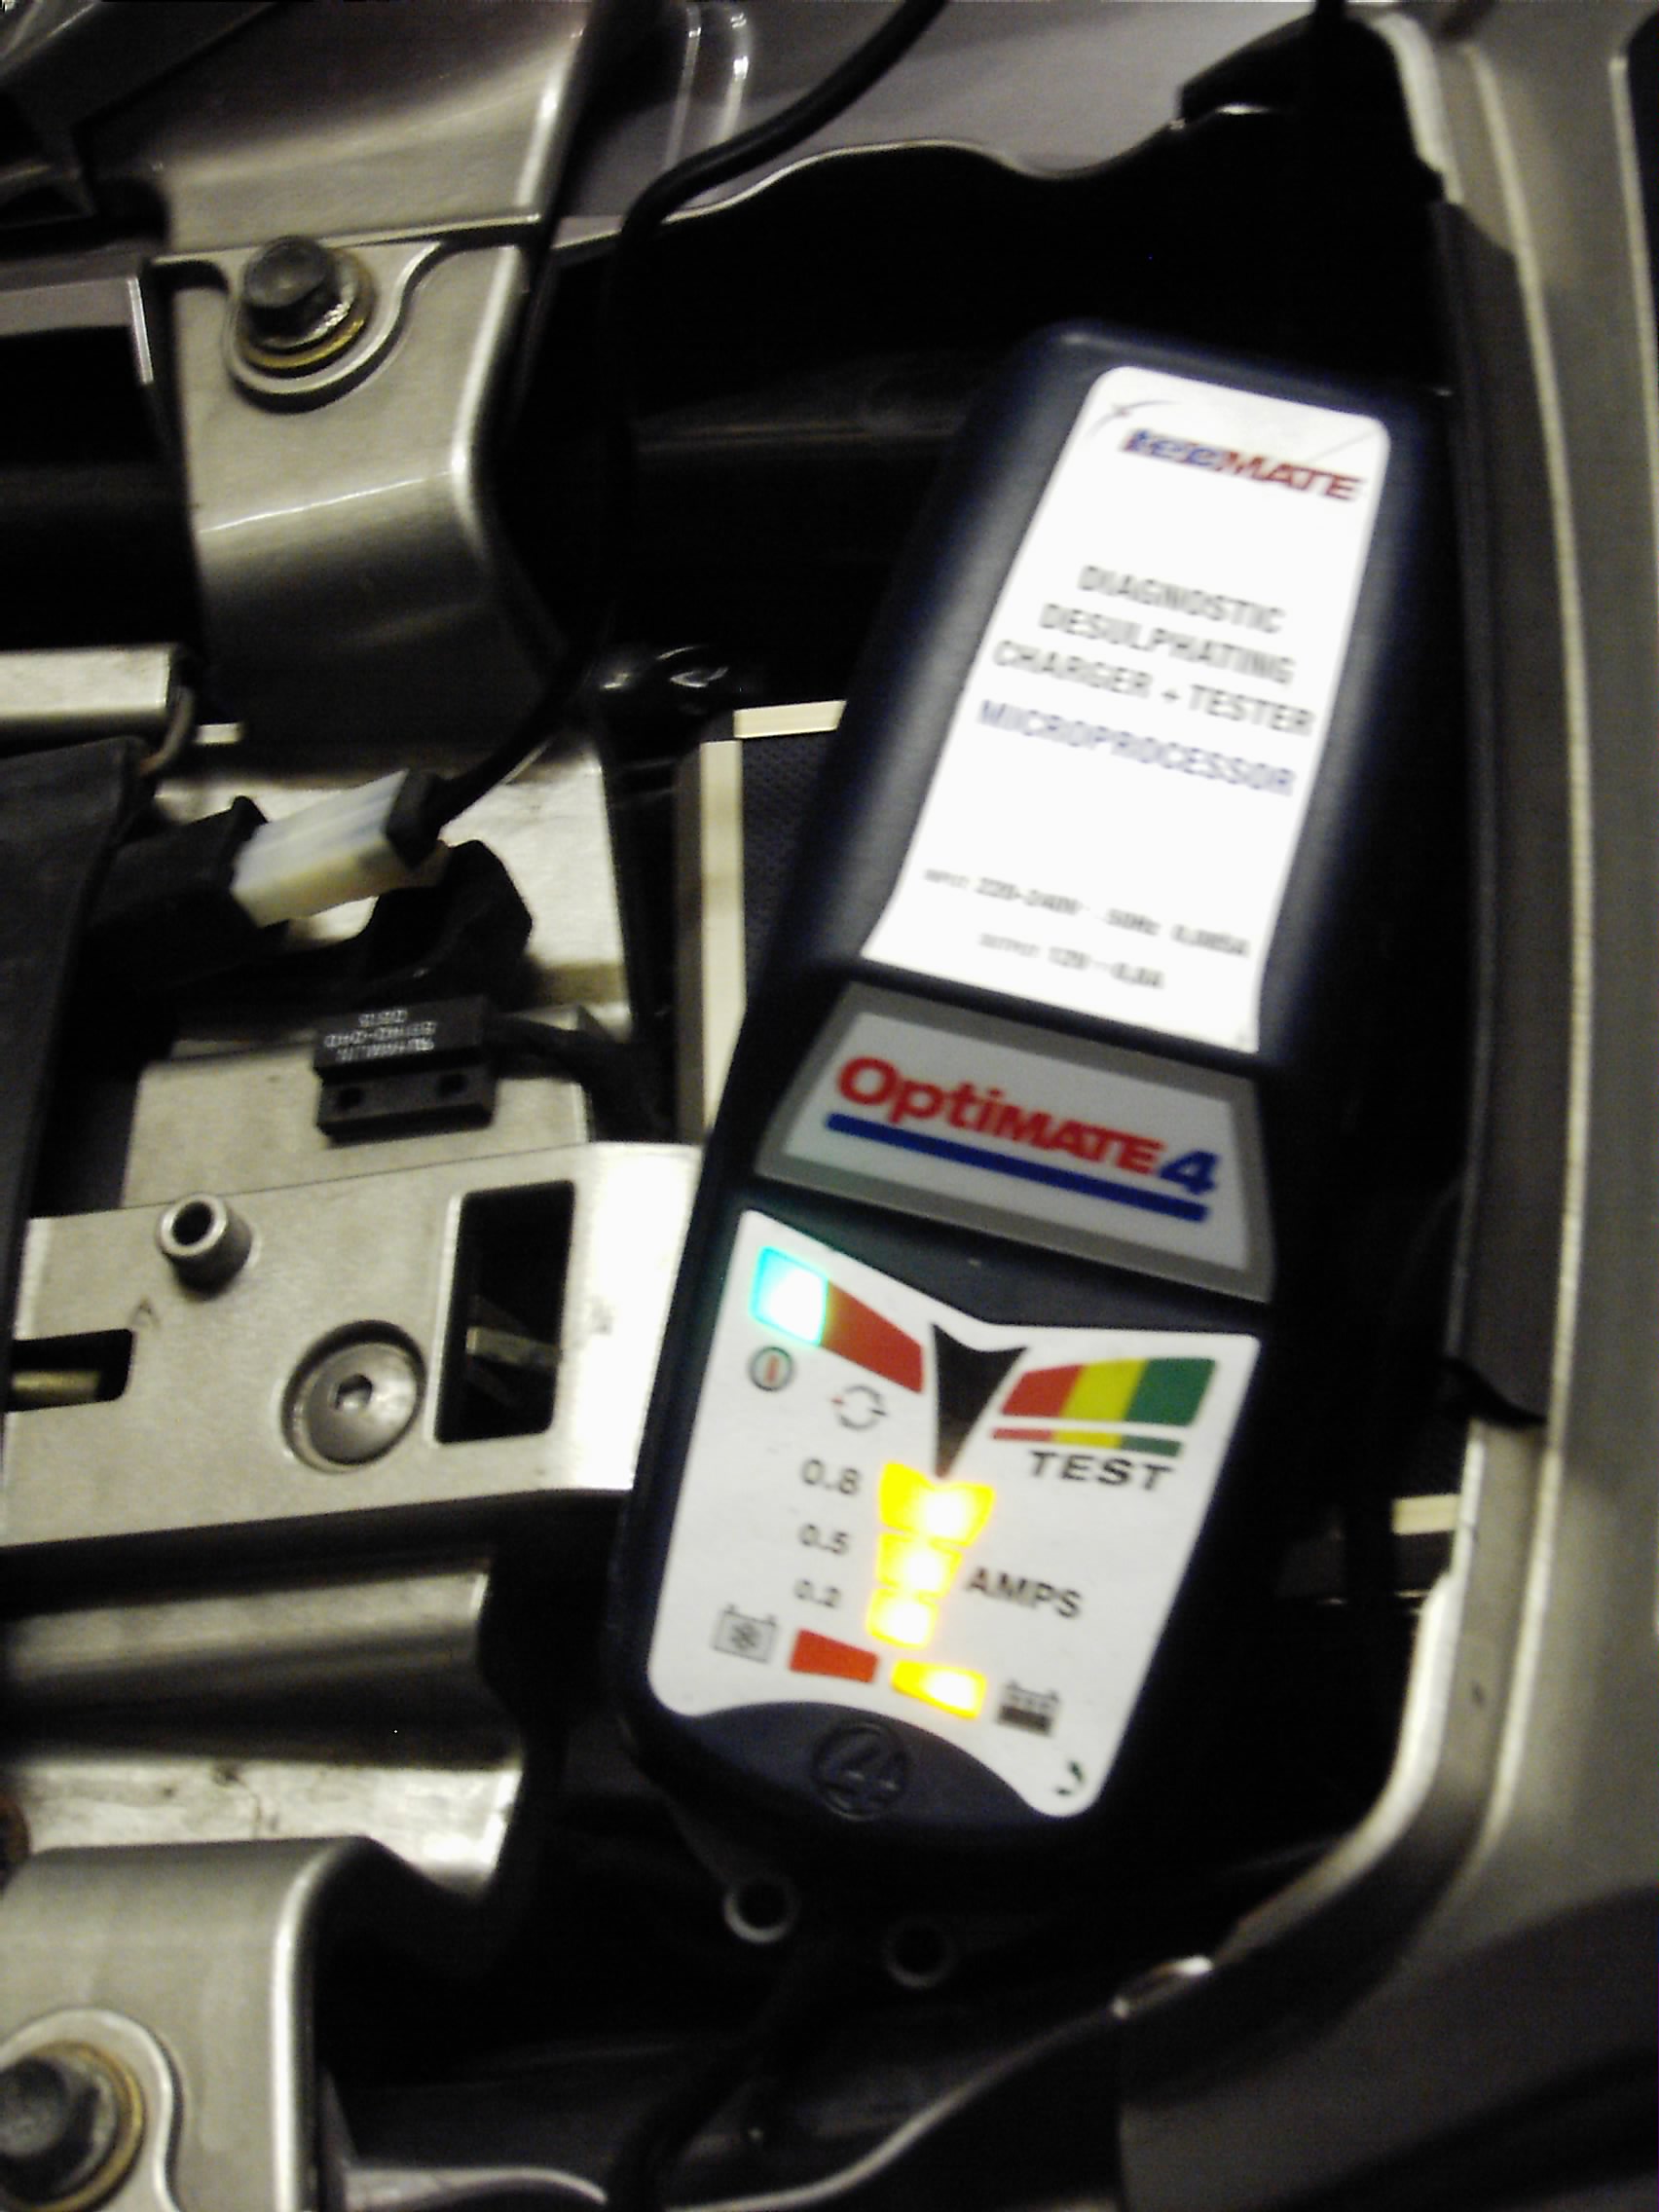
As I had Christmas Cash burning a hole in my pocket I thought it was time to buy an Optimate battery conditioner: the ST has a habit of flattening its battery if left stood for more than about ten days. Here's the Optimate doing its thing (the white connector at left is permanently attached to the bike and the conditioner plugs in here):
Update August 2018
A word of caution about these 'battery conditioners'... having used both an Optimate 3 (not pictured) and 4, and a cheap version sold in Aldi, it is my experience that they aren't all they're cracked-up to be, given that I've had to replace batteries on two bikes and the TVR despite them being connected to the 'conditioners' for weeks on end. The ST1300 battery that failed was a sealed-for-life type so fair enough, it may have reached the end of its natural life but the other two were the type where you can top-up with water... however all the electrolyte ('acid') had apparently boiled away. This coming winter I think I'll just bring the batteries into the house and charge them every couple of weeks... the old-fashioned way ;o)
Update 20 March '09
Right, that bloody seat! With summer looming and talk in the pub of another mad jaunt to some part of Europe, the conversation eventually turned to botty comfort. See we're all getting a bit long in the tooth and broad in the beam now and there is just no fun in walking like John Wayne every time you get off the bike. I sat down in front of Google and typed in 'gel pad'...
... and after raking through all manner of stuff from ladies' ergonomic bicycle seats(!) to breast implants, plus the inevitable Ebay sellers touting their wares, I found a company called DanMedicaSouth who specialise in making kit to ease pressure sores etc. of bedridden patients and the like. They offered a motorcycle-specific seat pad complete with cover to hold it in place. It dawned on me I'd seen the same text on Ebay and sure enough when I checked I found a seller who had the DMS product cheaper! After comparing a few sources including M&P I plumped for this lady and spent my wad (ooer).
The seat pad duly arrived, was strapped in place and off I went. A 90 mile ride was sufficient to give the distinct impression that it was no more comfortable than the standard seat, however the thickness of the pad meant that my riding position was altered to a degree. I'd also gone out in combats rather than full leathers but I was wearing the same trousers on the France trip last year when I was really suffering so it was a fair test. Maybe leathers would improve matters but what if I don't want to wear them?
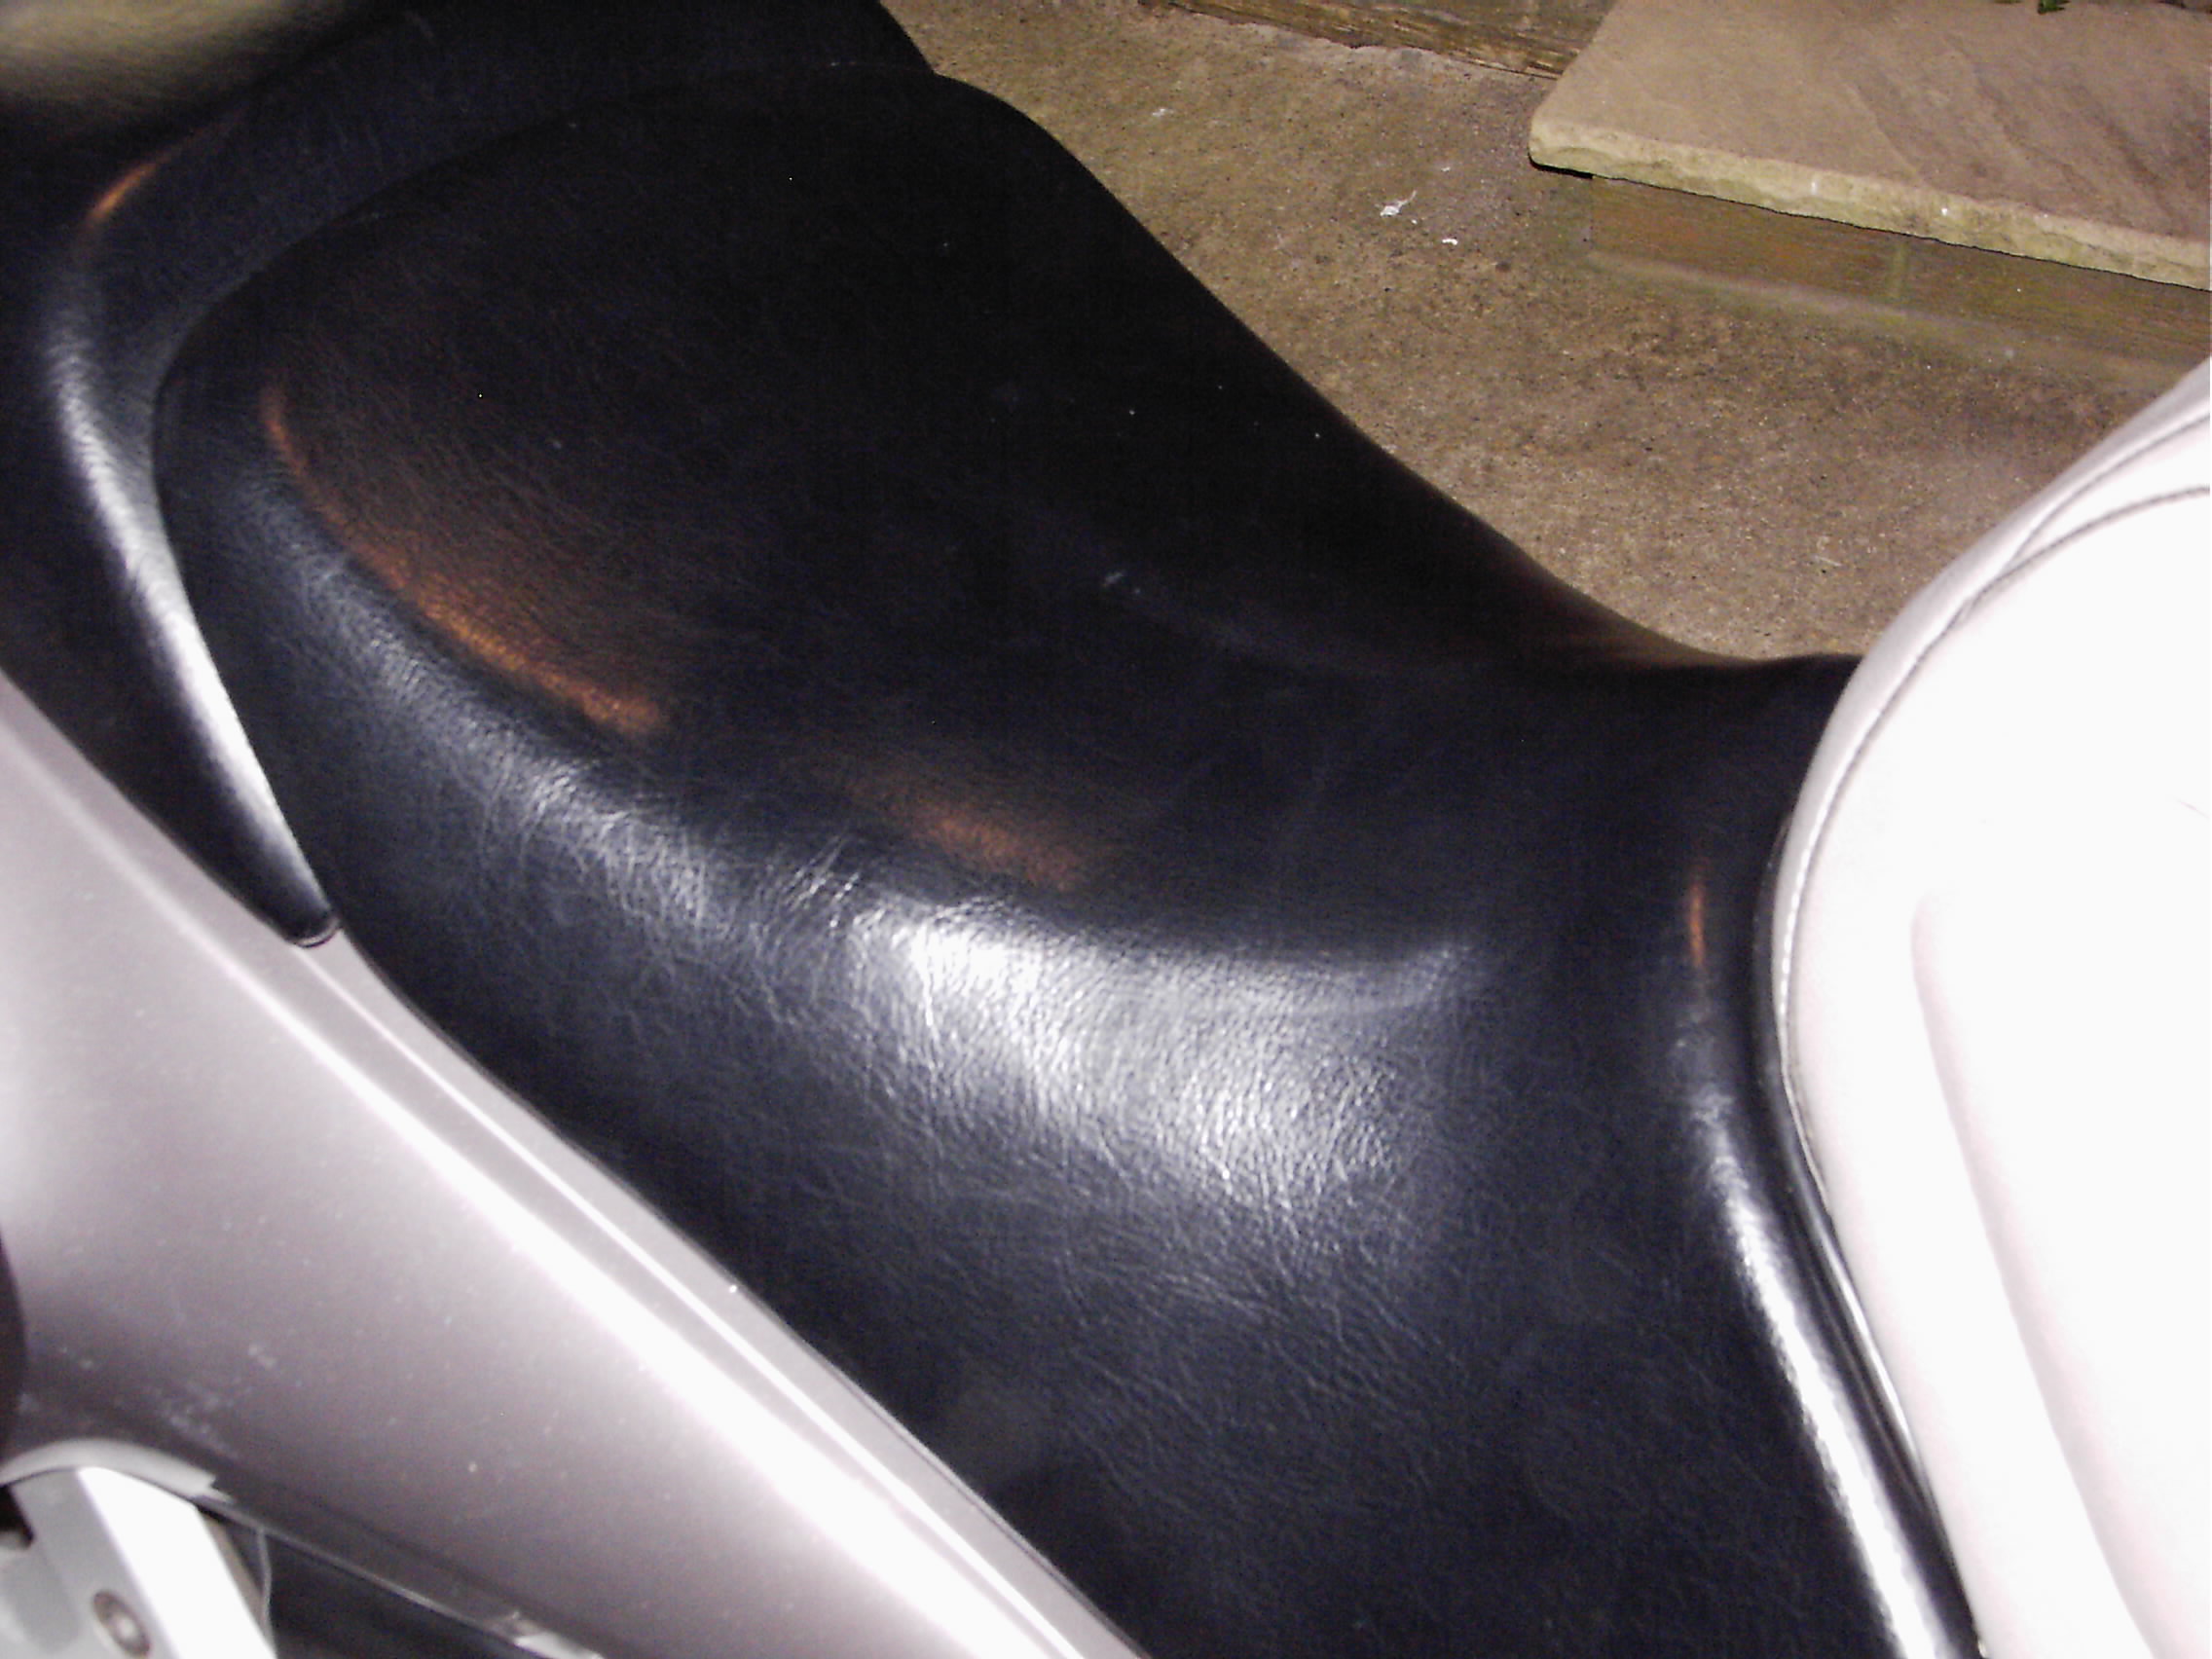
I had been loking for a spare rider's seat for the ST so that I could pull it apart and play with the foam, insert a gel pad or whatever, but they rarely seemed to come up on Ebay and I hate ringing round breakers' yards. Annoyingly, I missed one for £22. I decided to take the plunge and see if I could inset the gel pad into my existing seat. After all, the whole world is convinced that gel is good, so it must be my arse that's wrong, right? OK then. Incidentally, having decided that I was going to document the operation on here, I got the digital camera out, only to find the batteries were flat. Never mind, I thought, they'll soon charge up...
In common with most bikes theses days the ST seat comprises a moulded plastic base with a shaped foam pad gunged in place and the whole covered with a vinyl... er, cover... that is stapled in place. I attacked the staples with a pair of wire cutters (snip them in half and pull the two ends out), leaving the cover attached at the front of the base to give me a head start in refitting it correctly! I checked the camera once I'd extracted all the staples: batteries still charging.
I'd worked out whereabouts the pad needed to sit, so I positioned it on the foam, drew around it and reached for my trusty craft knife... cutting the outline was easy enough but trying to remove the whole section whilst maintaining an even depth proved a bit trickier. Eventually I had a gel pad-shaped recess in the foam, so I glopped some contact adhesive around the edge of the recess and the corresponding area of the pad, counted to 100 and dropped the pad in. Camera? Still dead.
OK, now for the tricky bit. I rolled the cover back into place and reached for the electric stapler that the kids bought me a few birthdays back, that had sat unused in the loft ever since. Using the old staple holes as a guide I realigned the cover along one side and banged in a couple of staples. Same thing the other side, then I pulled the rear of the cover into shape and secured it. Finally I worked my way round the seat, firing staples in approximately the same places as the originals.
By now it was about midnight but that didn't stop me popping outside and dropping the seat onto the bike. There didn't seem to be a great deal of difference in the feel of the new gel compared to the old foam. Hmmmm. The pad was just about visible as a faint outline in the vinyl cover but what the hell. Ah well, time for bed. I dropped the garage door and wandered back indoors. Just as the green light on the camera charger came on...
Here's the section of foam I cut out of the seat:
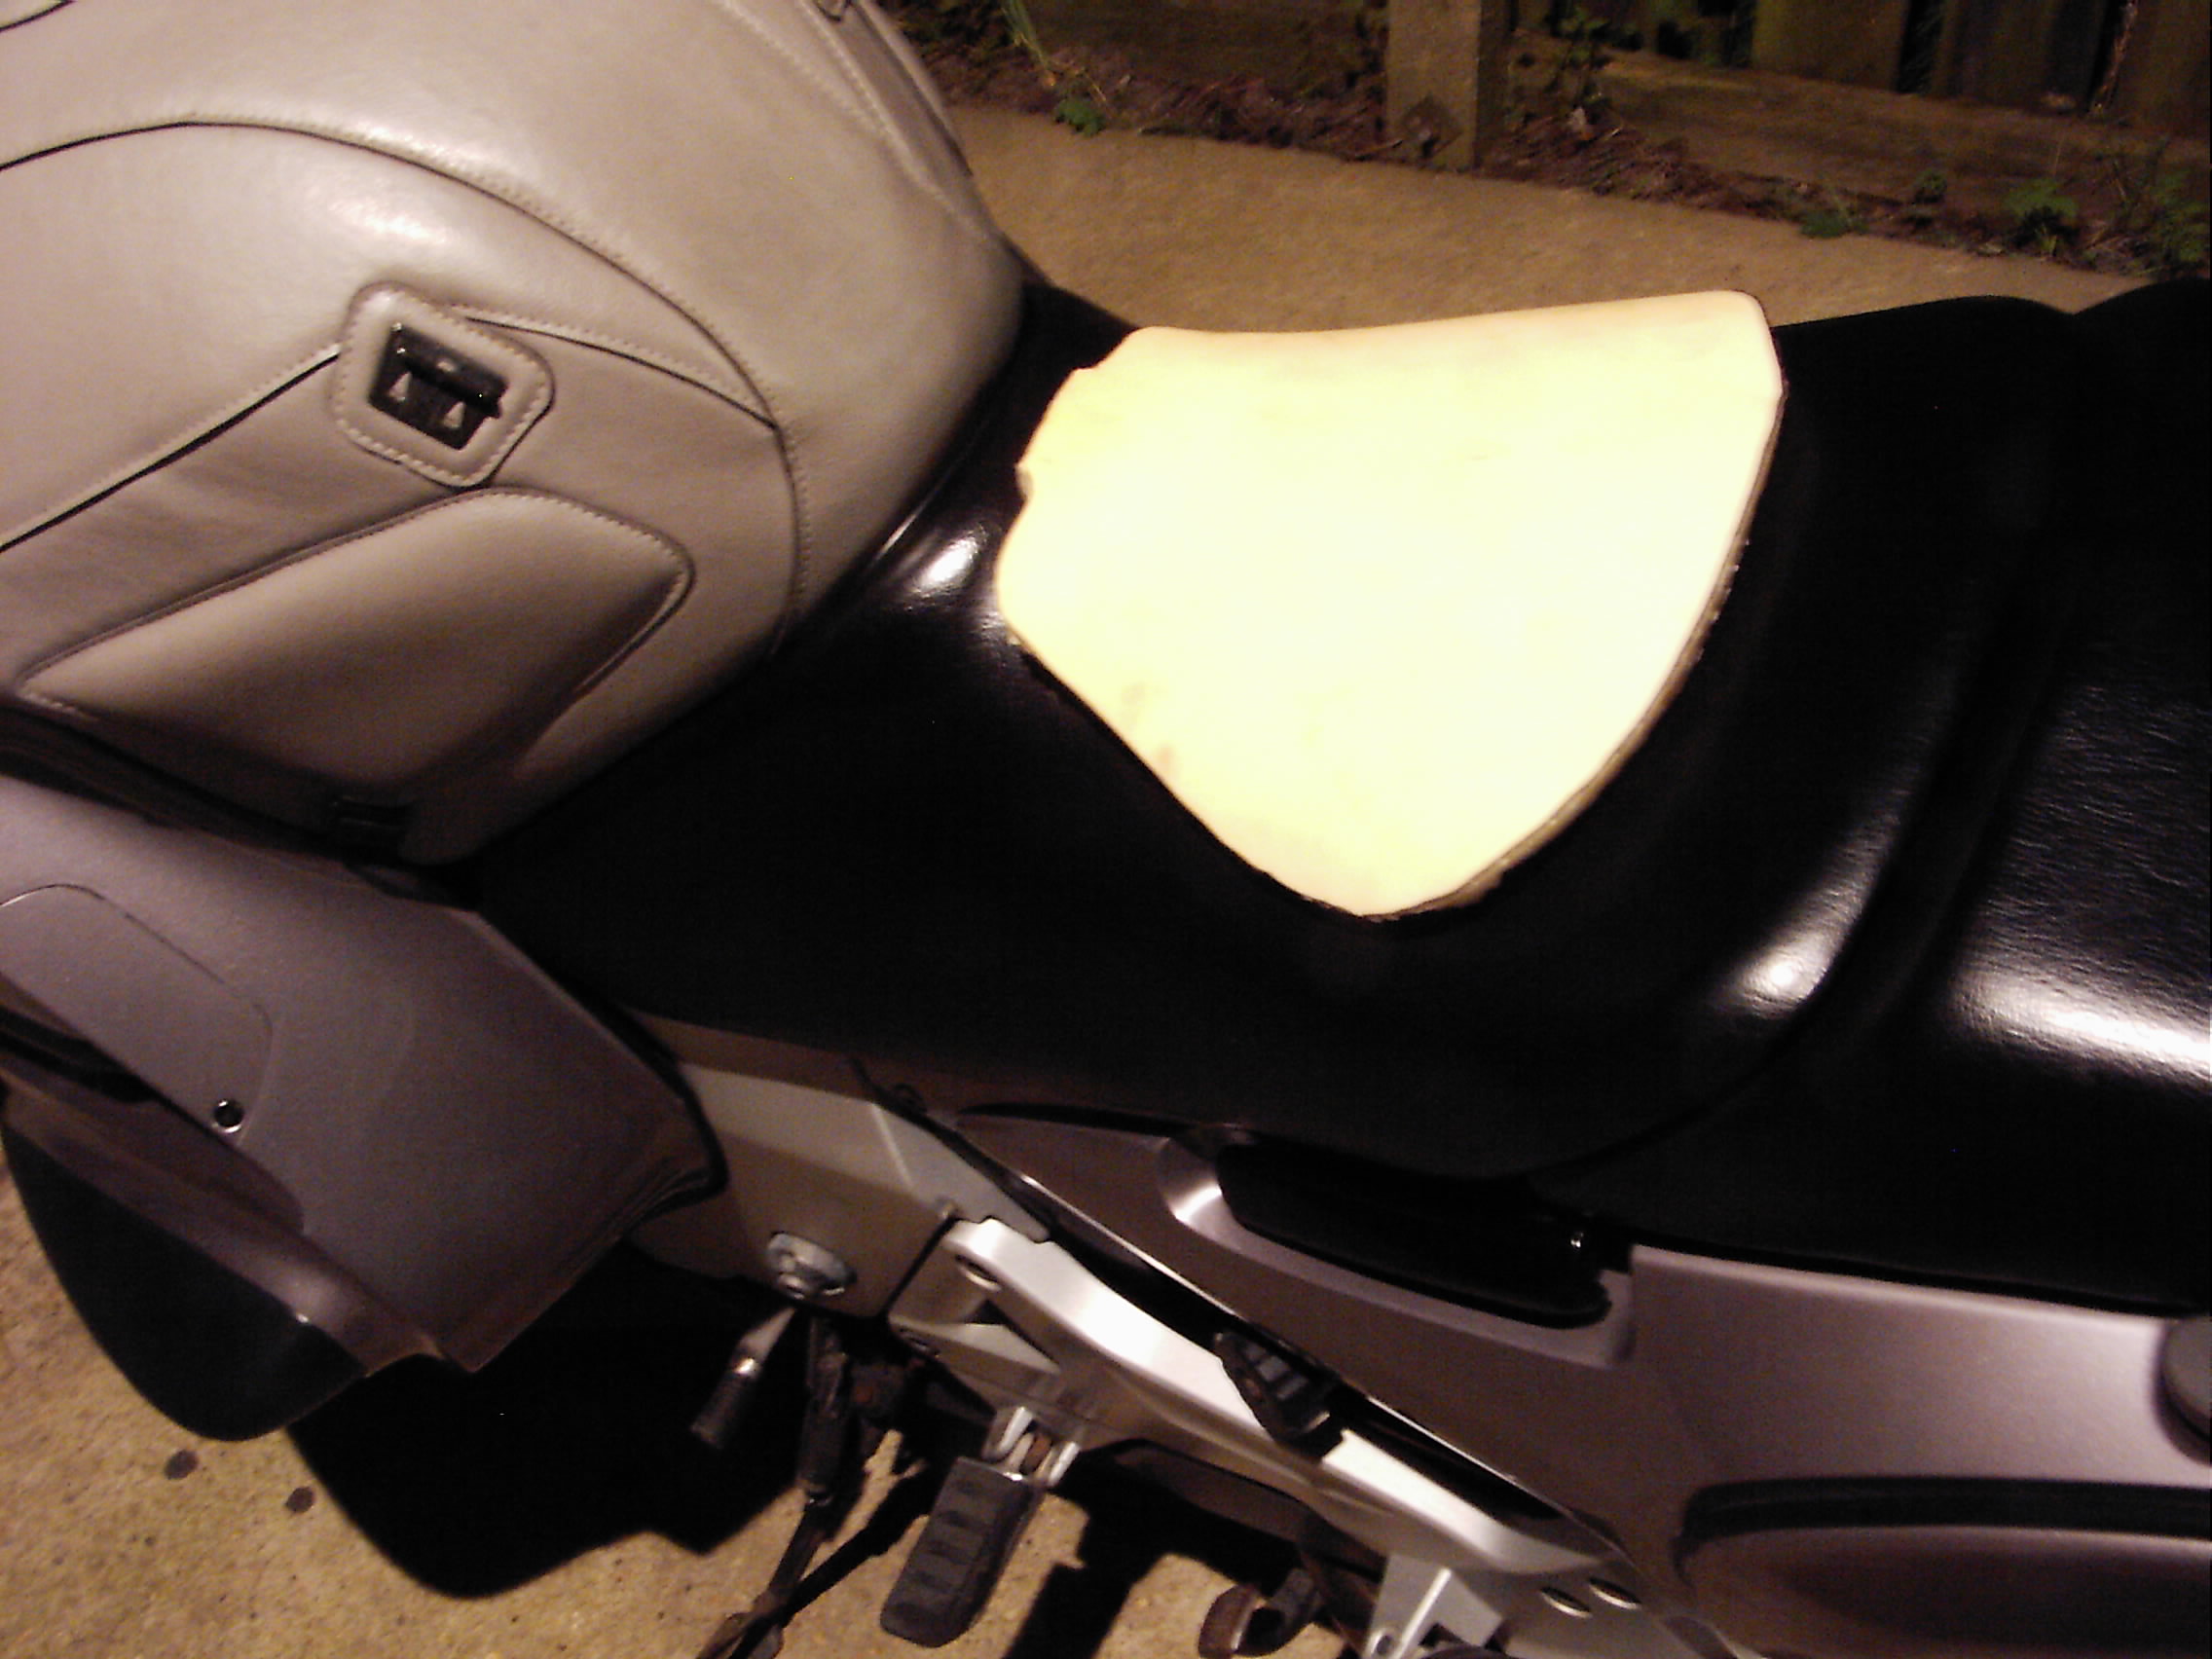
... and if you look carefully, you may be able to make out the outline of the gel pad:
Update 6th May 2011
Alas, the gel pad was still inset into the seat when the insurance company towed the bike away (see further down page). If I'd been a bit quicker I'd have delayed them a day, stripped the seat and removed it, but I didn't. So the seat discomfort issue persists with the 'new' bike. I bought a spare seat to play with and my first go at improving it involved a layer-cake approach - by which I don't mean I took up selling drugs and trying to shag Sienna Miller, rather I assembled three different densities of foam into a slightly bulkier-than-standard seat cushion and went for a ride. I made it to about 70 miles before the usual pains set in. Damnit. Looks like I may have to try an Airhawk after all... but watch this space, I don't give up easily ;O)
Update 30th September 2014
OK, so I gave up and bought an Airhawk :D This year's trip to the Alps was looming large and work on the TVR meant that the bike didn't get a look-in until the week before we went, when I gave the old bus a service. I opted for a K&N air filter as it was litle more than twice the price of a standard item, so if the general public can avoid knocking me off the bike, the filter should pay for itself in two more services. After a couple of attempts over recent years at 're-stuffing' my spare seat with varying types and combinations of packing (including, and I kid you not, bubble wrap!) I'd been watching Airhawks on Ebay on and off for a while but the 'Mk2' (i.e. the vinyl one) seemed to fetch almost the price of a new one. So I raided my piggybank and plumped (ho ho :D) for the real McCoy, the original neoprene version. You'd better be sitting down (arf arf :D) when you see the price of them. Actually, when I was on holiday in Canada earlier in the summer I'd popped into a bike shop (bike shop in the sense that it sold Harley-branded tat to Harley riders) in the hope I might get one for fewer Canadian dollars than pounds Sterling but drew a blank, so had to pay the full-fat UK price. Anyway, I'm sure you know by now that with me, if there's a simple way to do something and a complicated way, I'll go for the one that keeps me up all night: so sure enough after a quick 10 mile trip 'round the block' with the Airhawk plonked on the seat, I set to with craft knife and staple gun and inset the inflatable cushion into what remained of the original Honda foam. I went as far as cutting all the staples short so they wouldn't penetrate the plastic seat base and puncture the air cushion. The inflation valve was led out through a hole drilled through the seat base such that the valve lies under the front edge of the pillion pad. And it only bloody works! Our first day abroad was a 575-mile arse-numbing motorway thrash from Rotterdam to Garmisch-Partenkirchen with only brief fuel stops and it was only when I'd been sat in a bar for a while that evening that I realised I wasn't suffering from the usual pains.
Update 03 April '09
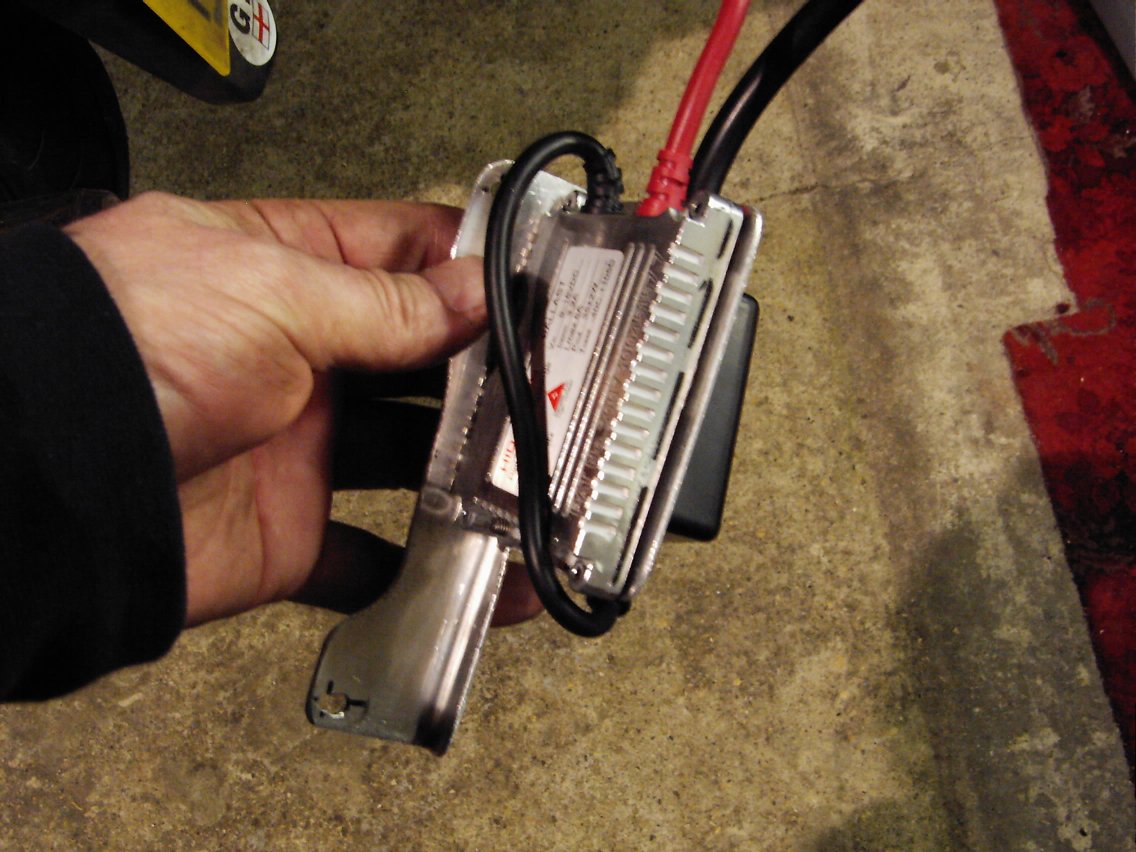
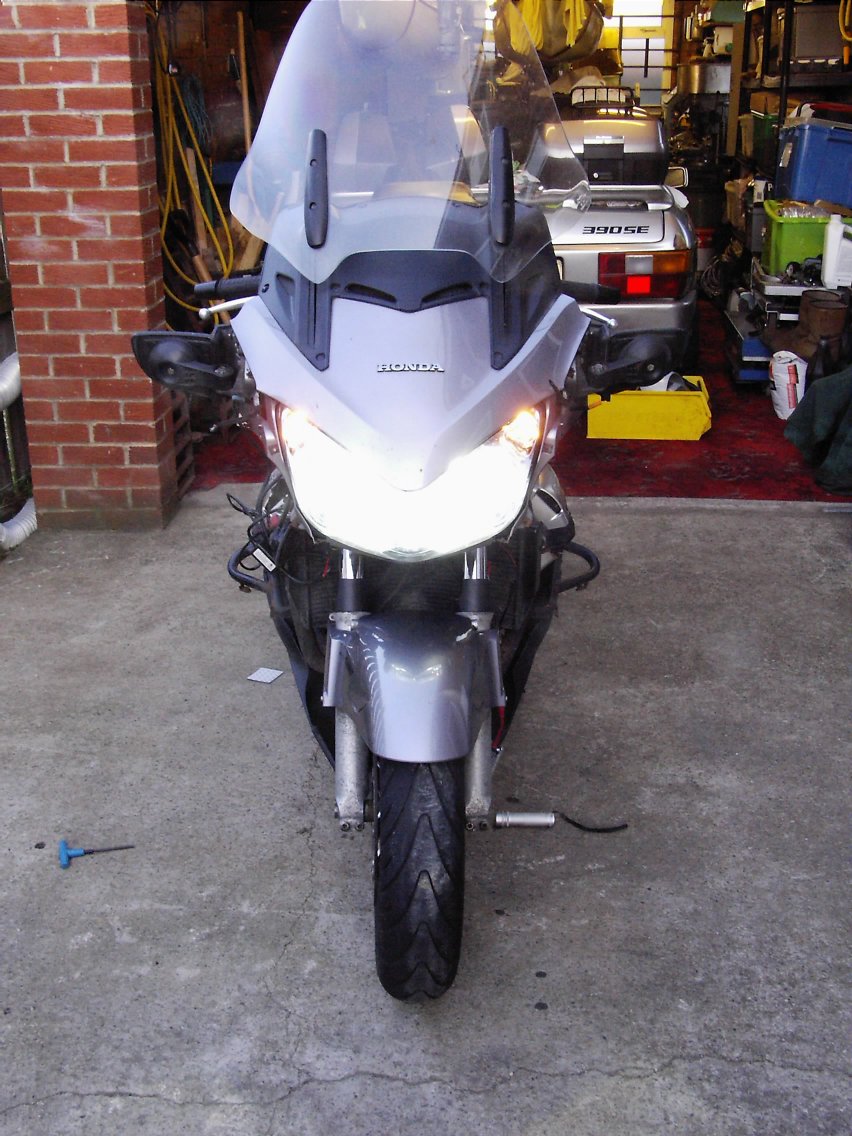
HIDs. That's High Intensity Discharge lamps to you. I decided I needed some. After all, the whole world seems to have them now and who am I to buck a trend? So I meandered through the internet, delved into Ebay (and unsurprisingly failed to find any bargains there) and eventually ordered a pair of H4 'bi-xenon' (which sounds like some kind of Star Trek deviant) lamps complete with ballasts, igniters and control box from Convert2Xenon. Their deal was as good as anyone else's (in fact they did free postage) but the main reason was that I wanted 4300K colour temperature bulbs and most of the sets on offer elsewhere were 6000K-plus. I also stumped up an extra tenner for the slimline ballasts just in case space turned out to be tight...
Before getting down to the nitty-gritty of hiding all the bits under the ST's acres of bodywork I thought it prudent to assemble the components as a system and ensure that they worked. A rat's nest followed:
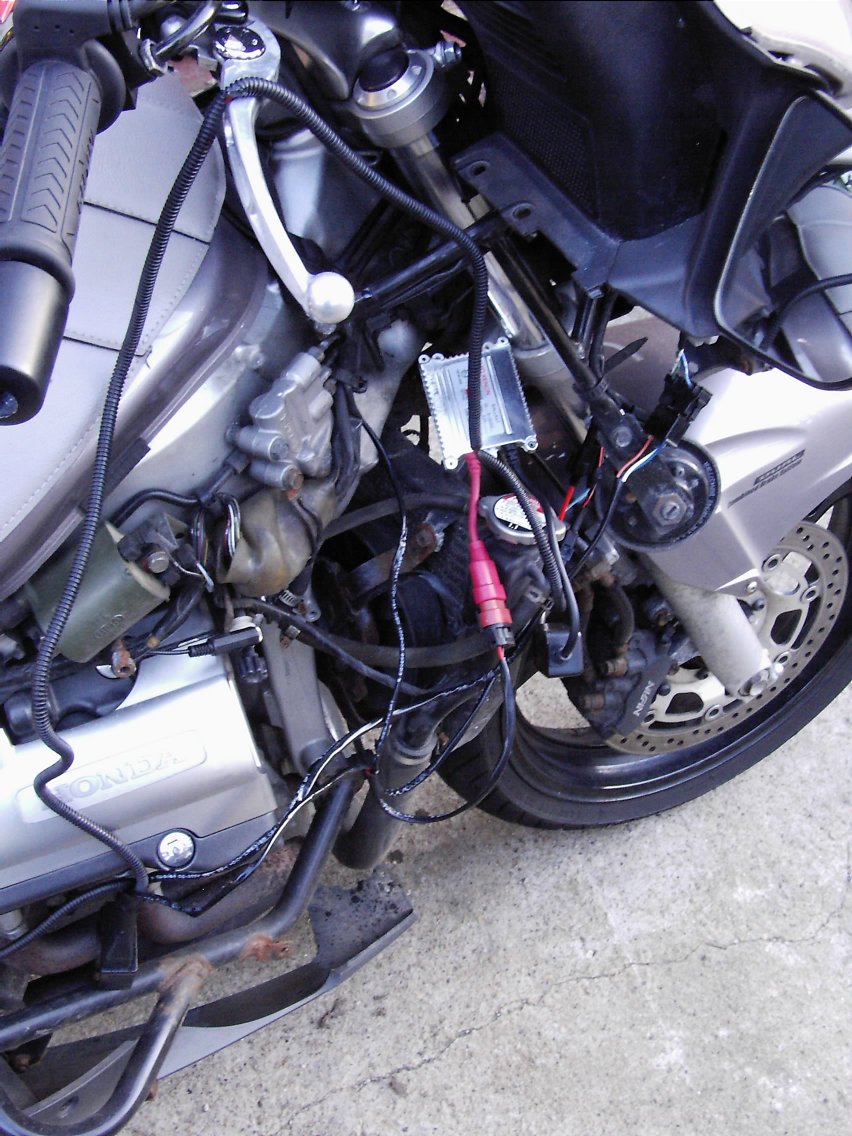
The silver box with thick red cable is the ballast unit, with the igniter being the black module just down and to the right of the red connector. Just above the horn is the original connector from the right-hand headlamp, with the control plug from the HID system plugged into it. Along with two earth tags and a fused feed to the battery, that's the only connections you need to make to the bike (though there are quite a few within the HID setup itself - all easily identifiable, I might add). The control module is hanging down by the exhaust headers at bottom left. The bulbs dropped straight in to replace the original H4 halogens, even down to the dust covers being a perfect fit. The bi-xenon bulbs are a single-filament type; to achieve dip and main beam there's a sleeve that is retracted over the bulb to change its spread of light towards the reflector. The bulb bases have integral solenoids to retract the sleeves, you can hear them move with a clonk when you flick between beams. A lot of bikes use separate bulbs for dip and main and it's not recommended to fit xenons in both holders as the bulbs need time to warm up, a potentially disastrous situation. The bi-xenon gets round this quite neatly and it works perfectly on the road. The only minor drawback is that you can't light up dip and main filaments together as you can with a halogen, but that's a trivial issue. Not so trivial is the cost of replacement HID bulbs: about £30 instead of £3 for halogen! Best hope that the claimed 30,000 hours is attainable...
With the system tested it was time to get stuck in and fit it in something resembling a professional fashion. You'd imagine that the ST would have loads of space under all that fairing, but you'd be wrong. As was I. The Japanese are masters of packaging and there's scarcely room to smuggle a kilo of... er, ah, well anyway, there's not much room. The kit comes with large double-sided sticky pads (quality ones by 3M, not the sort of things you find in Staples) with which to mount the ballasts, but the only flat areas I could find to stick them would have obstructed the sidelamps - and besides, they'd have been all crooked ;O) I thought I could do better. So with a bit of judicious measuring and the aid of a bench guillotine, aviation shears, cordless drill and a file, I precision-crafted (ahem) a pair of mirror-image aluminium brackets that mount by the screws that secure the headlamp unit:
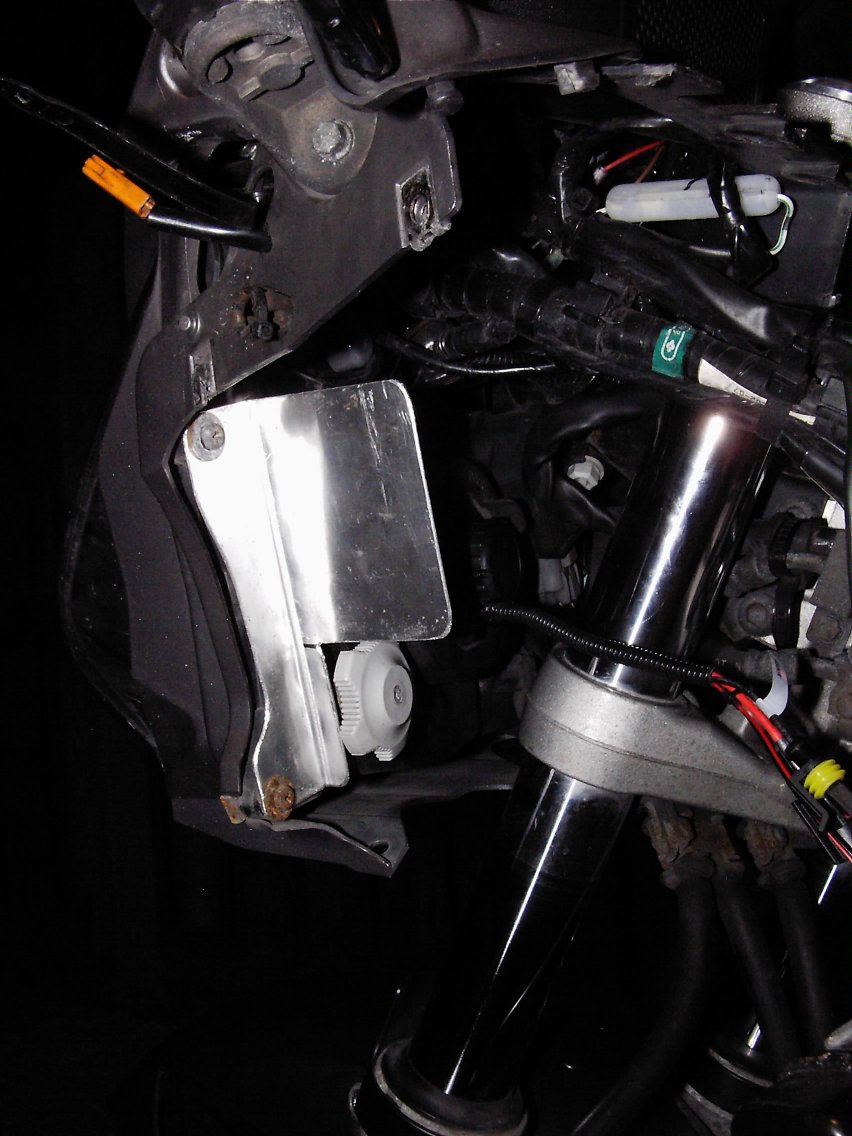
The grey knob is one of the headlamp adjusters. You're supposed to be able to get at them from underneath but my gnarly old claws aren't supple enough. Anyway I cut the plate away to allow the knobs to move if they need to. That curved cutaway at left is necessary to clear the side fairing: I told you it was tight! The ballast was mounted using M3 stainless screws (threadlocked) as well as the sticky pad. I wouldn't want the screws vibrating loose and having a ballast in my steering! The igniter was simply stuck to the other side; it kept the wiring tidy that way. Good job I opted for the slim ballasts!
I did take a pic of the assembled unit mounted on the bike but for some reason the camera decided to blur it :o/ The control module was cable-tied far up under the nose and two convenient M6 threads were located just behind the headstock to use as earth points. As this kit was actually intended for a car the cabling from one headlamp to the other was too long, and the battery feed was too short! Some snipping and soldering soon remedied that and all the wiring was cable-tied up alongside the various other loom sections that snake around the STs nose.
So, do they work? Of course they do! Unlike some sites I didn't take 'before' and 'after' pictures but in this pic you can see just how yellow the HIDs make the sidelights appear. I guess I'll be 'needing' some high-brightness LEDs next...!
Update 03 November '09 ...
Cruise control. That's what you need! Or at any rate, that's what I needed, earlier in the summer. That's the drawback of having a permanent Ebay search for 'ST1300', it finds all sorts of things you didn't know you needed. To be fair, my right elbow has always suffered from the ST's heavy throttle when riding for hours. Right then, that's enough justification, on with the bidding! The cruise control was originally (EDIT: but is no longer) supplied by Motorcyclecruise.co.uk. It's actually an Australian-made system... but we won't hold that against them ;o)
A bid was placed and a boxfull of parts arrived a few days later, accompanied by all the necessary installation notes. The job was straightforward and once the bike was back together I took it for a spin and found the cruise control to work perfectly. On a 3000-mile round trip to the south of France it came into its own, making for far less elbow pain on the Autoroutes. I was even able to use my free right hand to reprogram the satnav whilst on the move, no doubt there's a law against that here... sorry, what was that? Satnav? Yes, another toy. Courtesy of Tesco, who gave me a £50 voucher when I took out some home insurance with them. Added to £20-worth of Clubcard vouchers that had one day's validity on them, that left me £27 to find for a Garmin Nuvi 255! Now I know what you're thinking; the Nuvi isn't intended for bikes. Well no it's not, but a simple test with a polythene bag and some water proved that it doesn't take much to keep the weather out, and anyway it doesn't rain in France. Ahem. Well not much. Hardly ever, honest dear.
So, how to mount a Nuvi on a Pan European? The standard sucker-mount would probably keep it in place, if attached to the screen. One of the guys on our trip to Germany back in May '09 did just that, though most of us thought it'd fall off before we got to Hull. Thing is, I like to move the screen on the ST, so the Satnav could well end up slap in my line of sight. I was wandering around Maplins one night looking for something else, when I found a clearance pile of Hama satnav mounting bits. Amongst them was a long flexible arm and a ball-mount that replicates the genuine Garmin device. Both became mine for the princely sum of £6 and a spare clip to secure the Nuvi to the ball was another £6 from an Ebay seller. I didn't want to risk having the original (expensive!) Garmin items pinched from the bike, hence the replica parts. To mount the flexi-arm to the bike I bought a a spare nose cowling for the ST (another £6, bearing what looks like a minor burn from a soldering iron!) and drilled three holes to take the triangular baseplate. This places the Garmin just above the instrument panel but far enough away from the screen to not foul it.
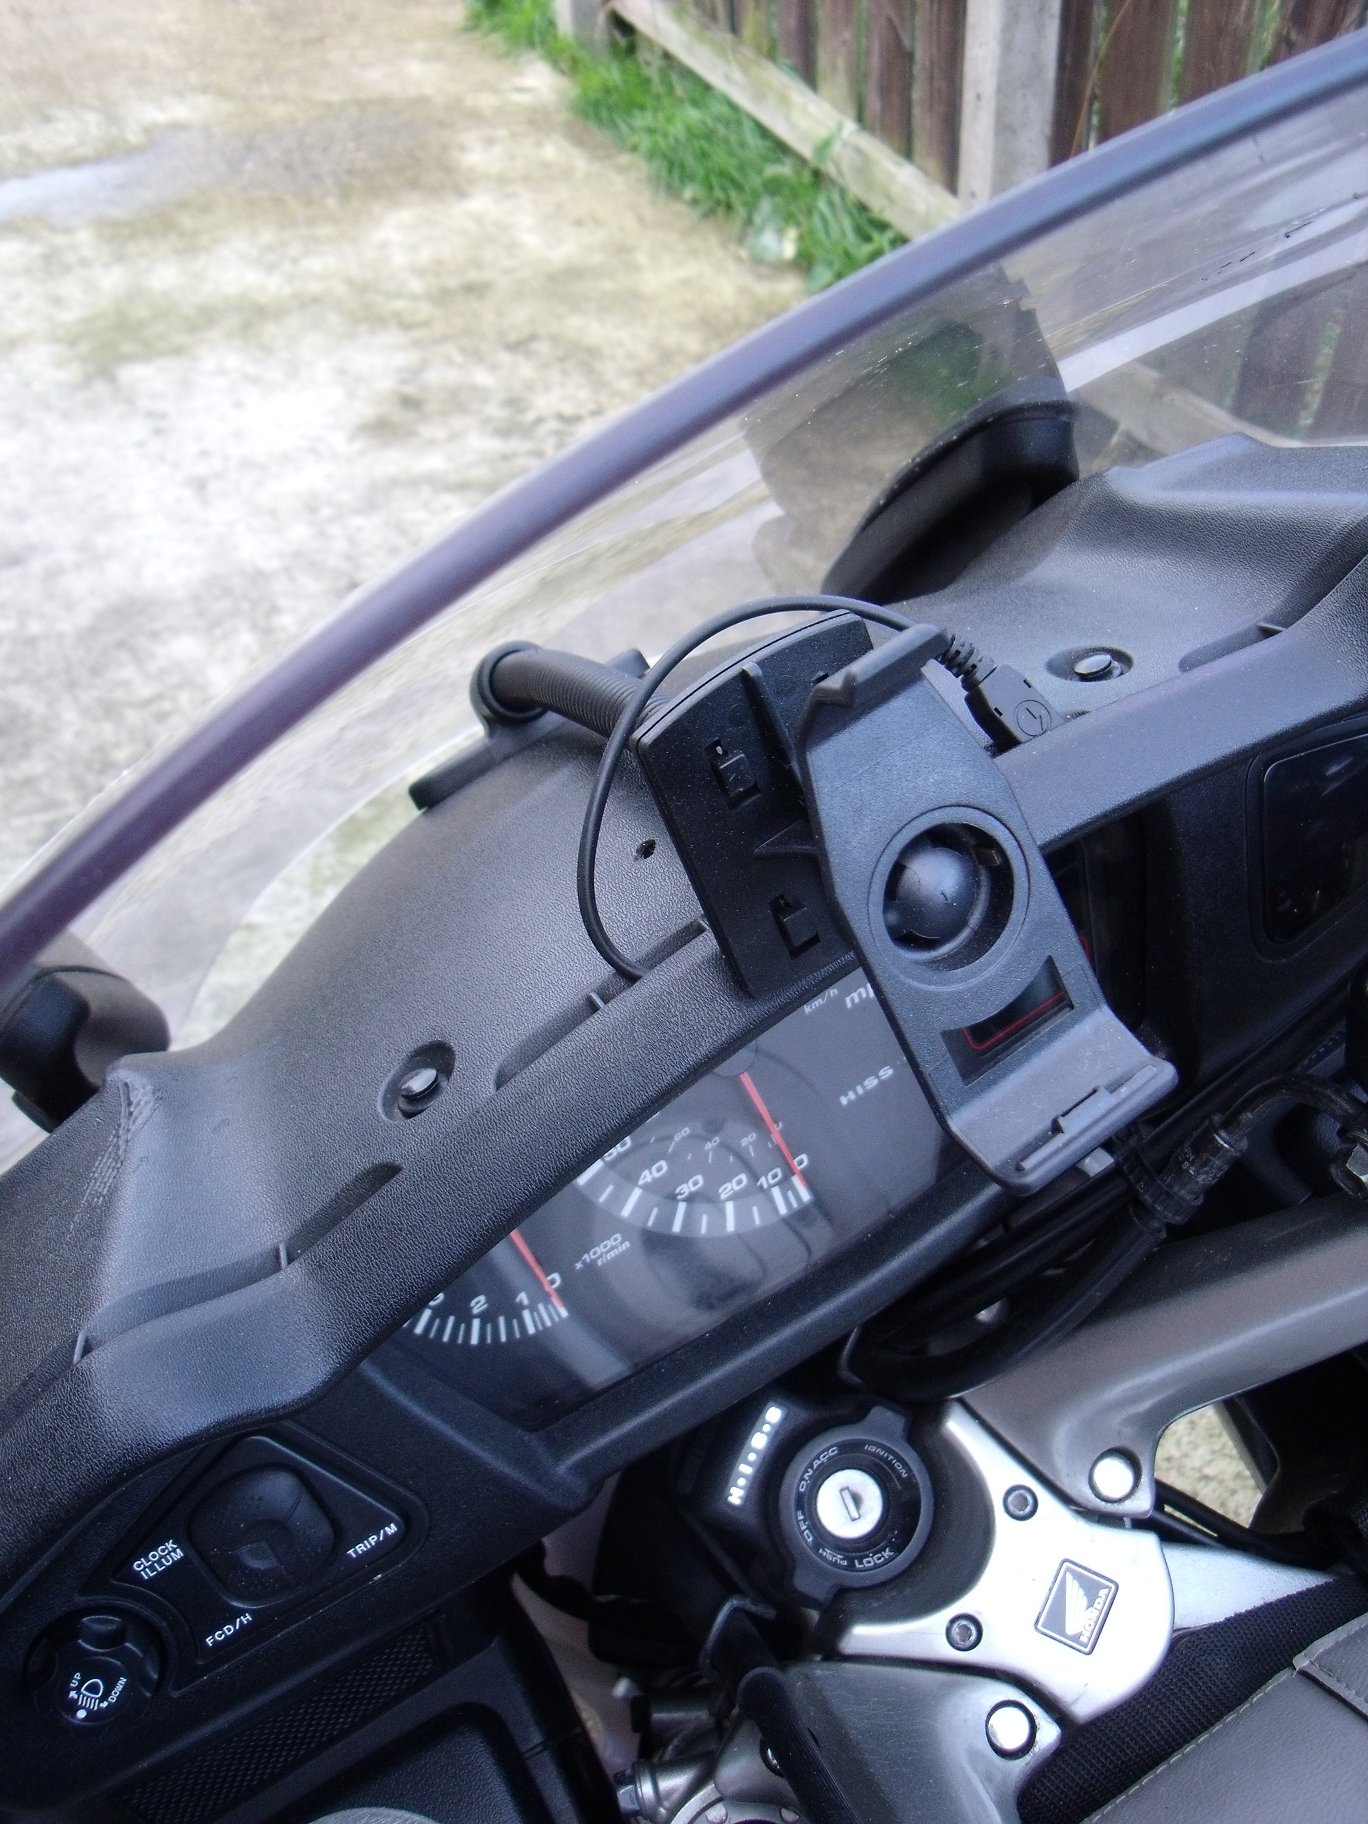
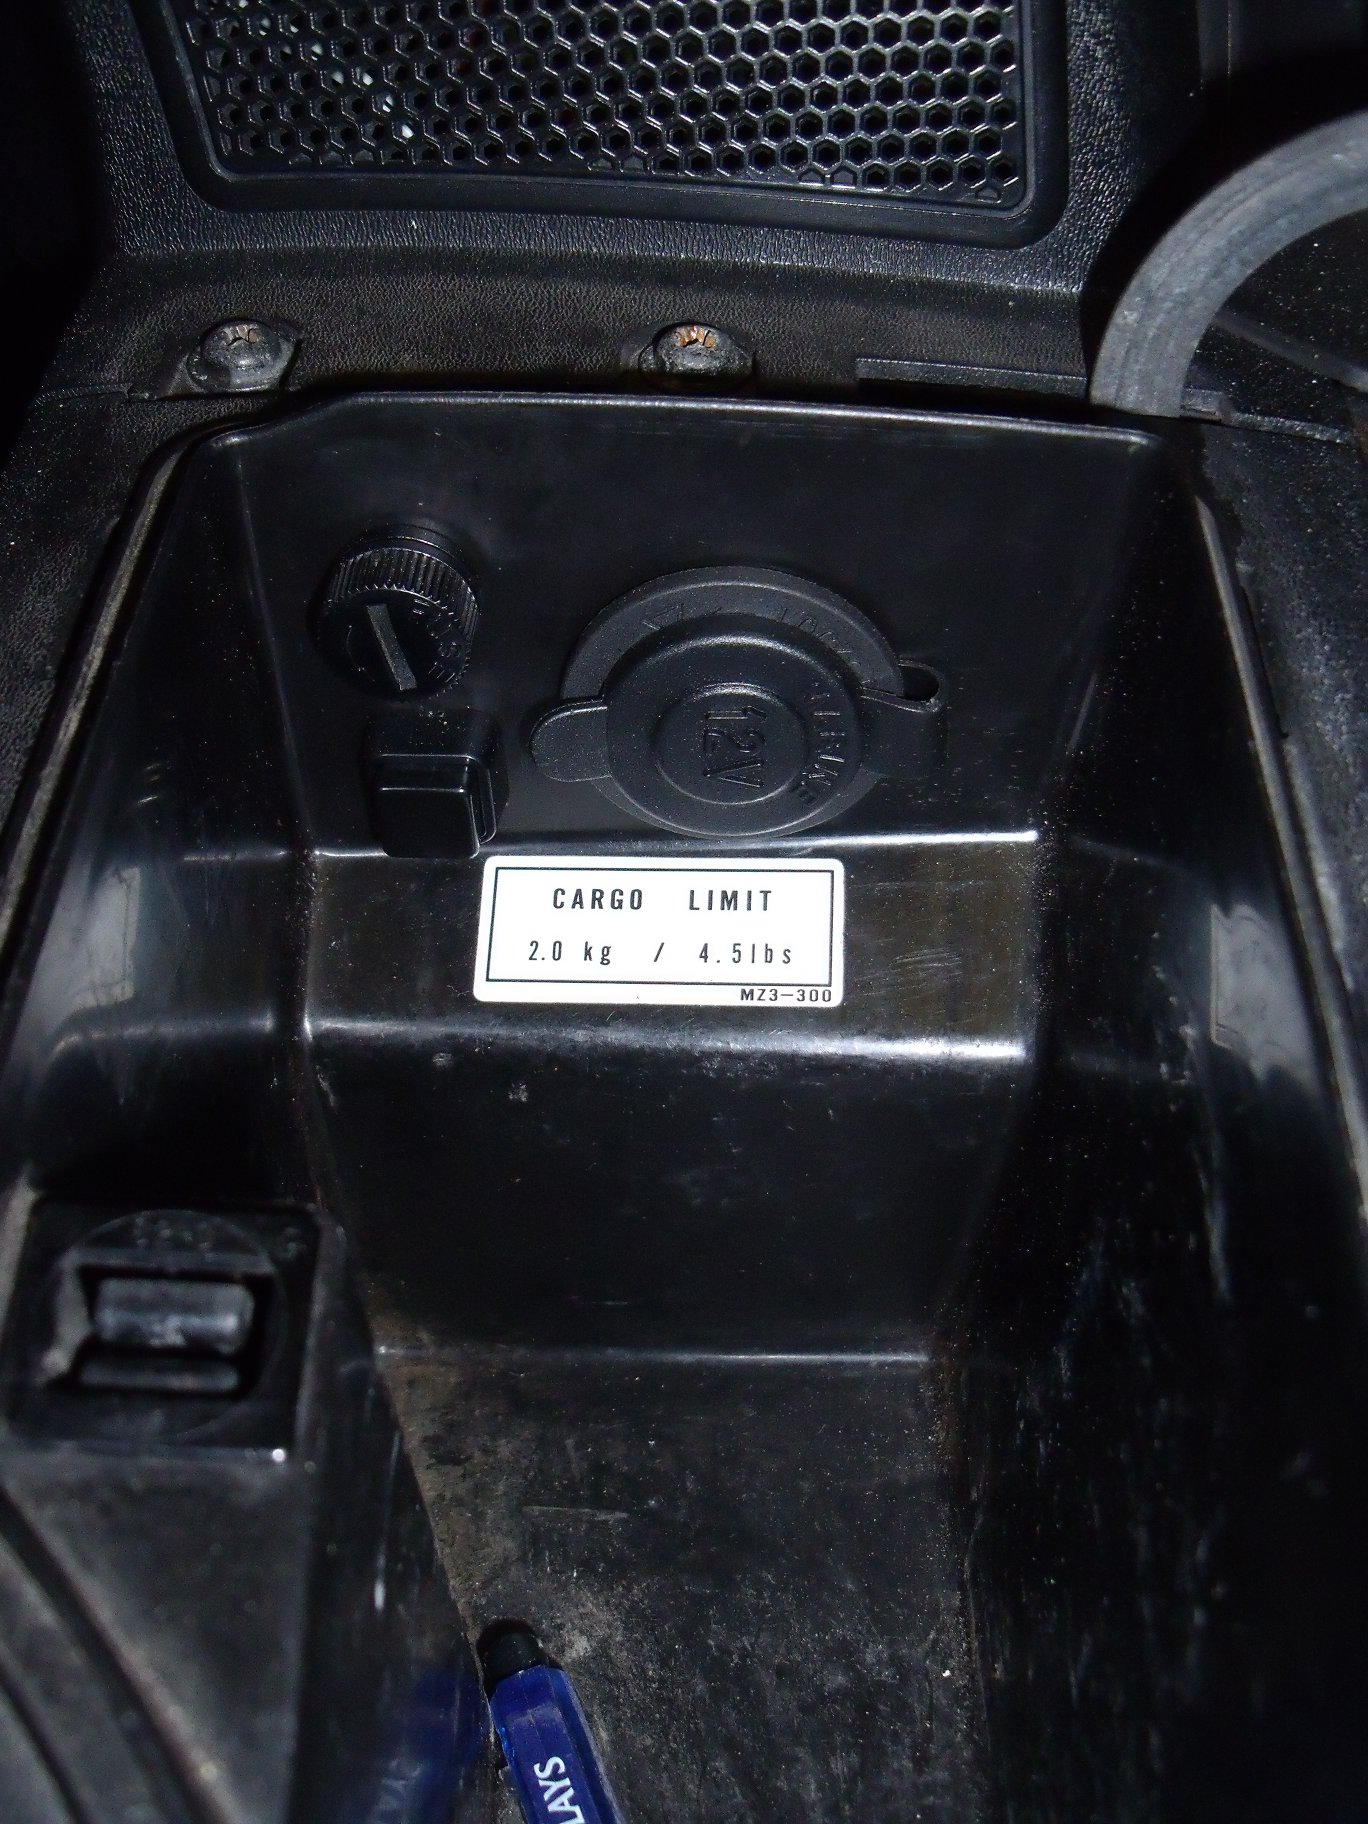
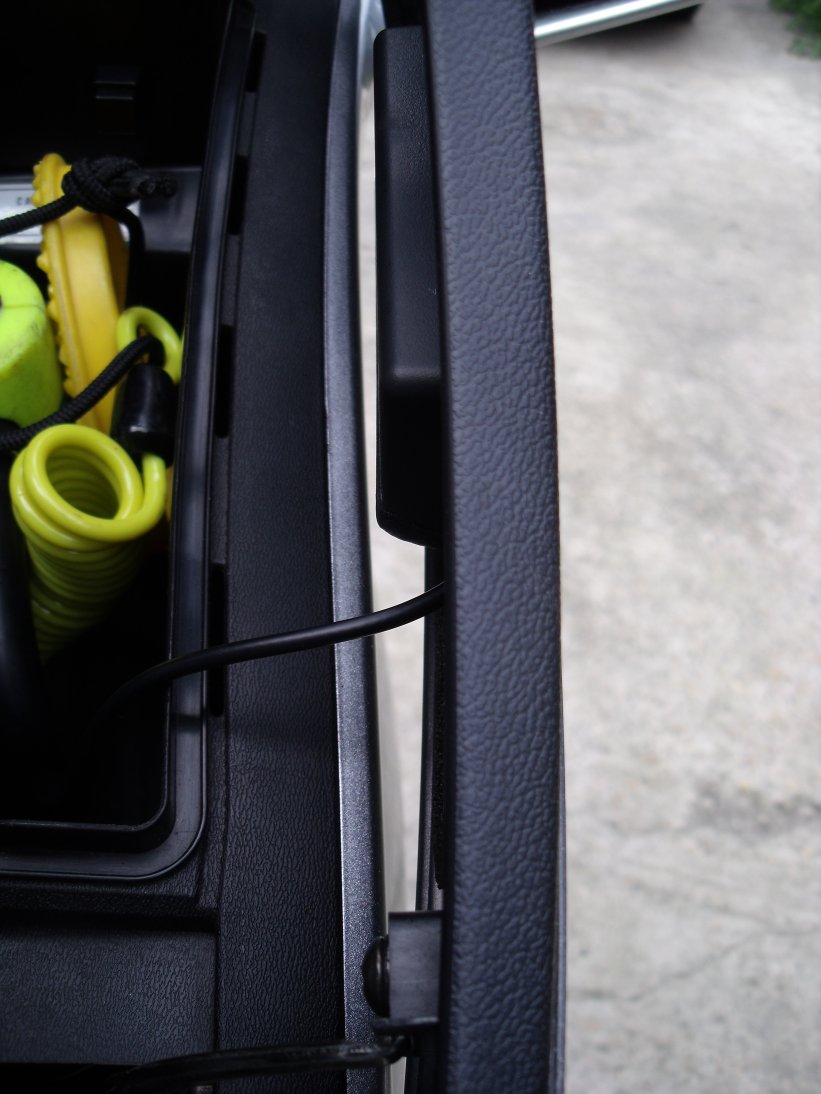
Next up was the power supply for the Nuvi. A full charge lasts a couple of hours at best. The obvious answer would be to fit a cigar lighter socket somewhere so that the Garmin's standard charger could be plugged in. This would make for a messy setup though, with wires getting tangled. On the other hand a cigar lighter socket WOULD be useful to charge the mobile phone. I decided that I'd fit a socket inside the right-hand fairing pocket and a concealed supply for the Nuvi. One of those cheap USB chargers was duly obtained (£6, bizarrely), ripped apart and reassembled into a small plastic box that took up residence under the nose cowling. This supply, together with the cigar lighter socket, were fed from a fuse and on/off switch also concealed in the right-hand fairing pocket. The phone and its charger remain in the pocket, whilst the only visible cable (see above) is six inches or so of satnav power lead that exits the joint between instrument panel and nose cowling. Job done :O) As an aside, the usually-recommended (by Honda) location for the cigar lighter socket is down towards the bottom of the front wall of the storage compartment. That is where it needs to go in order to clear the in-dash speaker units... but who the hell wants loudpeakers on a bike, apart from Goldwing riders, and they don't count...? The drawback to having the socket so low is that whatever you plug in eats into the space at the bottom. By placing the socket higher as I did you get more space and the charger etc. is easier to reach.
The France trip demanded a new front tyre. The rear had been replaced for the Germany trip in May, having lasted 7500 miles. I kept the old front tyre as a 'just-in-case' spare as it was still legal. Out of interest I measured the tread depth on both old and new tyres and was surprised to find that after 10500 miles there was only 2mm difference between the 'worn' and new tyres - in effect it was wearing at 1mm per 5000 miles, meaning that the old tyre would probably have survived the trip to the Med and back anyway! I'm still happy with the Michelin Pilot Road 2s.
UPDATE April 2010: Oh 5)*$%£( :O(
Some young lad in his mother's car ran into the back of me when I stopped at a pedestrian crossing. The bike's a bit broken, currently awaiting a verdict on whether it'll be classed as a write-off, although I reckon it could be repaired. Watch this space... and by the way, 'young lad' was being generous: he turned out to be a nasty piece of work who, as well as lying (on his mummy's advice) to the Police and insurers which cost me my excess and NCD, some time later smashed up a town centre with a baseball bat and got two years inside. Nice chap.
Update June 2010: new bike!
Despite my best efforts, I couldn't talk myself into retaining the old bike and repairing it. The insurers valued the bike at £5600 and offered me the bike plus £2700-ish. I reckoned that I could have repaired the bike to a satisfactory condition bar one or two minor marks (and let's face it, it wasn't immaculate to start with!) for the £700, leaving me with a couple of grand in my pocket. There was something of an urgency though, in that I was booked on a ferry to Europe within a few weeks and there were no guarantees I'd have the bike ready, or that it would prove to be mechanically as sound as I thought it would be... so I opted to take the £5200 cheque (£400 excess) and the bike went to a salvage auction. That wasn't the end of it though: I found the auctioneers' website, paid my £40 registration fee and on the appointed day I was sat at my PC with a figure in mind courtesy of a mate who'd offered to go halves with me on the basis that we'd split any profit we made on selling the repaired bike. It wasn't to be, however: the ST sold for almost exactly the sum that the insurers had wanted to dock from my payout had I kept it... the new owner has never contacted me about the bike which surprised me. If it was me I'd want as much history as I could learn. Meanwhile I took my £5200, added a chunk to it and bought... another ST1300 :D

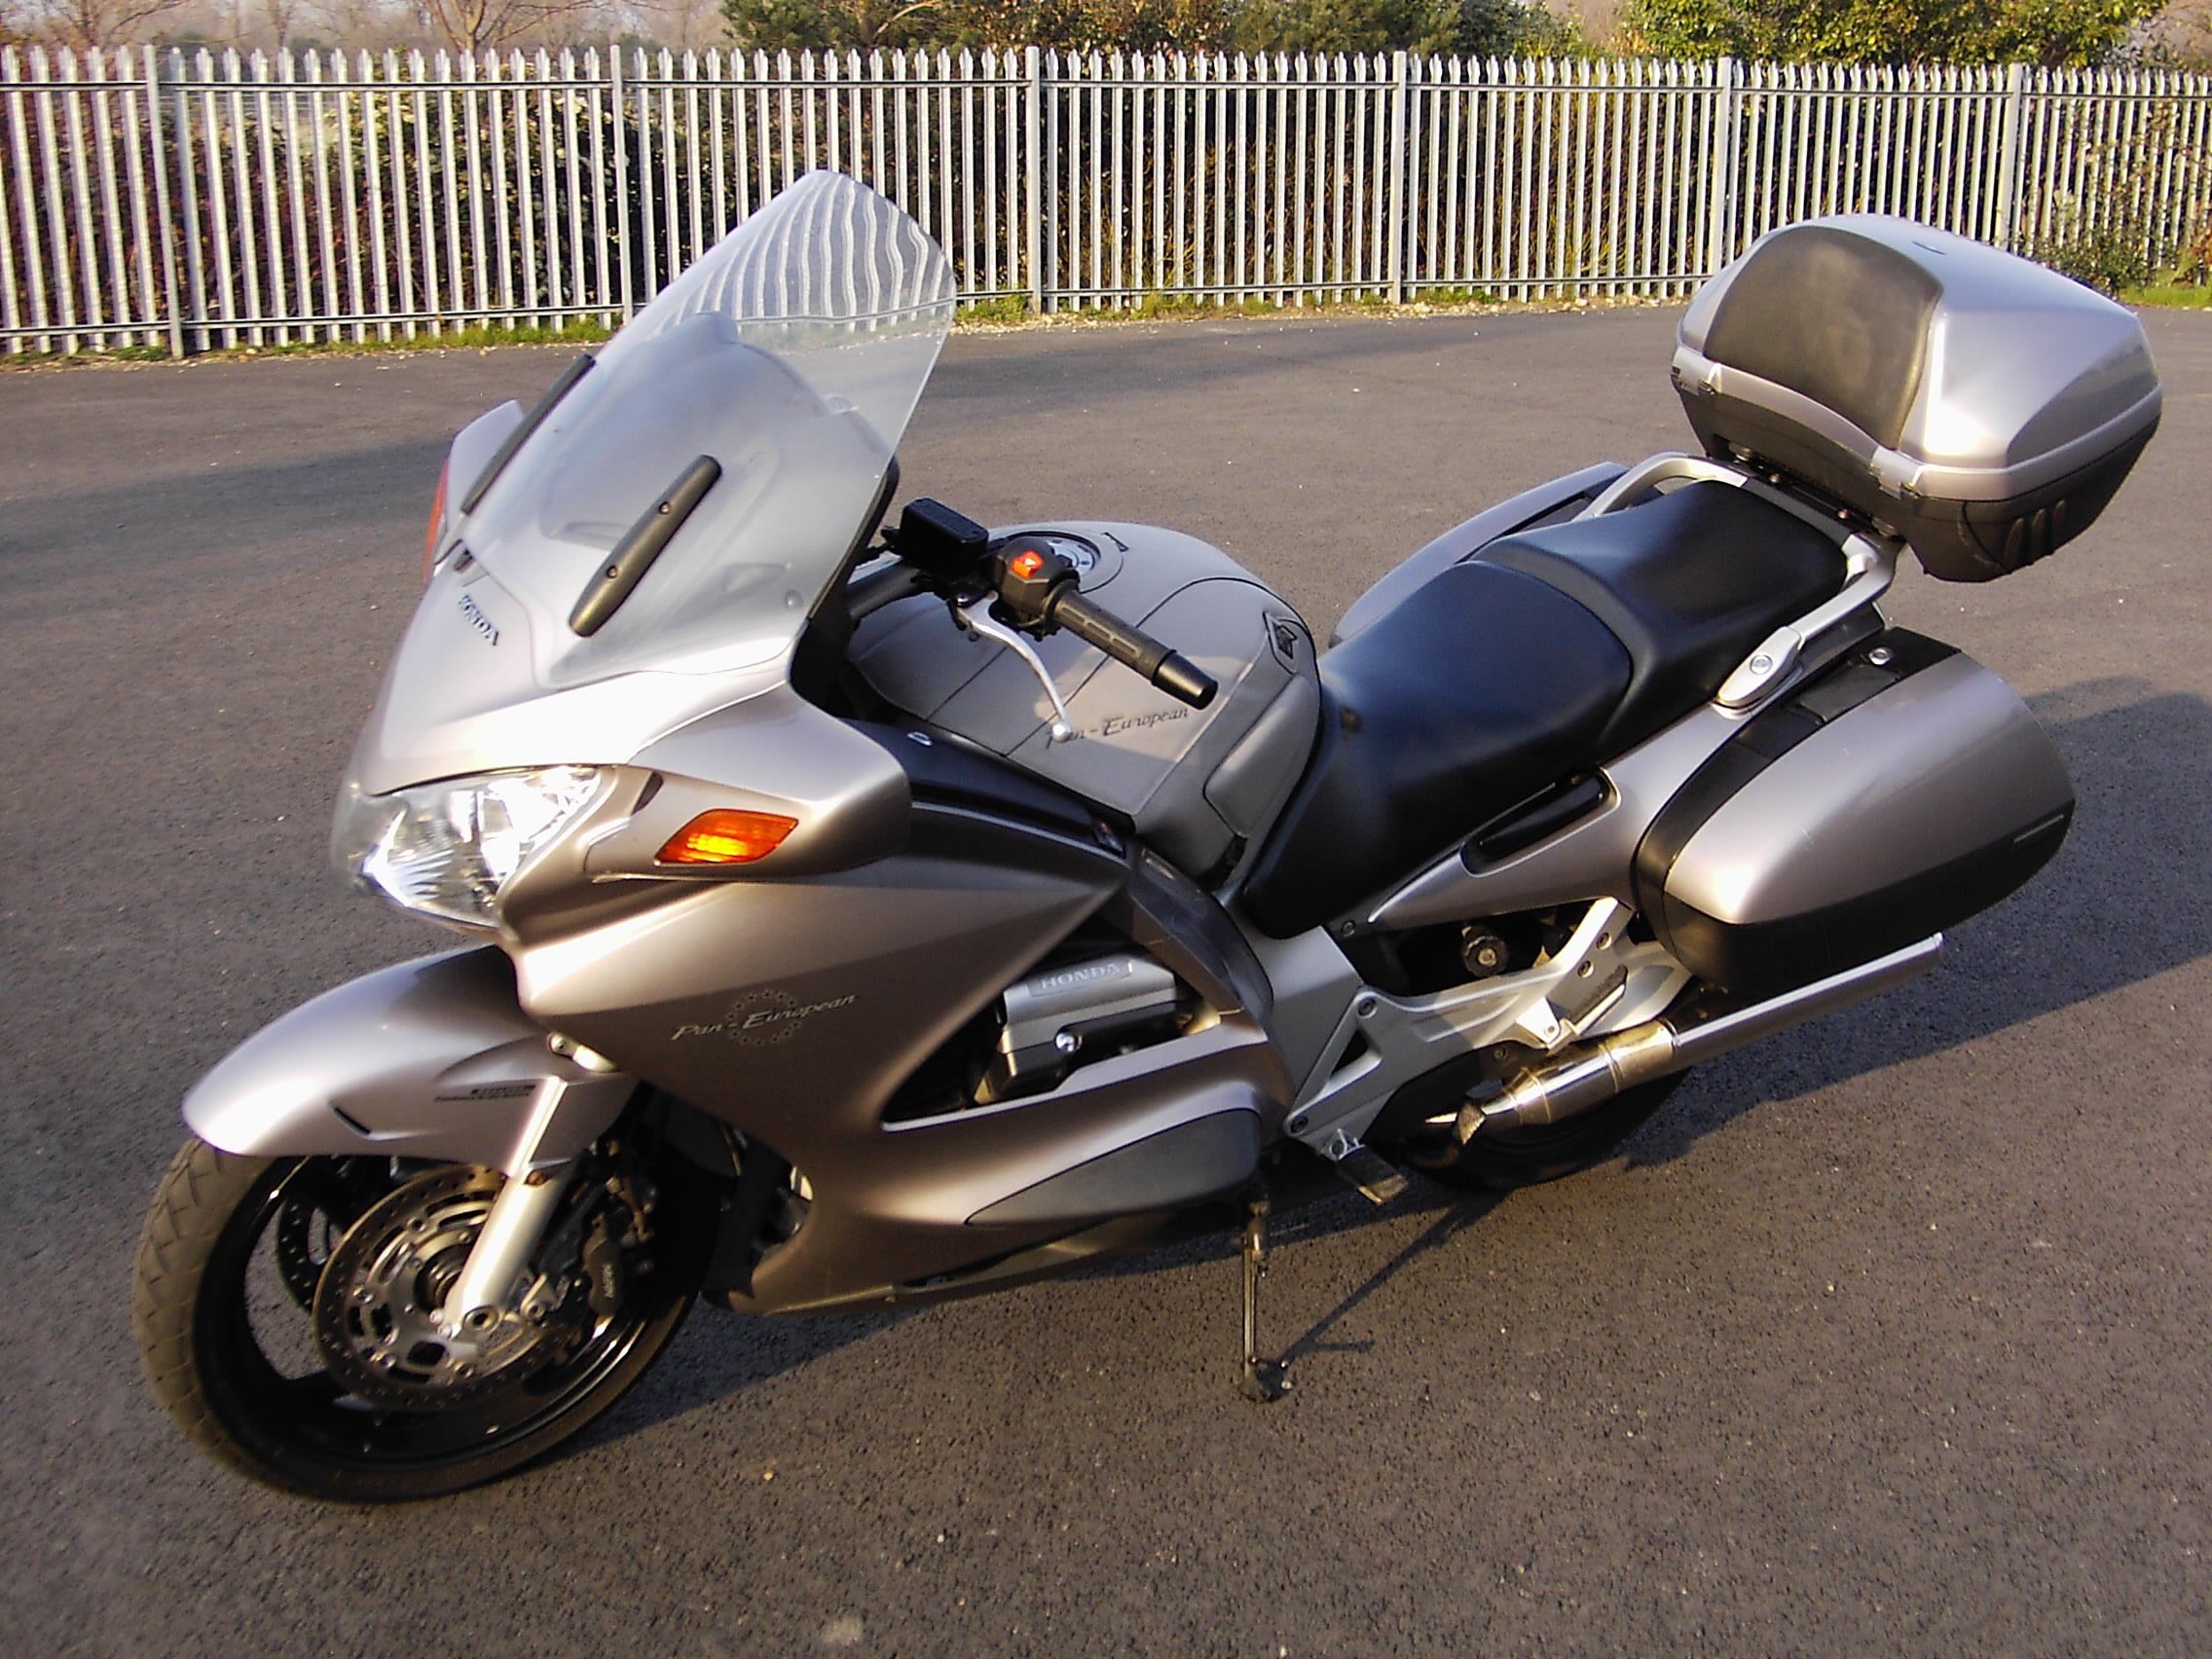
Good strong metal-flake effect in the paint...
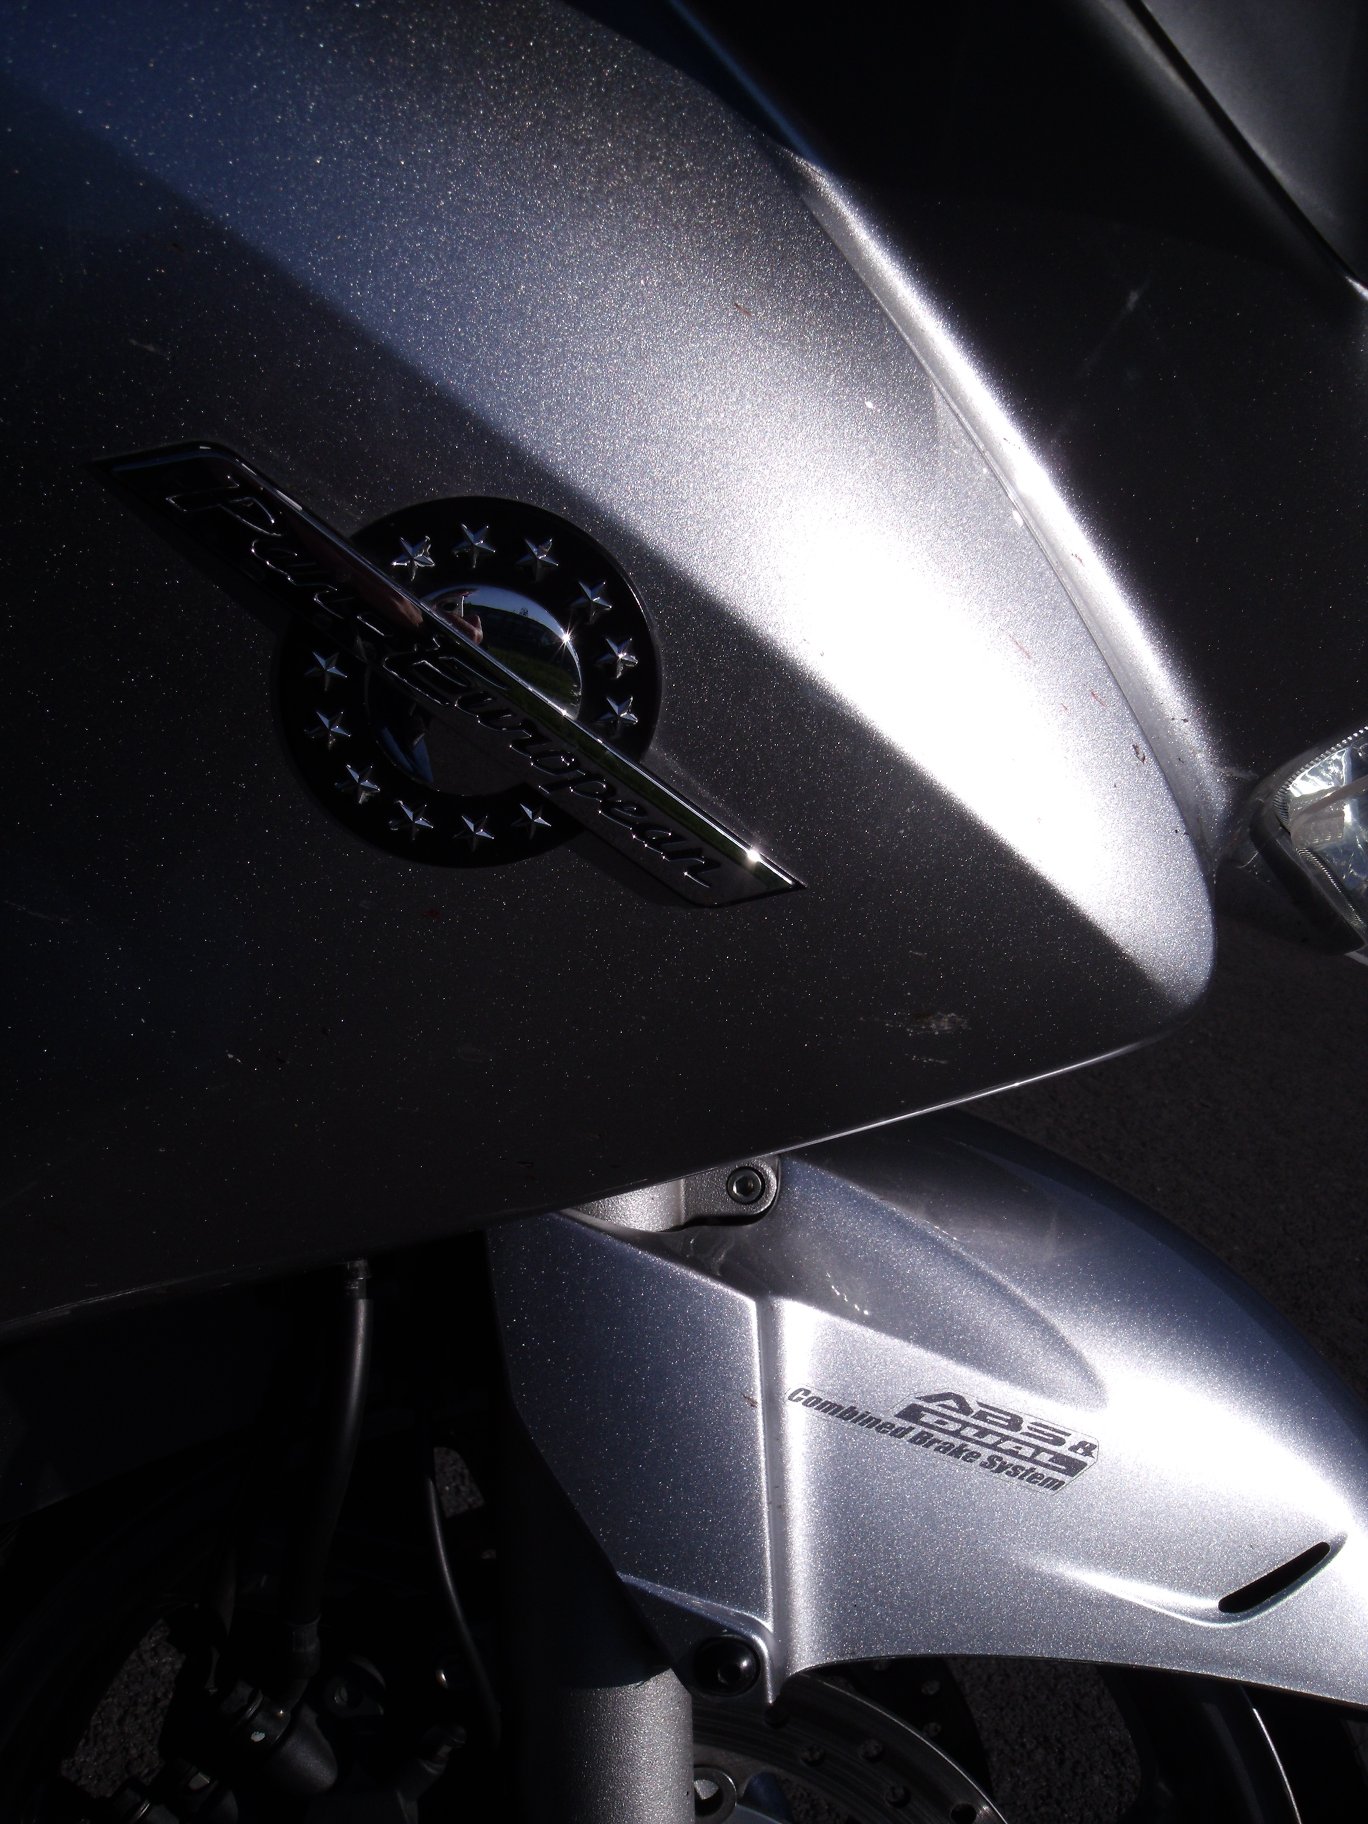
It's a 2005 bike with - unlike the old one - ABS and its one owner from new had covered 21000 miles, mostly on European jaunts. He claimed he never rode it from October to March every year and looking around the bike, it's easy to believe him! I was never impressed with the way some parts on the old bike had deteriorated: well, no such issues on this one. The only areas that look more worn on this bike than the last one are the footrest hangers, which tend to get scuffed by boot heels. I might get some of those 'BIke-Quip' protectors, but at the moment I'm still undecided about the headlamp protector of theirs that I bought - it seems to create a lot more turbulence around the front of the bike.
Needless to say, I removed all the 'toys' from the old bike before it went to auction... apart from the gel seat pad and the heated grips, unfortunately. I ended up buying another set of Roxters and using the Honda controller again - so now I have two spare Roxter controllers. Hmmm, heated footrests... :D
Fitting all the electronic gizmos to the new bike was an all-day job; I stripped all the bodywork off and installed the cruise, intercom, HIDs, satnav mount and power supply, glovebox power socket etc. in one mammoth session of bending, stooping, soldering and cursing ;o)
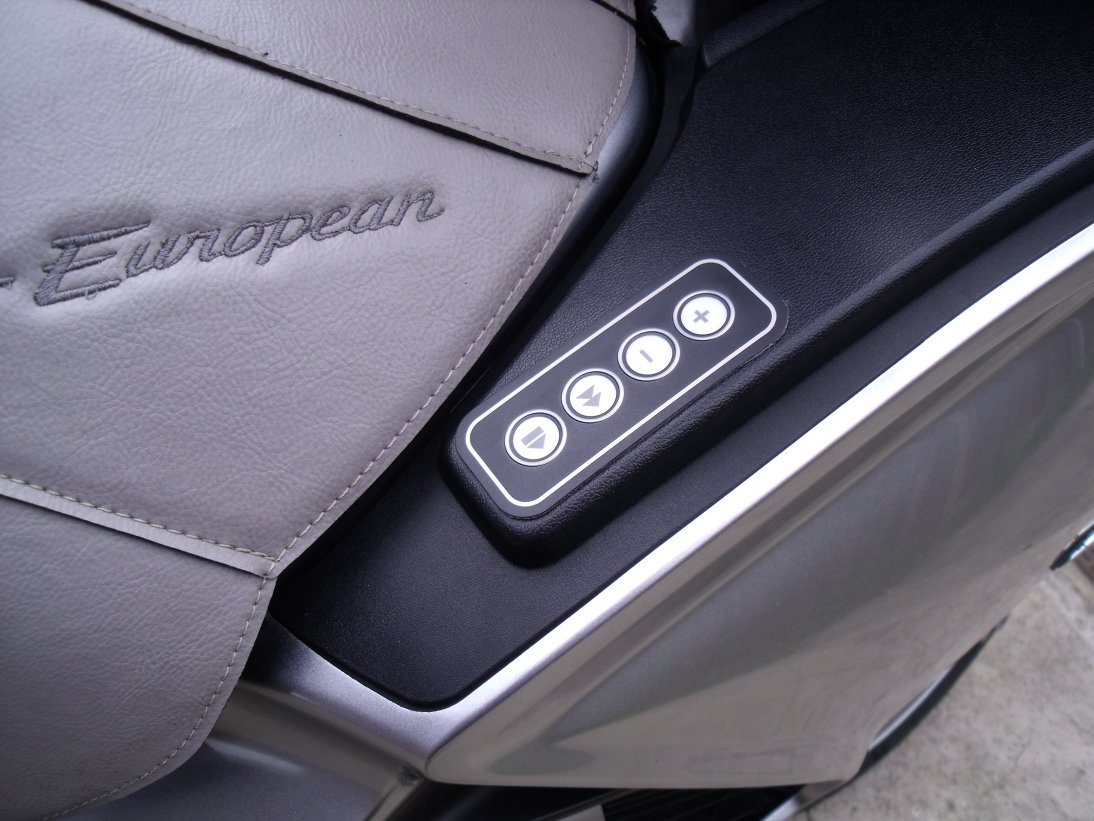
I finally got round to resolving the MP3 player remote control: you recall that the Zen Micro's wired remote was stashed in the glovebox, but of course it was nigh-on impossible to operate the titchy buttons whilst wearing gloves, let alone while riding along on cruise control. I found the solution in a self-adhesive keypad; initially I thought I was going to have to buy one bigger than I needed and have several spare buttons but after a bit of thought I decided that I could get away with a 4-button keypad as seen here:
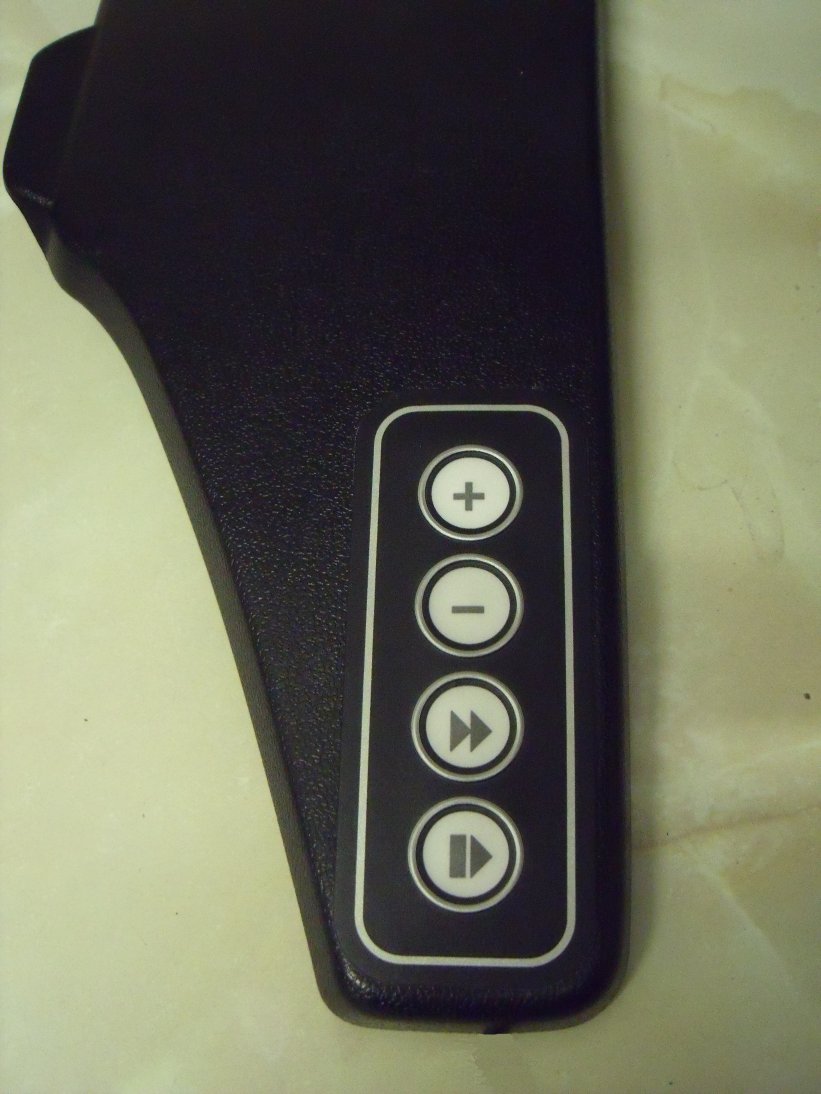
From the bottom: on/off/play/pause - next track - volume down - volume up. I always have the player on random shuffle anyway so 'previous track' seems pointless. Similarly, I never use the Zen's FM radio so no need for a 'mode' button. Symmetry fanatics will note that the keypad's very slightly off-centre; this is due to the position of the inner sealing lip of the door which would foul the ribbon cable from the keypad if I moved it across. The issue is a minor one, however. The key logos were designed by guesstimate in AutoCAD and so have a slight misalignment but again, a trivial detail that can be easily resolved. The ribbon cable is connected to a small circuit board that replicates the innards of the original Creative control:
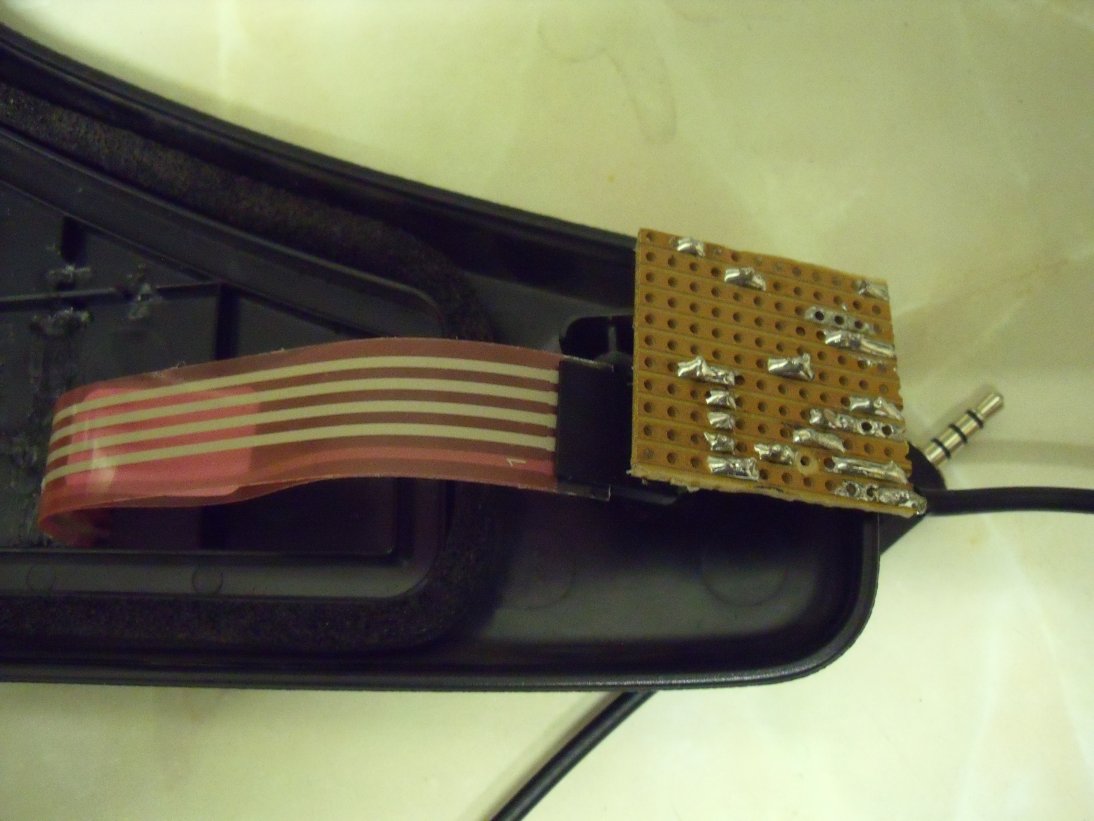
Of course the whole thing would be rapidly shredded by the contents of the glovebox so I found an electronics project box that was a good fit and cut away the ribs on the inside of the door (as you can see in the picture above) to allow me to solvent-weld the box in place:
Unfortunately my dry runs had not allowed for the arc that the door swings through and the box fouled the edge of the glovebox. I doctored the box accordingly and the lid shuts correctly now:
The box barely eats into the interior space of the glovebox:
The finished keypad on the bike (and yes, it works, even with gloves on!):
Update 28th September 2010
However....!! The first time I used the keypad remote, the Zen player randomly switched itself off en route and needed to have its battery removed to reset it... at which point I discovered that the track index had been erased and the player wouldn't play anything. Reloading the player from the PC restored correct operation, but the next time I tried it on the bike the same thing happened again. I tried a different Zen (I have a number of them, bought cheaply from Ebay sellers!) and it suffered the same issue, so I'm now thinking that the proximity of the remote and its cabling to the right-hand ignition coil is causing some spikes to be transmitted to the player, scrambling its memory... which is odd because the Creative wired remote was in the same general location and used the same cable. Oh well, time for a rethink; perhaps some screening or maybe rerouting of the cable... another job for the imminent winter.
Update 10th May 2011
In advance of another trip to the Alps I thought I might try and get to the bottom of the strange MP3 player issue. I tried 2 more Zen players and both suffered the same scrambling effect. I reprogrammed them and tried again, this time with the supply lead unplugged... and it still happened. So the issue would definitely seem to be related to the remote control. As a first fix I tried gluing (or should that be glueing?) aluminium kitchen foil over the electronics box I'd created. The following photo shows this; the ripples in the foil aren't due to careless application, it's the unravelled end of a length of screening braid that is attached to an earth cable to the bike frame.
That'll crack it, I thought, and indeed with the engine running on the driveway I had full MP3 functionality. I got my gear on, set off and... two streets away the player scrambled up again. F... f... for goodness sake, I said, and put the bike away. A few days later I decided it was time to fettle the problem I had last year when I installed the cruise control system: every time I bolted the airbox back in, it leaned on the cable splitter and opened the throttles a fraction, so the idle speed was about 2000 rpm! It didn't do it on the old bike and for the life of me I couldn't see what was causing it but I ran out of time and ended up just creating lots of slack in the throttle cable as a temporary fix for last year's Alps trip. It was annoying me though, so I duly ripped the airbox out and looked at the cruise installation from every angle. Cutting a story short (unusual for me, I know) I discovered that if I tilted certain things a certain way and put the screws in quick, it worked as it was supposed to. Before I dropped the tank it occurred to me that maybe if I routed the MP3 player's remote control lead inside the frame rather than outside, past the HT coil, it might help the scrambling problem. And so it proved! The player is still a bit erratic (which it was with the maker's original remote, to be fair) in that several quick presses of the 'next track' button causes it to freeze, sometimes temporarily, sometimes so bad that you have to whip the battery out to reset it - but the main thing is, it no longer seems to scramble the hard drive. This suggests that I'm on the right track, so next-up I plan to fit some clip-on ferrite beads... when I can remember where I put them.
Update 8th August 2016
Well, all of the foregoing hassle with Creative MP3 players is now totally irrelevant as I received an Ipod Touch for my birthday :D
Essentially you plug it in, it works, end of discussion. Oh OK, so I had to find room for it in the ST13's tail... and feed it some power via a Chinese USB power module... and then of course I needed a remote for it so I bought one of these:
http://www.satechi.net/index.php/satechi-bluetooth-button-series-media-button
It comes with a rubber holder that's meant to be fitted to bicycle handlebars but it also grips the ST's left-hand bar, around the wide part just in front of the clutch fluid reservoir. It's not rainproof, unfortunately, but at time of writing the only remote I could find that is waterproof costs £100.
So finally I have trouble-free music on-board! Now if only I could say the same for the satnav and phone...
Update 24th October 2010
From 2004 Honda changed the ST1300s lighting arrangement so that the headlamps could not be switched off. This was in anticipation of a global introduction of Daytime Running Lights… Honda evidently decided that if there was no reason to turn the lights off, why fit a switch? So they deleted it. The sidelights and headlights are therefore powered as long as the ignition is on.
I wanted to reinstate the lights switch on my ’05 bike, largely because if I’m working on the bike’s electrics I don’t want the headlamps flattening the battery. Yes, I could pull fuses, but surely a switch is easier? ;o) The other issue is that the ST’s onboard computer and the alarm system between them will drain the battery in a very short time, so being able to leave the lights off when cranking (or bump-starting!) with a sluggish battery is a bonus. To begin with, I needed the switchgear from a pre-’04 bike.
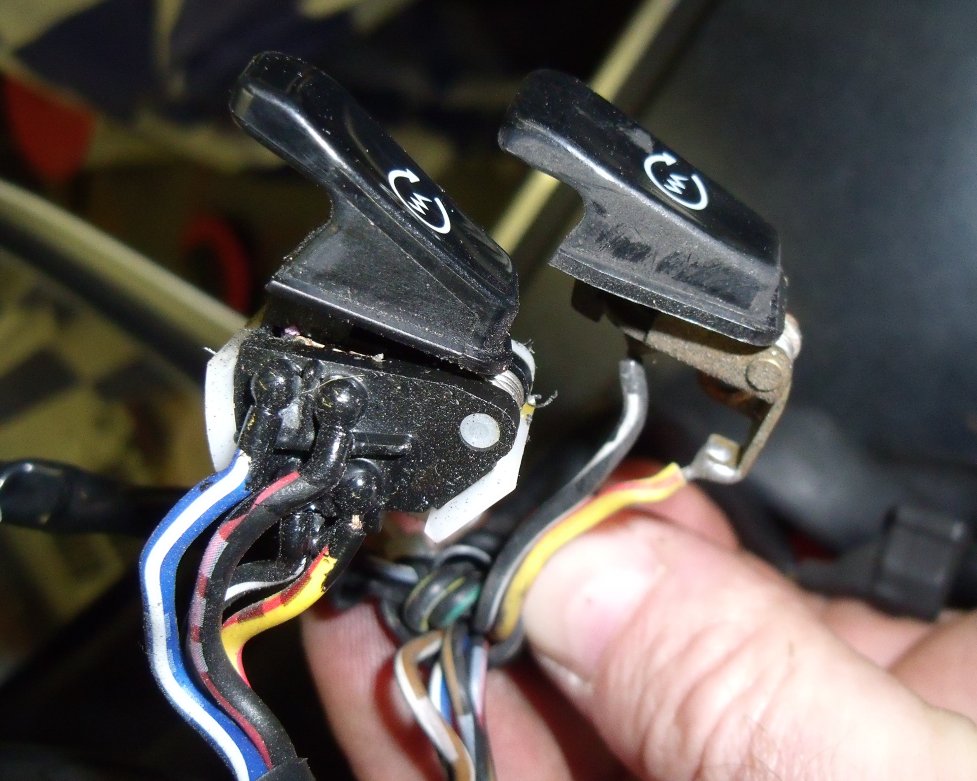
I watched Ebay and checked the breakers, but for some reason pre-’04 switchgear is thin on the ground and even when it’s available it seems to fetch upwards of £25! It occurred to me that in all probability, the ST13 wasn’t the only Honda to use that switchgear, so I checked bikes like the VFR and CB1000 and eventually found that the CBR1100 (Blackbird) switchgear was a dead ringer for the ST type… and lo and behold, available for under a tenner. I spent my wad :D and the part arrived. It is indeed the same unit!
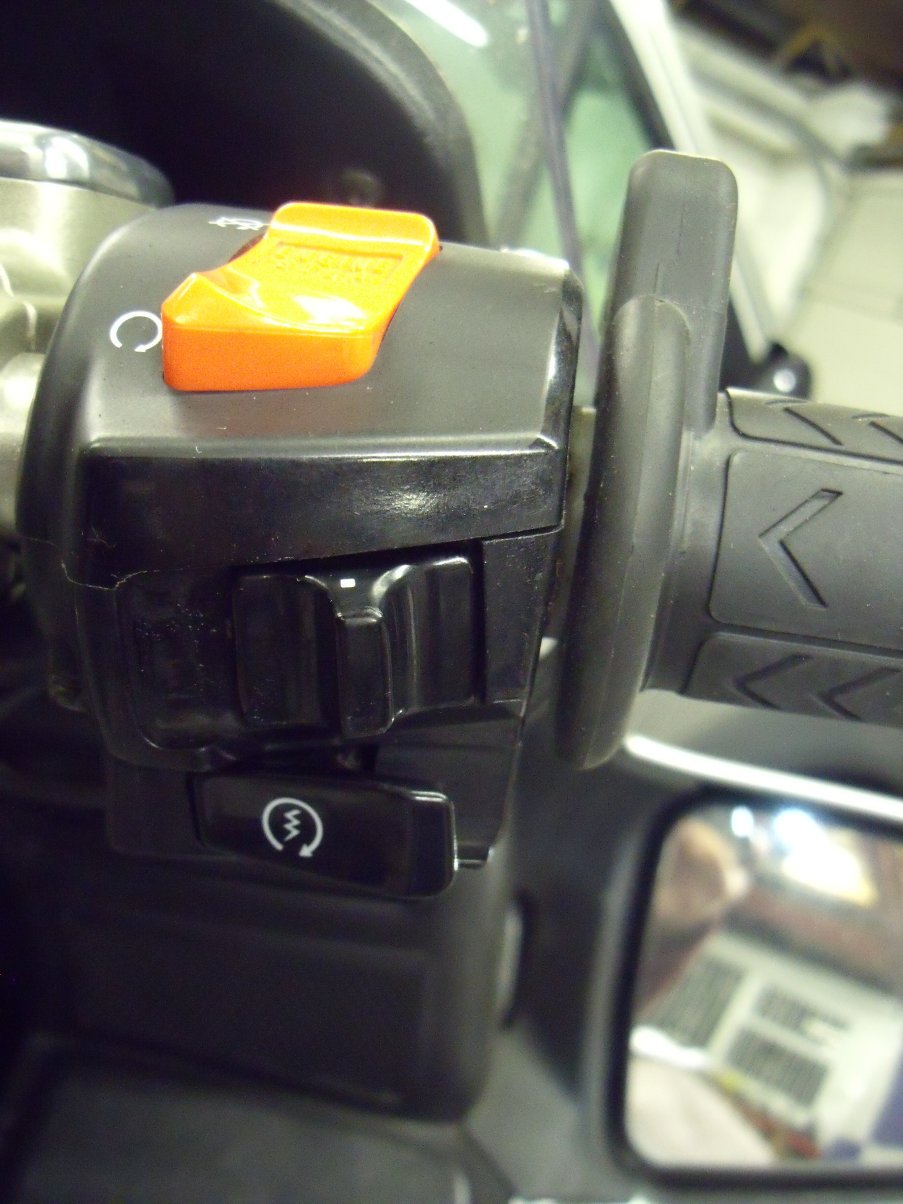
The later switchgear has a blank area where the lights switch ‘should’ be but is otherwise identical, even down to various internal screwholes and locating slots:
Yes I know, one looks larger than the other but they’re the same size, honest! The shiny bit is a steel pin that locates in a hole drilled in the handlebar to prevent the switchgear rotating around the bar.
My original plan was to simply swap the complete units over, but the ex-Blackbird top half was obviously in ‘used’ condition. Instead, I opted to retain the (still shiny!) top half of the ST unit and fit just the bottom half of the ‘Bird’s housing that actually carries the light switch. The only (very) slight issue was that there are no markings on the post-’04 top half to show the lighting positions but hell, if you can’t work out what the lights switch does you aren’t safe on a motorcycle. I duly snipped the lights switch from the ‘Bird’s loom and swapped the starter switch from the ST’s bottom housing to the CBR’s:
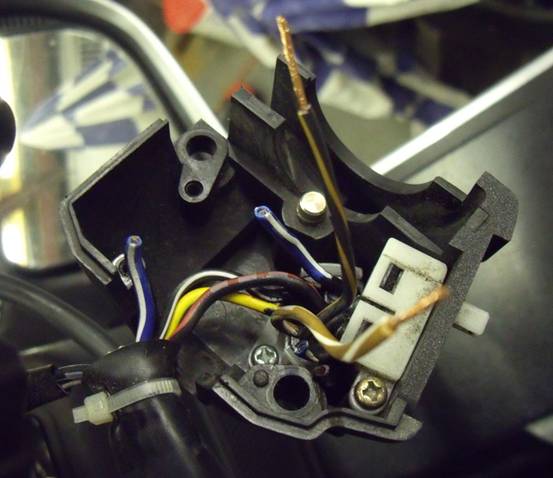
I wanted to reinstate the whole lighting circuit but studying the ST’s wiring diagram showed what a headache it would be: the sidelights are no longer fed from their own circuit but spliced into wiring that feeds all the other ignition-activated electrics. I didn’t fancy splitting the whole loom so settled for a compromise… in fact it was made easier for me by Honda’s new starter switch! In the process of losing the lights switch, Honda modified the starter switch so that whilst the starter is cranking, the headlamps are turned off to maximise the battery current available to the starter:
The extra pair of wires to the post-’04 starter switch (at left, obviously!) are the very wires that fed the original lights switch: i.e. 12v fused supply coming in and feed to the dip/main switch going out. When you press the starter, this circuit breaks, momentarily turning the lights off. All I had to do, then, was cut one wire and re-route it through the lights switch:
I opted to use the ‘sidelights’ contact of the switch rather than the ‘headlights’ contact, as that way it doesn’t matter which of the ‘on’ positions you use, the headlamps will be on.
And that’s as hard as it was! Bit of solder and some heatshrink sleeving…
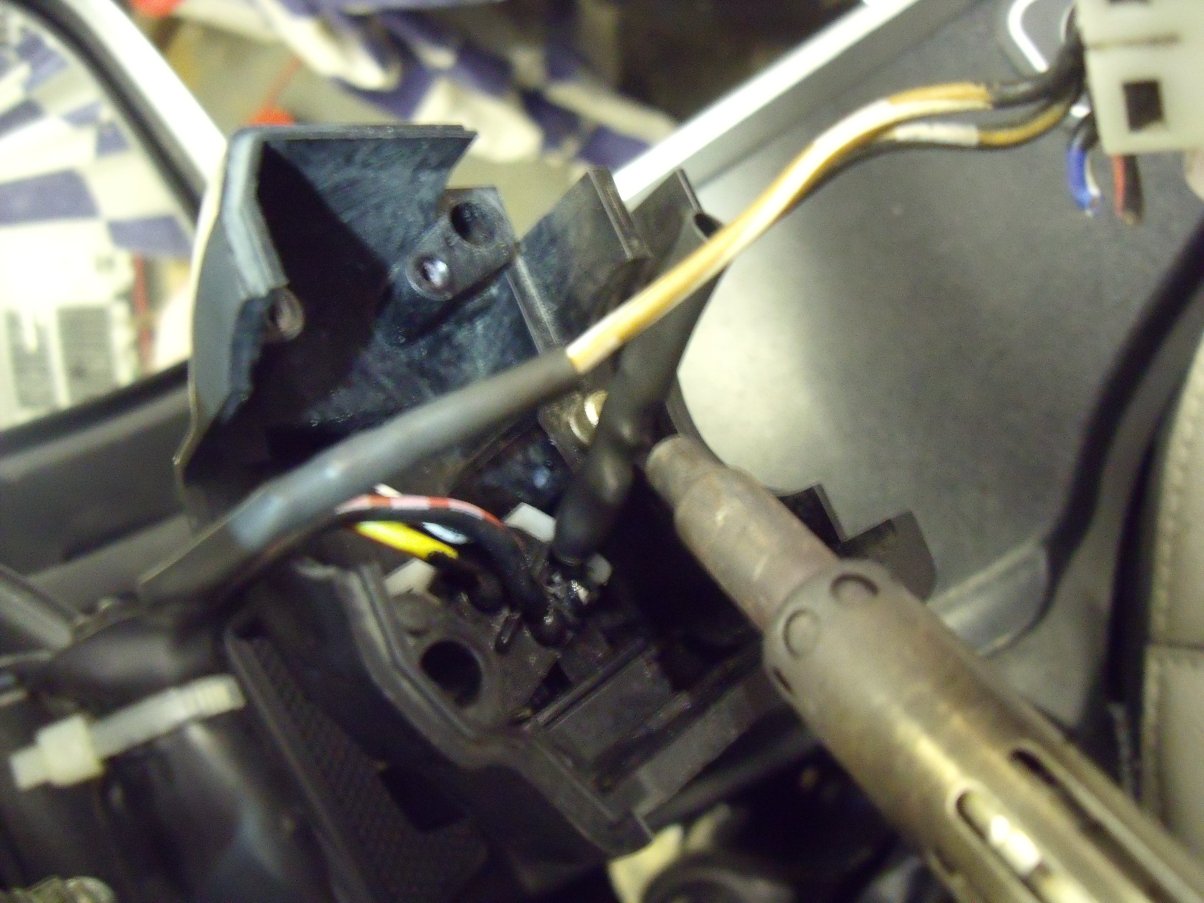
and Bob’s yer uncle :O)
I decided that the grey Bagster tank cover/protector/bag harness was looking a bit shabby. It wasn't really, but I'd seen another silver ST13 with a black cover and thought it looked nicer, which was excuse enough to go out and buy one :D Well OK, technically I stayed in and bought it from Ebay but you know what I mean. I subsequently sold the grey one (for a disappointingly low figure, but that's the luck of the draw with auctions) so now I have no option but to like the black one:
Update 30th September 2014: rear suspension upgrade (or is it?)
The ride quality of the ST13 isn't bad but I wondered if a progressive rear spring might effect some improvement; even at minimum preload I've found the bike to get a bit 'crashy' on certain roads. As it happens, when I had my first ST13 I'd bought a 'just in case' spare rear suspension unit (ironically, not long before I was knocked off the bike):
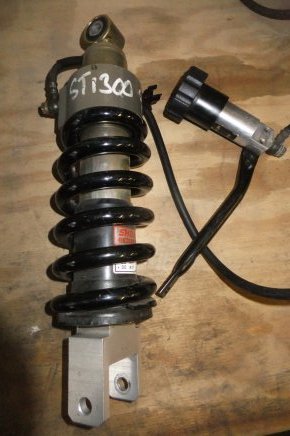
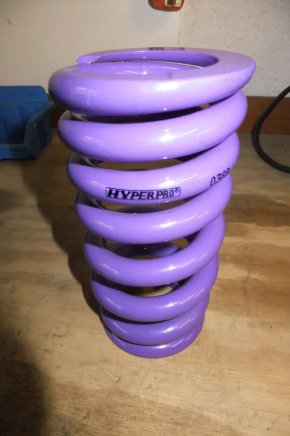
and I happened across someone selling a Hyperpro spring on Ebay; supposedly he'd bought it but never got around to fitting it before he sold his bike. To be fair, it did look like new and came in its original box with fitting instructions etc. so at about half the price of a new one it was a firm bargain in my book...
I just needed some way of getting the standard spring off and this one on! One afternoon of raiding the scrap bin and scratching my head produced this lash-up:

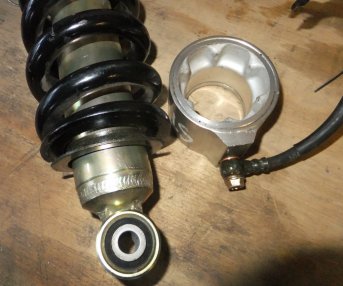
To remove the spring you first have to remove the hydraulic preload unit from the damper body; to do this you use the bottle jack to push the damper upwards, which compresses the spring and forces the damper through the preload unit, exposing this wire clip which you prise off:
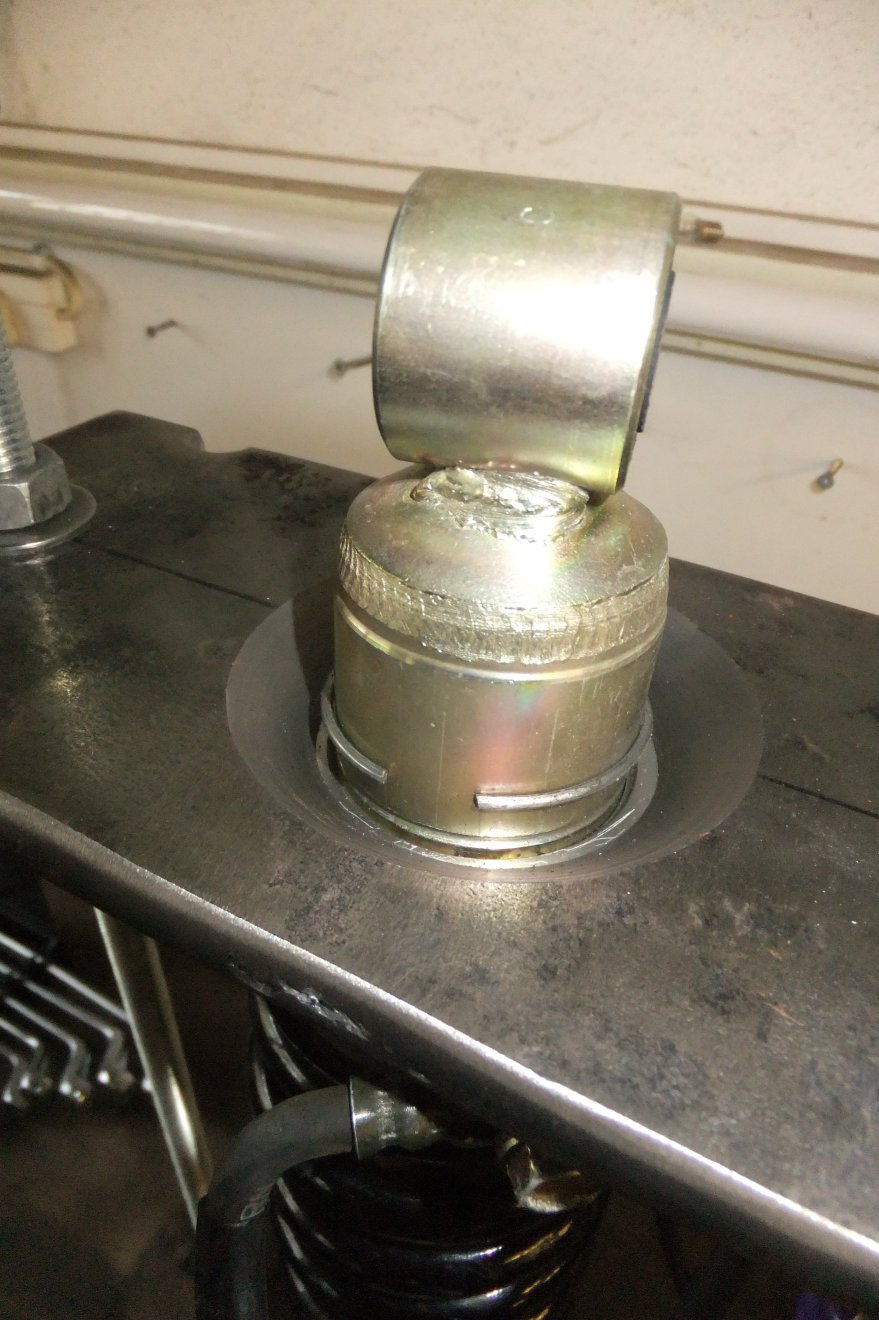
allowing (once you remove the unit from the compressor) the preload unit to be slid off, followed by the spring.
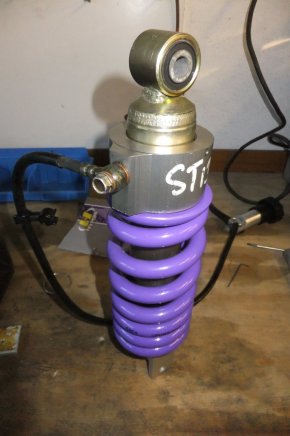
It's then a simple matter to slip on the new spring, refit the preload unit, reinstall to the compressor and refit the spring clip. The result:
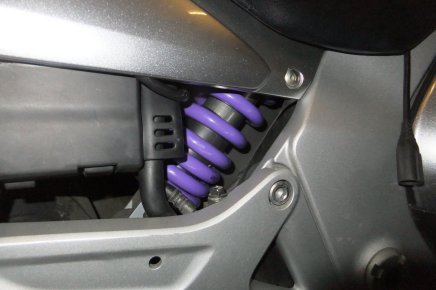
...and on the bike:
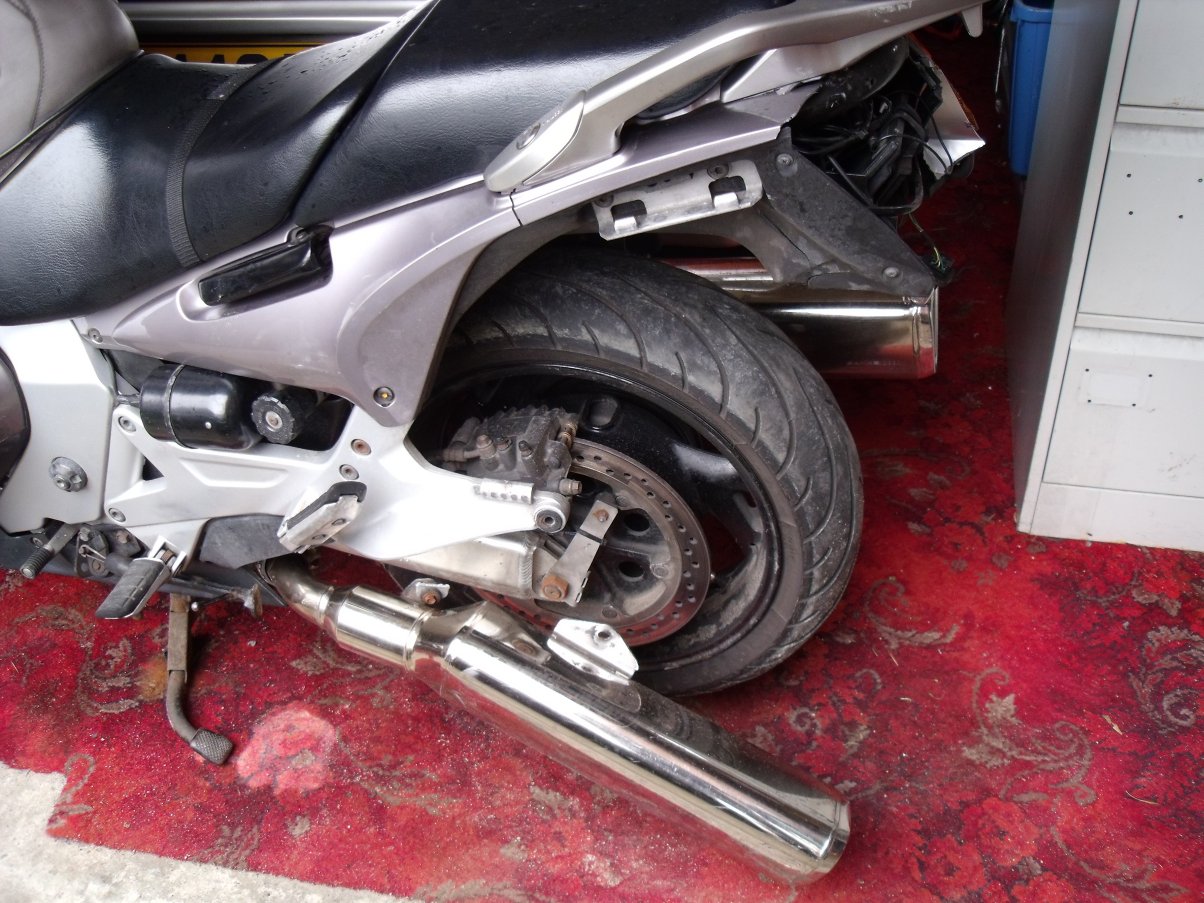
So, is there an improvement? I would have to say yes, with minimal preload the bike does seem a bit more supple on rough surfaces. On our 2014 trip to the Alps I was confidently chucking the bike into hairpins that had the footrests grinding every time without feeling as though the back end was about to lose composure. I even thought for a while that it had improved the ST's high-speed weave but sadly not. I have yet to take a pillion out with the new spring fitted so can't comment further on the ride quality with more load. As an aside, those hairpins finished off the back tyre:
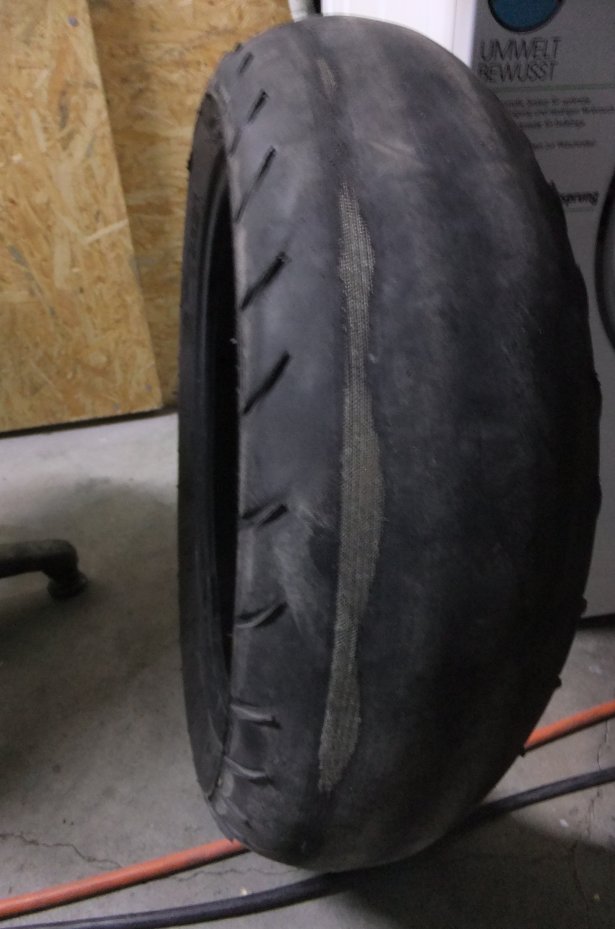
That used to be a Michelin Pilot Road 2! And isn't the ST1300 supposed (according to internet 'experts') to be a fat tourer that doesn't handle...?